Home Blog Page 41

Collagen Induction Therapy: The Latest Advancement in Skincare

Collagen Induction Therapy (CIT), also known as microneedling, is a skin rejuvenation treatment that has gained popularity in recent years. This procedure involves using tiny needles to create micro-injuries in the skin, triggering the body’s natural healing process and stimulating collagen and elastin production. In this article, we will discuss the benefits of CIT and why it is a highly effective anti-aging treatment.

How Does Collagen Induction Therapy Work?

CIT works by using a handheld device with multiple tiny needles that puncture the skin’s surface. These tiny micro-injuries stimulate the skin’s healing process, resulting in the production of new collagen and elastin fibers. Collagen is a protein that provides structure to the skin, while elastin gives it elasticity, so it’s essential for maintaining a youthful appearance.

During the treatment, the skin’s outer layer is punctured, creating micro-channels that allow for better absorption of skincare products. This means that the treatment can enhance the effectiveness of topical skincare products, providing even better results.

What Are the Benefits of Collagen Induction Therapy?

CIT is a highly effective anti-aging treatment that offers numerous benefits for the skin. Here are some of the top benefits of CIT:

  1. Reduces Fine Lines and Wrinkles

As we age, our skin produces less collagen and elastin, leading to the formation of fine lines and wrinkles. CIT stimulates collagen and elastin production, helping to reduce the appearance of these signs of aging. The result is smoother, firmer, and younger-looking skin.

  1. Improves Skin Texture and Tone

CIT can also improve the overall texture and tone of the skin. It helps to reduce the appearance of acne scars, hyperpigmentation, and other skin irregularities. The treatment can also make the skin appear brighter and more radiant.

  1. Minimizes Pore Size

CIT can help to reduce the appearance of enlarged pores, making the skin look smoother and more refined. This is because the treatment stimulates collagen production, which helps to plump the skin and reduce pore size.

Collagen Induction Therapy: The Latest Advancement in Skincare

  1. Non-Invasive and Minimal Downtime

CIT is a non-invasive procedure that requires minimal downtime. Patients may experience some redness and swelling immediately after the treatment, but this typically subsides within a few hours to a few days. Patients can resume their normal activities soon after the treatment.

  1. Safe and Effective

CIT is a safe and effective procedure when performed by a trained and experienced skincare professional. It is essential to choose a reputable provider who uses sterile equipment and follows proper hygiene protocols to minimize the risk of infection.

  1. Enhances the Effectiveness of Skincare Products

CIT creates micro-channels in the skin that allow for better absorption of skincare products. This means that the treatment can enhance the effectiveness of topical skincare products, providing even better results.

Conclusion

Collagen Induction Therapy is a highly effective anti-aging treatment that can help to reduce the appearance of fine lines and wrinkles, improve skin texture and tone, minimize pore size, and enhance the effectiveness of skincare products. This non-invasive treatment requires minimal downtime and is safe and effective when performed by a trained and experienced skincare professional.

If you’re looking for a way to rejuvenate your skin and achieve a more youthful appearance, Collagen Induction Therapy may be the perfect solution for you. Talk to your skincare provider to see if this treatment is right for you.

To know more about Skincare Devices and Beauty’s latest updates, please Like and Follow our Facebook and Instagram accounts…

Read also: From Fine Lines to Firm Skin: All About Radio-Frequency Skin Treatments
From Fine Lines to Firm Skin: All About Radio-Frequency Skin Treatments

In recent years, radio-frequency skin treatments have gained popularity among those seeking a non-invasive and effective way to rejuvenate their skin. But what exactly are these treatments and how do they work? In this article, we will explore everything you need to know about radio-frequency skin treatments.

What is Radio-Frequency Skin Treatment?

Radio-frequency (RF) skin treatments use radio waves to heat the deeper layers of the skin, promoting collagen production and tightening the skin. RF energy is delivered to the skin through a handheld device that is moved over the target area.

The heat generated by the RF energy causes the collagen fibers in the skin to contract, which in turn stimulates the production of new collagen. This new collagen helps to improve skin texture and tone, while also reducing the appearance of wrinkles and fine lines.

How it Works

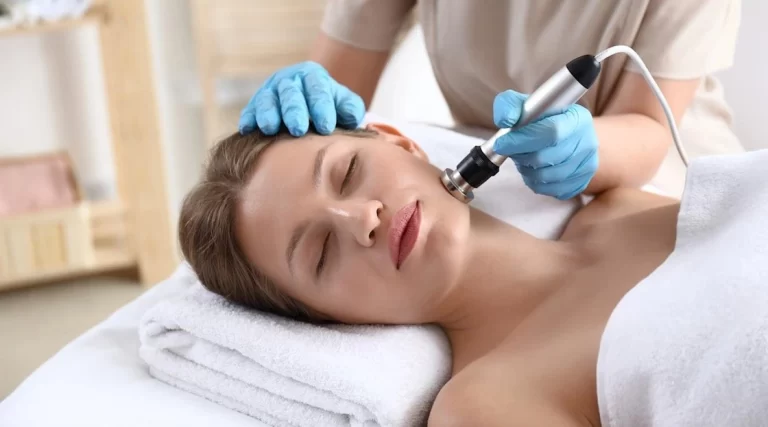
Fractional radiofrequency skin resurfacing works by delivering radiofrequency energy into the deeper layers of the skin through tiny micro-needles. The needles create microscopic wounds in the skin that stimulate the body’s natural healing process, promoting the production of collagen and elastin. The heat from the radiofrequency energy also helps to tighten the skin and improve its texture.

The treatment is performed using a handheld device that has a set of microneedles that penetrate the skin at different depths. The depth of the needles can be adjusted based on the specific needs of the patient. The radiofrequency energy is delivered through the needles, heating the skin and creating the desired effect.

Benefits of Fractional Radiofrequency Skin Resurfacing

Fractional radiofrequency skin resurfacing has many benefits, including:

  1. Reduced fine lines and wrinkles: The heat from the radiofrequency energy stimulates the production of collagen and elastin, which can reduce the appearance of fine lines and wrinkles.
  2. Improved skin texture: The treatment can also improve skin texture, making it smoother and more even.
  3. Reduced acne scars: Fractional radiofrequency skin resurfacing can reduce the appearance of acne scars and other types of scarring.
  4. Minimal downtime: The treatment is minimally invasive, and most patients can resume their normal activities immediately after the procedure.
  5. Safe for all skin types: Fractional radiofrequency skin resurfacing is safe for all skin types, including sensitive skin.
  6. Long-lasting results: The results of the treatment can last for several months to a year, depending on the individual’s skin type and the extent of the treatment.

What to Expect During the Procedure

Fractional radiofrequency skin resurfacing is a minimally invasive procedure that can be performed in a doctor’s office or medical spa. Before the procedure, the skin is numbed with a topical anesthetic to minimize any discomfort.

During the procedure, the handheld device is passed over the skin, delivering radiofrequency energy through the micro-needles. The treatment takes about 30 to 60 minutes, depending on the size of the area being treated.

After the procedure, the skin may be red and slightly swollen. This is normal and should subside within a few hours to a few days. Most patients can resume their normal activities immediately after the treatment.

From Fine Lines to Firm Skin: All About Radio-Frequency Skin Treatments
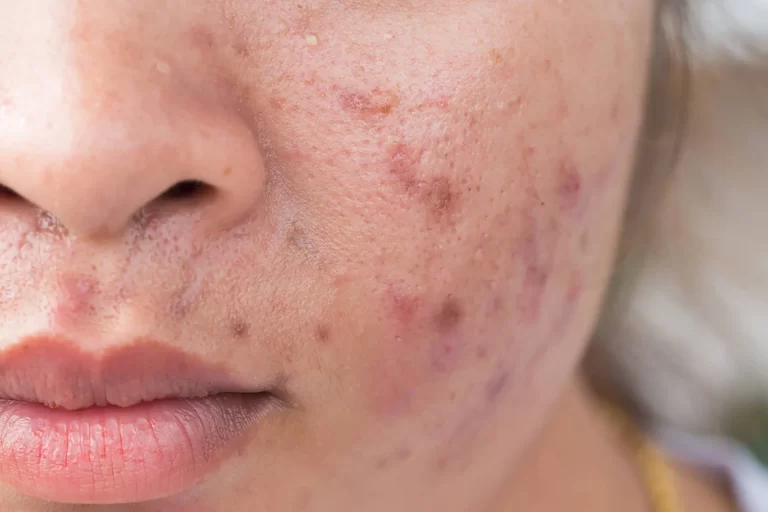
Here are some of the things you can expect during the procedure of fractional radiofrequency skin resurfacing:

  1. Consultation: Before the procedure, you will have a consultation with a trained professional to discuss your goals, medical history, and any concerns you may have.
  2. Preparation: The treatment area will be cleaned and numbing cream may be applied to minimize discomfort during the procedure.
  3. Treatment: The radiofrequency device will be passed over the skin in a precise pattern, delivering energy to the targeted areas. You may feel some heat or mild discomfort during the treatment.
  4. Post-treatment: After the procedure, your skin may appear red or swollen, and you may experience some mild discomfort or itching. These side effects typically resolve within a few days.
  5. Follow-up: Your provider will give you specific instructions for post-treatment care, including how to care for your skin and when to schedule follow-up appointments.

To know more about Skincare Devices and Beauty’s latest updates, please Like and Follow our Facebook and Instagram accounts…

Read also: Hyperbaric Oxygen Therapy: A Comprehensive Guide

Managing Acne Caused by Whey Protein: Dos and Don’ts

0

Whey protein is a popular supplement among fitness enthusiasts and athletes, as it is known to promote muscle growth and aid in recovery after exercise. However, some people may experience an unexpected side effect of whey protein consumption – acne. In this article, we will discuss how whey protein can cause acne and how to treat it effectively.

What is Whey Protein?

It is a byproduct of cheese production and is considered a complete protein source as it contains all nine essential amino acids that are required by the body. It is a popular supplement among people who engage in strength training and other forms of exercise, as it is known to promote muscle growth and aid in recovery after exercise.

How Can Whey Protein Cause Acne?

It contains various hormones, including insulin-like growth factor 1 (IGF-1), which can stimulate the production of sebum, the oily substance that can clog pores and lead to acne. Additionally, it can increase the production of certain hormones such as testosterone, which can also contribute to acne development.

Furthermore, some people may be sensitive to the lactose or other components in whey protein, which can trigger an inflammatory response in the body and lead to the development of acne.

How to Treat Whey Protein Induced Acne?

If you are experiencing acne due to whey protein consumption, there are several steps you can take to alleviate the symptoms and promote clear skin.

  1. Switch to Plant-Based Protein Sources

If you suspect that whey protein is causing your acne, consider switching to plant-based protein sources such as pea protein, hemp protein, or soy protein. These protein sources are less likely to contain hormones or lactose that can trigger acne development.

  1. Reduce Your Whey Protein Consumption

If you do not want to give up this protein completely, consider reducing your consumption and monitoring your acne symptoms. You may find that reducing your intake of it can help alleviate your acne symptoms.

Managing Acne Caused by Whey Protein: Dos and Don'ts

  1. Maintain Good Hygiene Practices

Good hygiene practices can help reduce the severity of acne symptoms. Make sure to wash your face twice a day with a gentle cleanser and avoid touching your face throughout the day. Additionally, make sure to clean any fitness equipment you use before and after use to prevent the spread of bacteria.

  1. Use Topical Acne Treatments

There are various over-the-counter topical treatments available that can help reduce the severity of acne symptoms. Look for products that contain ingredients such as benzoyl peroxide, salicylic acid, or alpha-hydroxy acids, which can help unclog pores and reduce inflammation.

  1. Consider Prescription Acne Medications

If your acne symptoms are severe, you may need prescription medication to effectively treat your condition. Talk to your dermatologist about prescription medications such as antibiotics, retinoids, or hormonal treatments that may be suitable for your specific needs.

To know more about Skincare Devices and Beauty’s latest updates, please Like and Follow our Facebook and Instagram accounts…

Read also: Hyperbaric Oxygen Therapy: A Comprehensive Guide

Boost Your Skin’s Glow: Incorporating Vitamin C in Your Skincare Routine

0

Vitamin C is an essential nutrient that provides numerous benefits to the body, including boosting the immune system, protecting against oxidative stress, and improving skin health. Incorporating vitamin C into your skincare routine is an excellent way to nourish your skin and enhance its appearance. This article will explore the benefits of vitamin C for the skin and provide tips on how to incorporate it into your daily skincare regimen.

What is Vitamin C?

Vitamin C, also known as ascorbic acid, is a water-soluble vitamin found in many foods, including citrus fruits, strawberries, kiwi, and green leafy vegetables. It is a powerful antioxidant that helps protect the body from harmful free radicals, which can cause cellular damage and accelerate the aging process.

Benefits of Vitamin C for the Skin

Vitamin C offers many benefits for the skin, making it a popular ingredient in skincare products. Here are some of the ways vitamin C can help improve your skin:

  1. Brightens and evens out skin tone: Vitamin C can help reduce the appearance of dark spots, hyperpigmentation, and other forms of discoloration, resulting in a brighter, more even skin tone.
  2. Protects against environmental stressors: Vitamin C has been shown to protect the skin from the damaging effects of UV radiation, pollution, and other environmental stressors that can cause premature aging.
  3. Boosts collagen production: Collagen is a protein that gives skin its strength and elasticity. Vitamin C is essential for the production of collagen, and its use in skincare products can help improve skin firmness and reduce the appearance of fine lines and wrinkles.
  4. Improves skin texture: Vitamin C can help improve skin texture by reducing the appearance of pores and smoothing out rough or uneven areas.

Boost Your Skin's Glow: Incorporating Vitamin C in Your Skincare Routine

How to Incorporate Vitamin C into Your Skincare Routine

Now that you know the benefits of vitamin C for the skin, here are some tips on how to incorporate it into your daily skincare regimen:

  1. Choose the right product: When selecting a vitamin C product, look for one that contains L-ascorbic acid, which is the most potent form of vitamin C for the skin. Other forms of vitamin C, such as ascorbyl palmitate or magnesium ascorbyl phosphate, may be less effective. Also, consider the concentration of vitamin C in the product. Ideally, you want a product with at least 10% vitamin C, but not more than 20%, as higher concentrations may cause irritation.
  2. Use it in the morning: Vitamin C is most effective when applied in the morning because it can help protect the skin from environmental stressors throughout the day. Apply your vitamin C product after cleansing and toning but before moisturizing and applying sunscreen.
  3. Start slow: If you are new to using vitamin C in your skincare routine, start with a lower concentration and gradually work your way up. This will help minimize the risk of irritation and allow your skin to adjust to the product.
  4. Store it properly: Vitamin C is unstable and can degrade quickly when exposed to air, light, and heat. Store your vitamin C product in a cool, dark place, away from direct sunlight.
  5. Consider combining with other antioxidants: Vitamin C works synergistically with other antioxidants, such as vitamin E and ferulic acid. Look for products that contain these ingredients to maximize the benefits for your skin.
  6. Don’t forget to apply sunscreen: Although vitamin C can help protect the skin from UV damage, it is not a substitute for sunscreen. Always apply a broad-spectrum sunscreen with an SPF of 30 or higher as the last step in your skincare routine.
  7. Be patient: It can take several weeks to see the full benefits of vitamin C on your skin. Don’t expect overnight results and be consistent with use of the vitamin C product. Incorporate it into your daily routine and use it consistently to see the best results.

In conclusion, incorporating vitamin C into your skincare routine is a great way to improve the health and appearance of your skin. Vitamin C offers numerous benefits, including brightening and evening out skin tone, protecting against environmental stressors, boosting collagen production, and improving skin texture. When selecting a vitamin C product, choose one that contains L-ascorbic acid and has a concentration of at least 10%. Use it in the morning, start slow, store it properly, and consider combining with other antioxidants for maximum benefits. Don’t forget to apply sunscreen as the last step in your skincare routine, and be patient as it can take several weeks to see the full benefits of vitamin C on your skin. By incorporating vitamin C into your skincare routine, you can achieve healthy, radiant skin.

To know more about Skincare Devices and Beauty’s latest updates, please Like and Follow our Facebook and Instagram accounts…

Read also: Hyperbaric Oxygen Therapy: A Comprehensive Guide

Hyperbaric Oxygen Therapy: A Comprehensive Guide

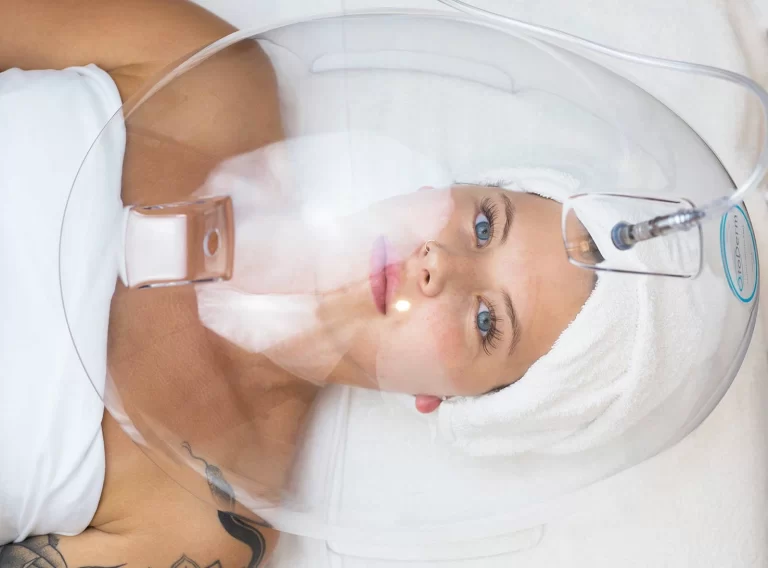
Oxygen dome therapy, also known as hyperbaric oxygen therapy (HBOT), is a type of treatment that involves breathing in pure oxygen in a pressurized chamber or dome. This therapy has gained popularity in recent years due to its potential benefits for a variety of conditions, including chronic pain, sports injuries, neurological disorders, and more. In this article, we will discuss what you need to know about oxygen dome therapy, including its benefits, risks, and potential side effects.

What is Oxygen Dome Therapy?

Oxygen dome therapy involves the use of a hyperbaric oxygen chamber or dome, which is a sealed, pressurized chamber designed to deliver high concentrations of oxygen to the body. The chamber or dome is filled with pure oxygen, which is breathed in through a mask or hood. The increased pressure inside the chamber or dome helps to deliver oxygen to the body’s tissues and organs at a greater rate than normal.

The therapy works on the principle that oxygen is vital for the body’s natural healing processes. By increasing the amount of oxygen in the body, oxygen dome therapy may promote tissue regeneration, reduce inflammation, and improve circulation. This can lead to faster healing times for injuries and other conditions.

What are the Benefits of Oxygen Dome Therapy?

Oxygen dome therapy has been used to treat a wide range of conditions, including:

  1. Chronic pain: Hyperbaric oxygen therapy may help reduce chronic pain by reducing inflammation, improving circulation, and promoting tissue regeneration.
  2. Sports injuries: Oxygen dome therapy may help reduce the recovery time for sports injuries by improving circulation and promoting tissue regeneration.
  3. Neurological disorders: Oxygen dome therapy has been used to treat conditions such as multiple sclerosis, Parkinson’s disease, and stroke by promoting tissue regeneration and improving circulation.
  4. Wound healing: Oxygen dome therapy may help speed up the healing process for wounds, including those that are slow to heal due to diabetes or other conditions.Hyperbaric Oxygen Therapy: A Comprehensive Guide
  5. Radiation therapy side effects: Hyperbaric oxygen therapy has been used to reduce side effects of radiation therapy, such as tissue damage and scarring.
  6. Skin rejuvenation: Oxygen dome therapy has been used to improve the appearance of the skin by promoting tissue regeneration and reducing inflammation.

What are the Risks of Oxygen Dome Therapy?

While oxygen dome therapy is generally considered safe, there are some risks associated with the treatment. These include:

  1. Oxygen toxicity: Breathing in high concentrations of oxygen for an extended period can lead to oxygen toxicity, which can cause seizures, lung damage, and other serious complications.
  2. Ear pain: Changes in pressure inside the chamber or dome can cause ear pain or other discomfort.
  3. Claustrophobia: Some people may experience feelings of claustrophobia or anxiety inside the chamber or dome.
  4. Fire risk: Oxygen is a highly flammable gas, and there is a risk of fire if the chamber or dome is not properly maintained.
  5. Infection: There is a risk of infection if the chamber or dome is not properly cleaned and sanitized between treatments.

It is important to discuss the risks and potential benefits of oxygen dome therapy with your healthcare provider before undergoing the treatment.

What to Expect During Oxygen Dome Therapy

During oxygen dome therapy, you will be placed inside a hyperbaric oxygen chamber or dome. The chamber or dome will be pressurized, and you will be asked to breathe in pure oxygen through a mask or hood. You may experience a popping sensation in your ears as the pressure inside the chamber or dome changes.

The treatment usually lasts for about 60-90 minutes, depending on the condition being treated. You may need to undergo several sessions of oxygen dome therapy to achieve the desired results.

To know more about Skincare Devices and Beauty’s latest updates, please Like and Follow our Facebook and Instagram accounts…

Read also: Age is Just a Number: 5 Scientifically Proven Anti-Aging Strategies

Ear Piercing 101: A Comprehensive Guide for First-Timers

0

Ear piercing is a popular form of body modification that has been practiced for centuries. It is a simple and relatively painless procedure that involves creating a hole in the earlobe or cartilage to insert a piece of jewelry. While ear piercing is a common practice, there are some important things that you should know before getting your ears pierced. In this article, we will cover everything you need to know about ear piercing.

Types of Ear Piercing

The most common type of ear piercing is the earlobe piercing. The earlobe is the soft and fleshy part of the ear that hangs down. This area is easy to pierce and heals quickly. Other types of ear piercing include cartilage piercing, which is done on the upper part of the ear, and industrial piercing, which involves piercing two holes in the cartilage and connecting them with a piece of jewelry.

Preparation for Ear Piercing

Before getting your ears pierced, it is important to prepare yourself for the procedure. You should make sure that you are in good health and have no underlying medical conditions that could cause complications during or after the piercing. You should also avoid consuming alcohol or taking aspirin or other blood-thinning medications for at least 24 hours before the procedure.

Choosing the Right Piercer

Choosing the right piercer is essential for a successful piercing. You should choose a professional who is experienced and trained in ear piercing. They should also have a good reputation and use sterile equipment to prevent infections.

The Piercing Procedure

The piercing procedure involves using a sterilized needle to create a hole in the earlobe or cartilage. The piercer will mark the spot where the piercing will be made and clean the area with an antiseptic solution. They will then use a sterilized needle to create the hole and insert the jewelry.

Ear Piercing 101: A Comprehensive Guide for First-Timers

Aftercare for Ear Piercing

Aftercare is an important part of the piercing process. Proper aftercare will help to prevent infections and promote healing. The piercer will give you instructions on how to care for your piercing, which may include cleaning the area with an antiseptic solution and avoiding certain activities that could cause irritation or infection.

Healing Time for Ear Piercing

The healing time for ear piercing varies depending on the type of piercing and your body’s natural healing process. Earlobe piercings typically take 4-6 weeks to heal, while cartilage piercings can take 3-6 months. During the healing process, it is important to avoid touching the piercing or changing the jewelry to prevent irritation or infection.

Risks and Complications of Ear Piercing

It is generally safe when done by a professional using sterile equipment. However, there are some risks and complications that can occur, including infections, allergic reactions to the jewelry, and keloid scarring. If you experience any unusual symptoms, such as pain, redness, or swelling, you should seek medical attention immediately.

Choosing the Right Jewelry

Choosing the right jewelry is important for the healing process and for preventing allergic reactions. It is recommended to choose jewelry made from hypoallergenic materials, such as surgical steel or titanium. You should also choose jewelry that is the right size and shape for your ear piercing to prevent irritation or discomfort.

Piercing Guns vs. Needles

Piercing guns are often used in mall kiosks or other non-professional settings to perform ear piercings. However, piercing guns are not recommended because they can cause more tissue damage and are less precise than a needle. It is recommended to choose a professional piercer who uses a sterilized needle for a safer and more accurate piercing.

Ear Piercing and Cultural Significance

it has been practiced for centuries in many different cultures. In some cultures, ear piercing is a rite of passage that signifies a transition from childhood to adulthood. In many African and Asian cultures, ear piercing is a common practice that is done at a young age. In some cultures, the type of earring worn by a person can also signify their social status or marital status.

In Western cultures, it is often seen as a fashion statement and a way to express personal style. It is a popular form of self-expression, and many people choose to pierce multiple holes in their ears or wear unique and creative earrings.

It is a common and popular form of body modification that has been practiced for centuries. While it is generally safe when done by a professional using sterile equipment, there are some risks and complications that can occur. It is important to choose the right piercer, care for your piercing properly, and choose the right jewelry to prevent infection and promote healing.

Whether you choose to get your ears pierced for cultural significance, personal expression, or just for fun, it is important to educate yourself on the process and take the necessary precautions to ensure a safe and successful piercing.

To know more about Skincare Devices and Beauty’s latest updates, please Like and Follow our Facebook and Instagram accounts…

Read also: Age is Just a Number: 5 Scientifically Proven Anti-Aging Strategies

Look Your Best with These Facial Hair Care and Shaving Tips

Facial hair has become a popular trend among men, with various styles and designs to choose from. From the full beard to the clean-shaven look, there’s something for everyone. However, to maintain a well-groomed look, it’s essential to know how to care for facial hair and shave safely. This article will provide tips and tricks to help you achieve that perfect look at home.

  1. Start with a clean face

Before you start grooming your facial hair, it’s essential to have a clean face. Use warm water and a mild cleanser to wash your face thoroughly. The warm water will help to soften your facial hair, making it easier to trim or shave. It’s also essential to rinse your face with cold water after washing it to close the pores and reduce the risk of irritation.

  1. Use the right tools

To get the best results when grooming your facial hair, you need to use the right tools. Invest in a good quality razor or trimmer that suits your needs. If you have sensitive skin, look for a razor or trimmer that’s specifically designed for sensitive skin to reduce the risk of irritation. It’s also important to keep your tools clean and well-maintained to ensure they work correctly.

  1. Trim first

If you’re planning to shave your facial hair, it’s a good idea to trim it first. Use a trimmer to cut your hair to the desired length. This will make it easier to shave and reduce the risk of razor burn or skin irritation. When trimming your facial hair, use the appropriate guard size to achieve your desired length.

  1. Use shaving cream or gel

When shaving your facial hair, always use shaving cream or gel. This will help to lubricate the skin and reduce the risk of razor burn or cuts. Apply the shaving cream or gel in a circular motion to cover the entire area you’re shaving.

Look Your Best with These Facial Hair Care and Shaving Tips

  1. Shave with the grain

When shaving your facial hair, always shave with the grain of the hair. Shaving against the grain can cause irritation, razor burn, and ingrown hairs. If you’re unsure which direction the hair grows, run your fingers over the hair. The direction in which the hair feels smooth is the direction you should shave.

  1. Rinse the razor frequently

To prevent the build-up of shaving cream or hair in your razor, rinse it frequently while shaving. This will also ensure that you get a closer shave. Rinse your razor under warm water and shake off any excess water. If you’re using a disposable razor, replace it after two to three shaves.

  1. Moisturize

After shaving your facial hair, it’s important to moisturize your skin. Use a moisturizer or aftershave lotion to soothe your skin and prevent irritation. A moisturizer will also help to keep your skin hydrated, which is essential for healthy skin.

  1. Clean your tools

After grooming your facial hair, it’s essential to clean your tools thoroughly. Rinse your razor or trimmer under warm water to remove any hair or shaving cream. If you’re using an electric razor or trimmer, follow the manufacturer’s instructions for cleaning and maintenance.

In conclusion, grooming facial hair can be a simple task if you have the right tools and follow the right steps. Start by cleaning your face and using the right tools to achieve your desired look. Trim your facial hair before shaving and always use shaving cream or gel. Shave with the grain of the hair and rinse your razor frequently. Moisturize your skin after shaving and clean your tools thoroughly. By following these tips, you can achieve a well-groomed look and safely shave your facial hair at home.

To know more about Skincare Devices and Beauty’s latest updates, please Like and Follow our Facebook and Instagram accounts…

Read also: Nail Care: How to Prevent and Treat Brittle Nails Due to Household Chores

11 Incredible Ways Ozone Facial Therapy Can Transform Your Skin Health

Ozone facial therapy is a non-invasive skincare treatment that uses ozone gas to improve the health and appearance of the skin. While ozone therapy has been used in medical treatments for decades, its use in skincare is a more recent development. Ozone facial therapy offers numerous benefits for the skin and overall health, making it a popular treatment option for those seeking a non-invasive, natural approach to skincare.

Here are 11 surprising health benefits of ozone facial therapy:

  1. Stimulates collagen production

Ozone facial therapy helps stimulate collagen production, which is vital for healthy, youthful-looking skin. Collagen is a protein that gives the skin its strength, elasticity, and firmness. As we age, collagen production decreases, leading to wrinkles and sagging skin. Ozone therapy helps boost collagen production, improving the skin’s texture and reducing the appearance of fine lines and wrinkles.

  1. Kills bacteria and viruses

Ozone gas has potent antimicrobial properties that can kill bacteria and viruses. When applied to the skin, ozone can help eliminate harmful bacteria that can cause acne, infections, and other skin issues. Ozone therapy can also help improve the immune system, making it more resistant to viruses and other harmful pathogens.

  1. Reduces inflammation

Inflammation is a natural response of the body to injury or infection. However, chronic inflammation can lead to a range of health problems, including skin issues like acne, rosacea, and psoriasis. Ozone therapy can help reduce inflammation by increasing oxygen levels in the body and improving blood flow. By reducing inflammation, ozone therapy can help improve skin health and reduce the risk of chronic diseases.

  1. Improves circulation

Ozone therapy can help improve circulation by increasing the flow of oxygen-rich blood to the skin. This can help improve the skin’s texture and tone, reducing the appearance of fine lines and wrinkles. Improved circulation can also help speed up the healing process and reduce the risk of infections.

  1. Detoxifies the skin

Ozone therapy can help detoxify the skin by removing harmful toxins and impurities. When ozone gas is applied to the skin, it reacts with sweat, oils, and other impurities, breaking them down into harmless substances that can be easily eliminated from the body. This can help improve skin health and reduce the risk of acne and other skin issues.

11 Incredible Ways Ozone Facial Therapy Can Transform Your Skin Health

  1. Boosts skin hydration

Ozone therapy can help boost skin hydration by increasing the skin’s ability to retain moisture. This can help improve the skin’s texture and tone, reducing the appearance of fine lines and wrinkles. Hydrated skin is also less prone to dryness and irritation, reducing the risk of skin issues like eczema and psoriasis.

  1. Reduces the appearance of scars

Ozone therapy can help reduce the appearance of scars by stimulating collagen production and improving circulation. By increasing collagen production, ozone therapy can help improve the texture and tone of the skin, reducing the appearance of scars. Improved circulation can also help speed up the healing process, reducing the risk of scars forming in the first place.

  1. Improves acne-prone skin

Ozone therapy can help improve acne-prone skin by killing bacteria and reducing inflammation. When applied to the skin, ozone gas can help eliminate harmful bacteria that can cause acne, reducing the risk of breakouts. Ozone therapy can also help reduce inflammation, which can help improve skin health and reduce the risk of acne.

  1. Reduces hyperpigmentation

Hyperpigmentation is a common skin issue that causes dark spots and patches on the skin. Ozone therapy can help reduce hyperpigmentation by stimulating collagen production and improving circulation. By improving the skin’s texture and tone, ozone therapy can help reduce the appearance of hyperpigmentation and improve overall skin health.

  1. Helps reduce stress

Ozone therapy can help reduce stress by increasing oxygen levels in the body and improving circulation. Stress can cause a range of health issues, including skin problems like acne and premature aging. Ozone therapy can help reduce stress by increasing the flow of oxygen-rich blood to the skin, promoting relaxation and reducing anxiety.

  1. Promotes overall wellness

Ozone therapy can promote overall wellness by improving circulation, boosting the immune system, and reducing inflammation. By improving the health of the skin, ozone therapy can also improve self-esteem and confidence. Many people who receive ozone facial therapy report feeling more relaxed, energized, and healthier overall.

To know more about Skincare Devices and Beauty’s latest updates, please Like and Follow our Facebook and Instagram accounts…

Read also: Nail Care: How to Prevent and Treat Brittle Nails Due to Household Chores

Nail Care: How to Prevent and Treat Brittle Nails Due to Household Chores

0

The ongoing pandemic has brought about a significant change in our lifestyles, including the way we manage our households. With the increased workload, we find ourselves doing more cleaning, washing, and cooking than ever before. While these chores are essential, they can take a toll on our nails, leaving them dry, brittle, and weak. If you’re experiencing brittle nails due to increased household chores, here are five easy tips to help you fix and prevent the problem.

  1. Keep your nails dry.

Exposing your nails to water for extended periods can cause them to become brittle and weak. Therefore, it is essential to keep your nails dry as much as possible. Wear gloves while doing household chores such as washing dishes or cleaning with water. This will help to protect your nails from prolonged exposure to water.

If you don’t have gloves, try to keep your hands as dry as possible by using a towel to dry them frequently. Also, avoid using hot water when washing your hands or doing dishes. Instead, use lukewarm water to reduce the drying effect on your nails.

  1. Moisturize your nails and cuticles.

Moisturizing your nails and cuticles is vital to prevent them from becoming brittle and dry. Use a good quality hand cream or cuticle oil to keep your nails and cuticles hydrated. Apply the cream or oil to your nails and cuticles after every hand wash or at least twice a day.

When applying the moisturizer, massage it into your nails and cuticles gently. Massaging helps to improve blood flow to your nails, which can strengthen them and prevent brittleness.

  1. Avoid harsh chemicals.

Many household cleaning products contain harsh chemicals that can damage your nails. The chemicals in these products can strip your nails of their natural oils, leaving them dry and brittle. Therefore, it is essential to avoid using these products as much as possible.

If you must use these products, wear gloves to protect your nails and skin from the chemicals. Also, ensure that you use these products in a well-ventilated area to reduce the risk of inhaling harmful fumes.

Nail Care: How to Prevent and Treat Brittle Nails Due to Household Chores

  1. Maintain a healthy diet.

Maintaining a healthy diet is vital for healthy nails. Include foods that are rich in vitamins and minerals that promote healthy nails, such as biotin, zinc, and iron. Foods such as eggs, nuts, spinach, and fish are excellent sources of these nutrients.

Also, ensure that you stay hydrated by drinking plenty of water. Water helps to keep your nails and skin hydrated, preventing them from becoming dry and brittle.

  1. File your nails properly.

Filing your nails correctly is crucial in preventing brittleness. When filing your nails, use a soft nail file, and file in one direction. Avoid filing back and forth, as this can weaken your nails.

Also, avoid using metal nail files, as they can cause your nails to split or peel. Instead, use a glass nail file, which is gentle on your nails and helps to prevent damage.

In conclusion, increased household chores can take a toll on our nails, leaving them dry, brittle, and weak. However, by following the tips outlined above, you can fix and prevent this problem. Keeping your nails dry, moisturizing them regularly, avoiding harsh chemicals, maintaining a healthy diet, and filing them correctly are easy ways to keep your nails healthy and strong.

Remember, healthy nails are not only beautiful but also a sign of good health. Therefore, it’s essential to take care of your nails by following these simple tips. With a little effort, you can enjoy beautiful and healthy nails, even with increased household chores.

To know more about Skincare Devices and Beauty’s latest updates, please Like and Follow our Facebook and Instagram accounts…

Read also: Refresh and Rejuvenate: 3 Delicious Detox Water Recipes for Gorgeous Skin

A Guide to Achieving a Smooth Bikini Line with Any Hair-Removal Method

0

Getting a smooth bikini line is a common concern for many women. Whether you prefer a Brazilian, bikini, or just a simple tidy up, there are several hair-removal methods that can help you achieve a smooth, hair-free bikini area. In this article, we will discuss some popular hair-removal methods and tips to help you get the smoothest bikini line possible.

  1. Shaving

Shaving is one of the most popular and easy-to-use hair removal methods. It’s inexpensive, quick, and can be done in the comfort of your own home. However, shaving can also be the most challenging method to get a smooth bikini line, especially if you have sensitive skin. Here are some tips to get a smooth bikini line with shaving:

  • Start by trimming long hairs with scissors or clippers.
  • Use a sharp, clean razor to avoid irritation and ingrown hairs.
  • Apply a shaving cream or gel to moisturize and lubricate the skin.
  • Shave in the direction of hair growth to avoid irritation and ingrown hairs.
  • Rinse the skin with warm water and pat dry gently.
  • Apply a moisturizer or oil to soothe and hydrate the skin.
  1. Waxing

Waxing is a popular method for removing hair from the bikini area. It involves applying hot or cold wax to the skin and pulling it off with a strip to remove the hair. Waxing can be done at home or by a professional at a salon. Here are some tips to get a smooth bikini line with waxing:

  • Exfoliate the skin before waxing to remove dead skin cells and prevent ingrown hairs.
  • Trim long hairs before waxing to avoid pain and discomfort.
  • Apply the wax in the direction of hair growth and pull it off in the opposite direction.
  • Hold the skin taut while pulling off the wax to avoid pain and irritation.
  • Apply a soothing lotion or oil after waxing to calm the skin.

A Guide to Achieving a Smooth Bikini Line with Any Hair-Removal Method

  1. Sugaring

Sugaring is a natural hair-removal method that uses a sugar paste to remove hair from the root. It’s similar to waxing but gentler on the skin. Sugaring can be done at home or by a professional at a salon. Here are some tips to get a smooth bikini line with sugaring:

  • Exfoliate the skin before sugaring to remove dead skin cells and prevent ingrown hairs.
  • Trim long hairs before sugaring to avoid pain and discomfort.
  • Apply the sugar paste in the direction of hair growth and pull it off in the opposite direction.
  • Hold the skin taut while pulling off the sugar paste to avoid pain and irritation.
  • Apply a soothing lotion or oil after sugaring to calm the skin.
  1. Depilatory creams

Depilatory creams are chemical-based hair-removal products that dissolve the hair at the skin’s surface. They are easy to use and can be done at home. However, they can be irritating to the skin and have a strong odor. Here are some tips to get a smooth bikini line with depilatory creams:

  • Read the instructions carefully before using the product.
  • Apply the cream evenly to the bikini area and leave it on for the recommended time.
  • Use a spatula or washcloth to remove the cream and hair.
  • Rinse the skin thoroughly with warm water and pat dry gently.
  • Apply a moisturizer or oil to soothe and hydrate the skin.
  1. Laser hair removal

Laser hair removal is a long-term hair-removal method that uses a laser to destroy hair follicles. It’s a popular choice for those who want a permanent solution to unwanted hair. Laser hair removal can be done by a professional at a salon or at home with a handheld device. Here are some tips to get a smooth bikini line with laser hair removal:

  • Choose a reputable and experienced professional if getting the procedure done at a salon.
  • Follow the instructions carefully if using a handheld device at home.
  • Shave the bikini area before the procedure to avoid discomfort and pain.
  • Avoid sun exposure and self-tanning products before and after the procedure.
  • Apply a soothing lotion or oil after the procedure to calm the skin.

Tips for a smooth bikini line:

Regardless of the hair-removal method you choose, there are some general tips you can follow to get the smoothest bikini line possible:

  • Exfoliate the skin regularly to remove dead skin cells and prevent ingrown hairs.
  • Avoid tight clothing and underwear that can irritate the skin.
  • Use a gentle, fragrance-free soap or cleanser to clean the bikini area.
  • Apply a moisturizer or oil daily to keep the skin hydrated and smooth.
  • Avoid touching or scratching the bikini area to prevent irritation and infection.
  • If you experience pain, redness, or irritation, stop the hair-removal method and consult a dermatologist.

To know more about Skincare Devices and Beauty’s latest updates, please Like and Follow our Facebook and Instagram accounts…

Read also: Refresh and Rejuvenate: 3 Delicious Detox Water Recipes for Gorgeous Skin