Home Blog Page 38

Say Goodbye to Redness: A Skincare Routine for Rosacea

Rosacea is a common skin condition that affects many people around the world. It is characterized by redness, inflammation, and sometimes pimples on the face, particularly in the cheeks, nose, forehead, and chin. While there is no cure for rosacea, there are ways to manage and reduce its symptoms, including the use of a proper skincare routine. In this article, we will discuss what should be your skincare routine to reduce rosacea.

  1. Gentle Cleanser: The first step in any skincare routine is cleansing. When it comes to reducing rosacea symptoms, it’s important to use a gentle cleanser that won’t irritate the skin. Look for a cleanser that is fragrance-free and doesn’t contain any harsh ingredients such as sulfates or alcohol. It’s also important to avoid scrubbing the skin too hard, as this can cause further irritation.
  2. Moisturizer: Moisturizing is an essential step in any skincare routine, especially for those with rosacea. A good moisturizer will help to keep the skin hydrated and prevent dryness, which can aggravate rosacea symptoms. Look for a moisturizer that is specifically designed for sensitive skin and contains ingredients such as ceramides, hyaluronic acid, and glycerin. It’s also important to avoid moisturizers that contain fragrance or other irritants.
  3. Sunscreen: Sun exposure is a common trigger for rosacea, so it’s important to protect your skin from the sun’s harmful rays. Look for a sunscreen that is specifically designed for sensitive skin and has an SPF of at least 30. It’s also important to choose a sunscreen that doesn’t contain any irritating ingredients such as fragrance or alcohol.
  4. Avoid Harsh Products: When you have rosacea, it’s important to avoid using any products that contain harsh ingredients that can irritate the skin. This includes products that contain alcohol, fragrance, and abrasive exfoliants. Instead, look for products that are specifically designed for sensitive skin and are free from irritants. Say Goodbye to Redness: A Skincare Routine for Rosacea
  5. Use a Calming Serum: Using a calming serum can help to reduce inflammation and redness associated with rosacea. Look for a serum that contains ingredients such as niacinamide, green tea extract, or licorice extract. These ingredients have anti-inflammatory properties and can help to soothe irritated skin.
  6. Be Gentle: When Applying Products When applying skincare products, it’s important to be gentle with your skin. Avoid rubbing or scrubbing the skin too hard, as this can cause further irritation. Instead, use gentle, circular motions to apply your products.
  7. Avoid Hot Water: Hot water can be very damaging to the skin, especially for those with rosacea. It’s important to avoid using hot water when washing your face or taking a shower. Instead, use lukewarm water, which is less likely to cause irritation.
  8. Use a Humidifier: Dry air can exacerbate rosacea symptoms, so it’s important to keep your skin hydrated. Using a humidifier can help to add moisture to the air and prevent dryness. Place a humidifier in your bedroom or living room to help keep the air moist.
  9. Identify Triggers: Everyone’s rosacea is different, so it’s important to identify your own triggers. Common triggers include stress, spicy food, alcohol, and sun exposure. Once you’ve identified your triggers, try to avoid them as much as possible.
  10. See a Dermatologist: If you’re struggling to manage your rosacea symptoms, it’s important to see a dermatologist. They can help to diagnose your condition and recommend the best course of treatment. This may include prescription medication or other treatments such as laser therapy.

For more Skincare news and Beauty latest updates please Like and Follow our Facebook Page and Instagram account…
Why Shea Butter Is a Must-Have Ingredient in Your Skincare Routine

0

When it comes to taking care of your skin, you want to make sure that you are using the best ingredients possible. One ingredient that has gained a lot of attention in recent years is shea butter. This all-natural ingredient has been used for centuries in West Africa for its incredible moisturizing properties. In this article, we’ll explore why shea butter is one of the best ingredients to add to your skincare routine.

What Is Shea Butter?

Shea butter is a fat that is extracted from the nuts of the shea tree. The tree is native to West Africa, where the butter has been used for centuries in cooking and as a skincare ingredient. Shea butter is rich in fatty acids, which give it its moisturizing properties. It is also high in vitamins A and E, which are important for healthy skin.

Why Is Shea Butter Good for Your Skin?

  1. Moisturizes and Hydrates

Shea butter is an excellent moisturizer that can hydrate even the driest skin. It contains high levels of fatty acids, which help to seal in moisture and prevent water loss from the skin. Shea butter also contains natural emollients, which can help to soften and smooth the skin. Whether you have dry or sensitive skin, shea butter can help to keep your skin hydrated and healthy.

  1. Reduces Inflammation

Shea butter has anti-inflammatory properties that can help to soothe irritated or inflamed skin. It contains compounds such as lupeol cinnamate, which have been shown to reduce inflammation in the skin. This makes shea butter an excellent ingredient for those with eczema, psoriasis, or other inflammatory skin conditions.

  1. Promotes Healing

Shea butter contains compounds that can help to promote healing in the skin. For example, it contains allantoin, which is known to promote the growth of new tissue. This can help to heal wounds, scars, and other skin damage. Shea butter also contains vitamin A, which is essential for healthy skin cell growth.

  1. Protects Against UV Damage

Shea butter contains natural sun protection properties, which can help to protect the skin against UV damage. While shea butter alone is not a substitute for sunscreen, it can help to boost the effectiveness of your sunscreen and provide extra protection for your skin.

  1. Anti-Aging Benefits

Shea butter contains antioxidants such as vitamin A and E, which can help to fight free radicals that damage the skin. Free radicals are molecules that can cause oxidative stress in the skin, leading to premature aging. By using shea butter in your skincare routine, you can help to protect your skin against free radical damage and keep it looking youthful and healthy.

Why Shea Butter Is a Must-Have Ingredient in Your Skincare Routine

How to Use Shea Butter in Your Skincare Routine

There are many ways to incorporate shea butter into your skincare routine. Here are a few ideas:

  1. Use it as a Moisturizer

Shea butter makes an excellent all-natural moisturizer. Simply apply a small amount of shea butter to your skin after cleansing to help lock in moisture and keep your skin hydrated.

  1. Use it as a Lip Balm

Shea butter can also be used as a natural lip balm. Simply apply a small amount of shea butter to your lips to keep them moisturized and protected.

  1. Use it as a Hair Conditioner

Shea butter can also be used as a hair conditioner to help hydrate and soften hair. Simply apply a small amount of shea butter to your hair and leave it on for 30 minutes before washing it out.

  1. Use it as a Body Butter

Shea butter can also be used as a natural body butter. Simply apply a small amount of shea butter to your skin after showering to help lock in moisture and keep your skin soft and smooth throughout the day.

  1. Use it as a Hand Cream

It is also a great ingredient to use in hand creams. Our hands can often become dry and cracked due to frequent washing and exposure to harsh elements. Applying shea butter to your hands can help to lock in moisture and protect them from further damage.

For more Skincare news and Beauty latest updates please Like and Follow our Facebook Page and Instagram account…

Facial Toning Devices: The Secret to Firmer, More Youthful Skin

Facial toning devices have been around for quite some time now, and their popularity has been on the rise in recent years. These devices are designed to help you achieve a firmer, more youthful-looking complexion by stimulating the muscles in your face. With so many different types of facial toning devices on the market, it can be difficult to know which one is right for you. In this article, we will take a closer look at everything you need to know about facial toning devices.

What are Facial Toning Devices?

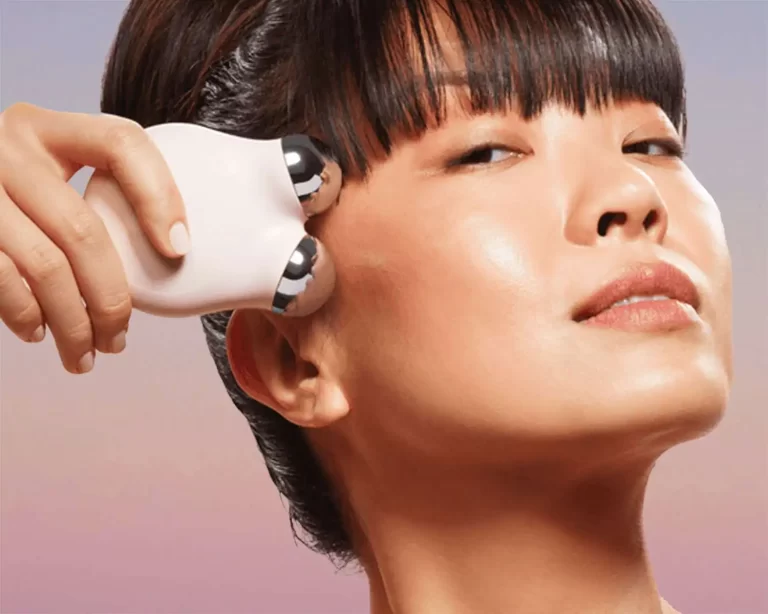
Facial toning devices are electronic devices that use microcurrent technology to stimulate the muscles in your face. Microcurrents are small electrical currents that mimic the natural electrical currents in your body. When these microcurrents are applied to your facial muscles, they cause the muscles to contract and tone. This, in turn, helps to lift and firm the skin on your face.

How do Facial Toning Devices Work?

Facial toning devices work by using small electrical currents to stimulate the muscles in your face. These electrical currents mimic the natural electrical currents in your body and cause your facial muscles to contract and tone. This, in turn, helps to lift and firm the skin on your face. Most facial toning devices have multiple settings, which allow you to adjust the intensity of the electrical currents to suit your individual needs.

What are the Benefits of Using Facial Toning Devices?

  1. Improved Skin Tone and Texture: These devices help to stimulate the muscles in your face, which can improve the tone and texture of your skin.
  2. Reduced Appearance of Wrinkles and Fine Lines: Regular use of a facial toning device can help to reduce the appearance of wrinkles and fine lines on your face.
  3. Increased Collagen Production: Collagen is a protein that is essential for healthy, youthful-looking skin. Facial toning devices can help to stimulate the production of collagen, which can improve the overall health and appearance of your skin.
  4. Enhanced Product Absorption: When you use a facial toning device, the microcurrents help to open up your pores, which allows for better absorption of skincare products.
  5. Increased Blood Circulation: The microcurrents used in these devices also help to increase blood circulation in your face, which can give you a healthy, radiant glow.

Facial Toning Devices: The Secret to Firmer, More Youthful Skin

What are the Different Types of Facial Toning Devices?

There are several different types of facial toning devices on the market, including:

  1. Microcurrent Devices: Microcurrent devices use small electrical currents to stimulate the muscles in your face. These devices can help to lift and firm the skin on your face and reduce the appearance of wrinkles and fine lines.
  2. LED Devices: LED devices use light therapy to help improve the overall health and appearance of your skin. These devices can help to reduce the appearance of wrinkles and fine lines, as well as improve the tone and texture of your skin.
  3. Sonic Devices: Sonic devices use high-frequency vibrations to help improve the overall health and appearance of your skin. These devices can help to exfoliate your skin, improve blood circulation, and enhance product absorption.
  4. Ultrasound Devices: Ultrasound devices use sound waves to help improve the overall health and appearance of your skin. These devices can help to stimulate collagen production, reduce the appearance of wrinkles and fine lines, and improve the tone and texture of your skin.

How to Use a Facial Toning Device?

To use a facial toning device, you will first need to cleanse your face to remove any dirt, oil, or makeup. Once your face is clean, apply a small amount of conductive gel to the area of your face you will be treating. This gel helps to conduct the electrical currents from the device to your skin. Then, turn on your facial toning device and adjust the intensity settings to your desired level. Gently glide the device over the targeted areas of your face, using circular or upward motions. Be sure to follow the instructions provided with your specific device for the recommended treatment time and frequency.

It’s important to note that while facial toning devices can provide many benefits for your skin, they should not be used as a replacement for a comprehensive skincare routine. It’s essential to maintain a healthy diet, stay hydrated, and use quality skincare products to keep your skin looking and feeling its best.

For more Skincare news and Beauty latest updates please Like and Follow our Facebook Page and Instagram account…
Protecting Your Skin from the Inside Out: The Role of Your Microbiome

When it comes to skincare, we often focus on the external factors that affect our skin’s health, such as sun exposure, pollution, and our daily skincare routines. However, we often overlook the internal factors that play a crucial role in maintaining healthy skin: the microbiome. The skin microbiome refers to the collection of microorganisms that live on and in our skin, including bacteria, fungi, and viruses. These microorganisms play a vital role in protecting our skin from harmful pathogens, regulating inflammation, and maintaining a healthy barrier function. In this article, we will explore the importance of the skin microbiome and why you need to pay attention to it.

  1. Protects against harmful pathogens

The skin is the body’s first line of defense against harmful pathogens, such as bacteria, viruses, and fungi. The skin microbiome helps protect against these pathogens by creating a physical barrier and producing antimicrobial peptides. These peptides are natural antibiotics that kill harmful bacteria, viruses, and fungi. When the skin microbiome is disrupted, it can lead to an overgrowth of harmful bacteria, causing infections, inflammation, and even acne.

  1. Regulates inflammation

Inflammation is a natural response of the immune system to injury or infection. However, chronic inflammation can cause damage to the skin, leading to premature aging and an increased risk of skin diseases. The skin microbiome plays a critical role in regulating inflammation by interacting with the immune system. Studies have shown that certain strains of bacteria in the skin microbiome can reduce inflammation, while others can promote it. By maintaining a healthy skin microbiome, you can help regulate inflammation and reduce the risk of skin damage.

  1. Maintains a healthy barrier function

The skin barrier function refers to the ability of the skin to retain moisture, prevent water loss, and protect against external factors such as UV radiation, pollution, and irritants. The skin microbiome plays a crucial role in maintaining a healthy barrier function by producing lipids that help keep the skin hydrated and by regulating pH levels. When the skin microbiome is disrupted, it can lead to a weakened barrier function, causing dryness, flakiness, and increased sensitivity to external factors.

  1. Influences skin health

The skin microbiome has been shown to play a role in various skin conditions, including acne, eczema, psoriasis, and rosacea. For example, studies have found that people with acne tend to have an overgrowth of a particular strain of bacteria called Propionibacterium acnes. By contrast, people with eczema tend to have a reduced diversity of bacteria in their skin microbiome. Understanding the role of the skin microbiome in these conditions can help develop new treatments that target the microbiome.

  1. Can be influenced by external factors

Several external factors can affect the skin microbiome, including diet, hygiene practices, and the use of antibiotics and other medications. For example, a diet rich in fiber and fermented foods has been shown to promote a healthy skin microbiome. On the other hand, the use of harsh soaps and disinfectants can disrupt the skin microbiome. Antibiotics, while necessary for treating infections, can also kill off beneficial bacteria in the skin microbiome, leading to an imbalance.

  1. Can be modulated

The good news is that the skin microbiome can be modulated through various means, including the use of probiotics, prebiotics, and postbiotics. Probiotics are live microorganisms that can be applied topically or ingested orally to promote a healthy skin microbiome. Prebiotics are substances that feed the beneficial bacteria in the skin microbiome, such as oligosaccharides and inulin. Postbiotics are the metabolic byproducts of beneficial bacteria that have been shown to have anti-inflammatory and antimicrobial properties. They can be used as topical treatments to promote a healthy skin microbiome.

In conclusion, the skin microbiome plays a vital role in maintaining healthy skin by protecting against harmful pathogens, regulating inflammation, and maintaining a healthy barrier function. External factors such as diet, hygiene practices, and medication use can affect the skin microbiome, but it can also be modulated through the use of probiotics, prebiotics, and postbiotics. By exploring and understanding your skin microbiome, you can take steps to promote healthy skin and reduce the risk of skin diseases. It’s time to give your skin microbiome the attention it deserves.

For more Skincare news and Beauty latest updates please Like and Follow our Facebook Page and Instagram account…

Choosing the Best Retinol Product: What You Should Know

0

Retinol is a highly effective ingredient in skincare that has been proven to reduce the signs of aging, acne, and hyperpigmentation. However, not all retinol products are created equal. With so many options available in the market, it can be overwhelming to choose the right one. In this article, we will discuss the key factors you need to consider when buying a retinol product.

  1. Concentration

Retinol products are available in various strengths, ranging from 0.1% to 1%. The concentration of retinol determines its potency and effectiveness. While higher concentrations may deliver faster results, they also come with a higher risk of irritation and sensitivity. Therefore, it is recommended to start with a lower concentration and gradually increase it as your skin gets accustomed to the product.

  1. Form

Retinol is available in various forms, including creams, serums, and oils. Each form has its own advantages and disadvantages, depending on your skin type and concerns. Creams are ideal for dry or mature skin as they provide long-lasting hydration. Serums are lighter in texture and absorb quickly, making them suitable for oily or acne-prone skin. Oils are beneficial for all skin types and provide deep nourishment and hydration. Choose a form that suits your skin type and concerns.

  1. Packaging

Retinol is a highly unstable ingredient that can degrade when exposed to light and air. Therefore, it is important to choose a product that comes in opaque, airtight packaging that minimizes exposure to light and air. Look for products that come in pump bottles or airless containers that prevent contamination and maintain the potency of the product.

Choosing the Best Retinol Product: What You Should Know

  1. Other Ingredients

Retinol products often contain other ingredients that enhance its effectiveness and address specific skin concerns. For instance, hyaluronic acid provides hydration, niacinamide reduces inflammation and hyperpigmentation, and vitamin C boosts collagen production. Look for products that contain complementary ingredients that target your skin concerns and enhance the benefits of retinol.

  1. Frequency of Use

Retinol is a potent ingredient that can cause irritation and sensitivity, especially when used in high concentrations or with other active ingredients. Therefore, it is important to follow the instructions provided by the manufacturer and gradually increase the frequency of use as your skin tolerates the product. Start with once or twice a week and gradually increase to every other day or daily use.

  1. Sun Protection

Retinol increases the skin’s sensitivity to the sun, making it more prone to damage and hyperpigmentation. Therefore, it is essential to use a broad-spectrum sunscreen with a minimum SPF of 30 every day, even on cloudy or rainy days. Look for products that provide both retinol and sun protection for optimal results.

For more Skincare news and Beauty latest updates please Like and Follow our Facebook Page and Instagram account…
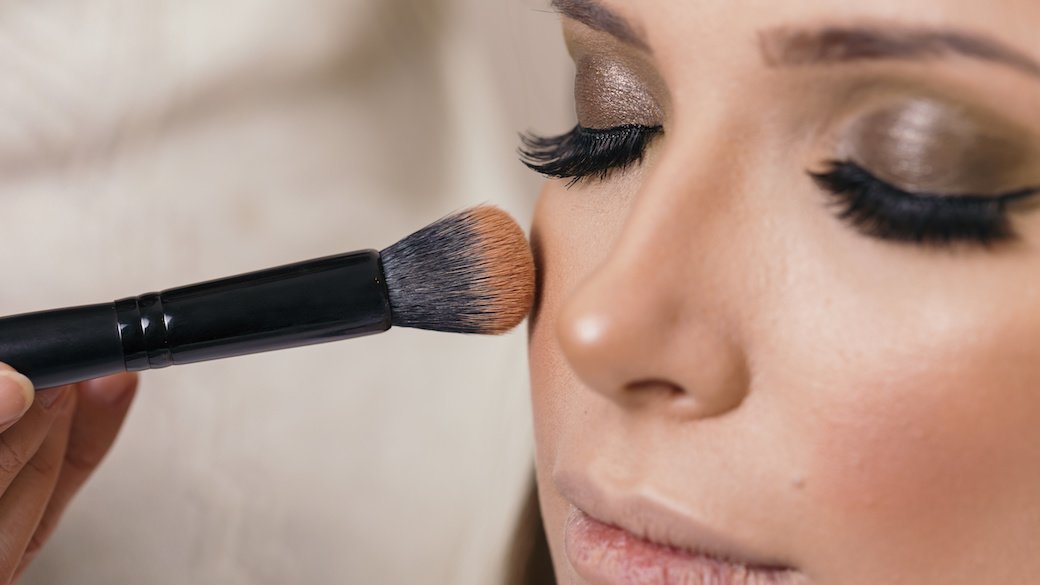
Glow Without the Grease: Tips for Using Highlighter on Oily Skin

0

Highlighters have become an essential makeup product in recent years, adding a touch of glow to the skin and enhancing facial features. However, if you have oily skin, using a highlighter can be a bit tricky. The oil on your skin can make the highlighter look greasy and melt away quickly. But fear not, there are ways to make your highlighter work for your oily skin. In this article, we will discuss how to use a highlighter on your oily skin effectively.

  1. Prep Your Skin

The first step to using a highlighter on oily skin is to prep your skin properly. It’s essential to clean and exfoliate your skin before applying any makeup products. This will help to remove any excess oil and dead skin cells that may clog your pores, making your skin look dull and oily.

After cleansing and exfoliating, apply a lightweight moisturizer that is suitable for oily skin. It’s important to choose a moisturizer that is non-comedogenic and oil-free to avoid clogging your pores. Using a moisturizer will keep your skin hydrated and prevent the highlighter from accentuating any dry patches on your skin.

  1. Choose the Right Highlighter Formula

When it comes to choosing a highlighter for oily skin, the formula is crucial. Avoid cream and liquid highlighters as they tend to slide off oily skin quickly. Instead, opt for powder or baked highlighters, which are long-lasting and will stay put on your skin.

You can also choose a matte highlighter, which will give you a subtle glow without adding any extra shine to your oily skin. If you want a more intense glow, go for a shimmer highlighter, but be sure to apply it sparingly.

  1. Apply the Highlighter to the Right Areas

Knowing where to apply the highlighter is crucial to achieving a natural and glowing look on oily skin. Avoid applying the highlighter on areas where you tend to get oily, such as the T-zone. Instead, focus on applying it to the high points of your face, such as the cheekbones, brow bone, and the tip of your nose.

Using a fan brush, pick up a small amount of the highlighter and tap off any excess powder. Then, apply it to the areas you want to highlight with a light hand. Build up the intensity gradually to avoid applying too much highlighter at once.

Glow Without the Grease: Tips for Using Highlighter on Oily Skin

  1. Set Your Highlighter with Powder

To make your highlighter last longer on oily skin, set it with a translucent powder. This will help to absorb any excess oil and prevent the highlighter from melting away.

Using a fluffy powder brush, dust a small amount of translucent powder on top of the highlighter. Be sure to blend it well to avoid any harsh lines.

  1. Use a Setting Spray

A setting spray is an excellent way to make your makeup last longer, including your highlighter. It will help to lock in your makeup, prevent any smudging or melting, and give your skin a natural-looking finish.

After applying your highlighter, spray a few pumps of setting spray on your face. Be sure to hold the bottle at arm’s length and avoid spraying too much product in one area.

For more Skincare news and Beauty latest updates please Like and Follow our Facebook Page and Instagram account…

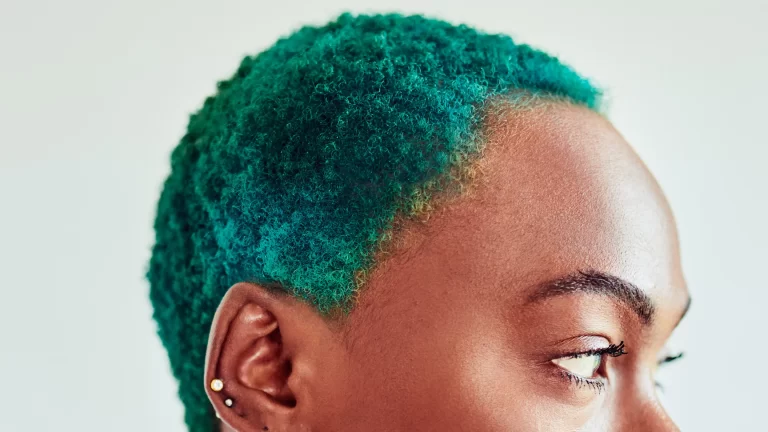
The Art of Hair Dyeing: Understanding the Different Techniques

0

Hair dyeing is a popular way to change one’s look, whether it be for a special occasion or just for fun. With so many different options available, it can be overwhelming to choose the right dyeing method for your hair type and desired outcome. In this article, we will explore the different ways to dye your hair, their pros and cons, and how to maintain your new hair color.

  1. Temporary hair dye

Temporary hair dye is the perfect option for those who want to experiment with a new color without making a long-term commitment. These dyes usually come in the form of sprays, gels, and wash-out color treatments. They work by coating the outside of the hair shaft and will wash out after one to two shampoos. The advantage of temporary hair dye is that it allows you to try out a new color without causing any damage to your hair. However, the downside is that the color may not be as vibrant as you would like and may not last very long.

  1. Semi-permanent hair dye

Semi-permanent hair dye is a step up from temporary hair dye in terms of longevity. It usually lasts between 6 to 8 weeks and gradually fades over time. Semi-permanent dye does not contain ammonia or peroxide, which means it won’t penetrate the hair shaft, making it less damaging to your hair. It is a great option for those who want to experiment with a new color or enhance their natural hair color without causing too much damage. However, the downside is that the color may not be as vibrant as permanent hair dye, and it may require more frequent touch-ups.

  1. Permanent hair dye

Permanent hair dye is the most popular and long-lasting dyeing option. It uses a combination of ammonia and peroxide to penetrate the hair shaft and deposit color. Permanent hair dye can last up to 8 weeks or longer, depending on how well you take care of it. It provides a more vibrant and noticeable color change than semi-permanent or temporary hair dye. However, the downside is that the chemicals used in permanent hair dye can cause damage to your hair and scalp. It is essential to take proper precautions when using permanent hair dye, such as doing a patch test and using protective gloves.

The Art of Hair Dyeing: Understanding the Different Techniques

  1. Highlighting

Highlighting is a dyeing method that involves adding lighter or darker streaks of color to your hair. It is a great way to add dimension and depth to your hair without completely changing your hair color. There are different techniques for highlighting, such as foil highlights, balayage, and ombre. Foil highlights involve weaving sections of hair and applying bleach or dye, while balayage and ombre involve freehand painting of the hair. The advantage of highlighting is that it can be done with any hair color, and it is a low maintenance option. However, the downside is that it can be damaging to your hair if not done properly and may require frequent touch-ups.

  1. Color melting

Color melting is a dyeing technique that involves blending multiple colors seamlessly to create a natural-looking gradient effect. It involves using a combination of foil highlights and freehand painting techniques to create a subtle yet noticeable color change. The advantage of color melting is that it can be done with any hair color and works well with various hair lengths and textures. It is also a low maintenance option, as the color gradually fades over time, making it perfect for those who don’t want to commit to frequent touch-ups. However, the downside is that it can be time-consuming and may require multiple sessions to achieve the desired effect.

Maintaining your hair color

Regardless of which dyeing method you choose, it is essential to take proper care of your hair to maintain the color and prevent damage. Here are some tips to help you maintain your new hair color:

  1. Use sulfate-free shampoo and conditioner: Sulfates can strip your hair of its natural oils and color, making it fade faster. Use a sulfate-free shampoo and conditioner to protect your hair color and keep it looking fresh for longer.
  2. Limit heat styling: Heat styling tools like flat irons and curling irons can damage your hair and make the color fade faster. If you must use them, use a heat protectant spray and keep the temperature low.
  3. Avoid washing your hair too often: Washing your hair too often can strip it of its natural oils and color. Try to wash your hair every other day or less frequently if possible.
  4. Protect your hair from the sun: The sun can cause your hair color to fade faster, so wear a hat or use a leave-in conditioner with UV protection when you’re outside.
  5. Get regular touch-ups: Depending on the dyeing method you choose, you may need to get touch-ups every 6 to 8 weeks or more frequently. This will help keep your hair color looking fresh and vibrant.

For more Skincare news and Beauty latest updates please Like and Follow our Facebook Page and Instagram account…
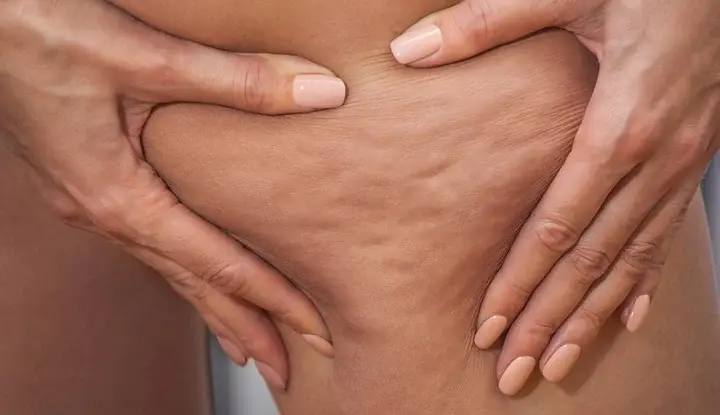
The Ultimate Guide to Cellulite: Causes, Treatments, and Prevention

Cellulite is a common condition that affects approximately 90% of women and 10% of men. It is a condition in which the skin appears dimpled or lumpy due to the underlying fat pushing against connective tissue. Cellulite can occur in any part of the body, but it is most commonly found on the thighs, buttocks, and abdomen.

While cellulite is not a serious medical condition, it can be a cause of concern for many people, affecting their self-esteem and confidence. The good news is that there are several things you can do to reduce the appearance of cellulite.

  1. Exercise Regularly

Exercise is one of the most effective ways to reduce the appearance of cellulite. When you exercise, you burn fat and build muscle, which helps to tone and firm the skin. Exercises that target the muscles in the affected areas, such as squats, lunges, and leg lifts, can be particularly effective.

Cardiovascular exercise, such as running, cycling, or swimming, can also help to burn fat and improve circulation, which can reduce the appearance of cellulite. Aim to exercise for at least 30 minutes a day, five days a week, to see the best results.

  1. Maintain a Healthy Diet

Eating a healthy diet can also help to reduce the appearance of cellulite. Aim to eat a diet that is rich in fruits, vegetables, lean proteins, and whole grains. Avoid processed foods, sugary snacks, and foods high in saturated fats.

Drinking plenty of water is also important for maintaining healthy skin. Aim to drink at least eight glasses of water a day to keep your skin hydrated and healthy.

  1. Get a Massage

Massage can be a great way to reduce the appearance of cellulite. A massage can help to improve circulation and lymphatic drainage, which can help to reduce the appearance of cellulite.

There are several types of massage that can be effective for cellulite, including deep tissue massage, lymphatic massage, and myofascial release. You can visit a professional masseuse or try self-massage techniques at home.

The Ultimate Guide to Cellulite: Causes, Treatments, and Prevention

  1. Use Topical Treatments

There are several topical treatments available that claim to reduce the appearance of cellulite. These treatments typically contain ingredients such as caffeine, retinol, or antioxidants, which are thought to improve circulation and promote collagen production.

While some people have reported success with these treatments, there is limited scientific evidence to support their effectiveness. If you decide to try a topical treatment, be sure to choose one that is backed by scientific research and follow the instructions carefully.

  1. Consider Medical Treatments

If you are struggling with severe cellulite, you may want to consider medical treatments. There are several medical treatments available that claim to reduce the appearance of cellulite, including laser therapy, radiofrequency therapy, and ultrasound therapy.

These treatments typically involve using a device to heat or massage the affected area, which can help to break down fat and improve circulation. While these treatments can be effective, they can also be expensive and may require several sessions to see results.

  1. Embrace Your Body

Finally, it is important to remember that cellulite is a natural part of the body and that it is nothing to be ashamed of. While it can be frustrating and may affect your self-confidence, it is important to love and embrace your body just as it is.

Try to focus on the things that you love about your body, rather than fixating on your perceived flaws. Surround yourself with people who uplift and support you, and remember that true beauty comes from within.

For more Skincare news and Beauty latest updates please Like and Follow our Facebook Page and Instagram account…

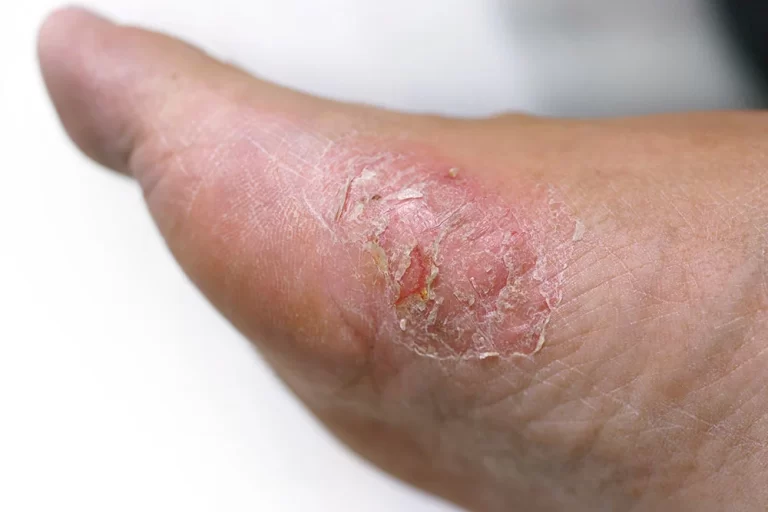
Skin Deep: How Skin Lesions Can Help Diagnose Diabetes

Skin lesions are one of the many indicators that can suggest that an individual may have diabetes. Diabetes is a chronic disease that affects how the body processes blood sugar, also known as glucose. There are two types of diabetes: type 1 and type 2. Type 1 diabetes is an autoimmune disease where the body’s immune system attacks and destroys the cells in the pancreas that produce insulin. Type 2 diabetes occurs when the body becomes resistant to insulin or the pancreas doesn’t produce enough insulin to regulate blood sugar levels. Both types of diabetes can cause skin lesions, which can be a useful tool in detecting the disease.

Here are some skin lesions that may suggest an individual has diabetes:

  1. Acanthosis Nigricans: Acanthosis nigricans is a skin condition that causes dark, thick patches of skin to develop in folds and creases, such as the neck, armpits, groin, and under the breasts. The patches may feel velvety or rough to the touch. Acanthosis nigricans is commonly associated with insulin resistance, which is often seen in individuals with type 2 diabetes.
  2. Diabetic Dermopathy: Diabetic dermopathy is a skin condition that causes light brown, scaly patches to develop on the skin, usually on the shins. The patches may be round or oval, and they usually don’t hurt or itch. Diabetic dermopathy is often seen in older adults with type 2 diabetes.
  3. Necrobiosis Lipoidica: Necrobiosis lipoidica is a skin condition that causes red or brown patches to develop on the skin, usually on the lower legs. The patches may be round or oval, and they may have a shiny or waxy appearance. Necrobiosis lipoidica is more commonly seen in women with type 1 diabetes.
  4. Eruptive Xanthomatosis: Eruptive xanthomatosis is a skin condition that causes small, yellow bumps to develop on the skin, usually on the arms, legs, and buttocks. The bumps may be itchy or tender, and they usually occur in clusters. Eruptive xanthomatosis is often seen in individuals with uncontrolled type 1 or type 2 diabetes. Skin Deep: How Skin Lesions Can Help Diagnose Diabetes
  5. Digital Sclerosis: Digital sclerosis is a skin condition that causes thick, tight, waxy skin to develop on the fingers, hands, and toes. The skin may become stiff and difficult to move. Digital sclerosis is more commonly seen in individuals with type 1 diabetes.
  6. Bullosis Diabeticorum: Bullosis diabeticorum is a skin condition that causes fluid-filled blisters to develop on the skin, usually on the feet, legs, and hands. The blisters may be large or small, and they may be surrounded by a red or brown border. Bullosis diabeticorum is often seen in individuals with poorly controlled diabetes.
  7. Candidiasis: Candidiasis is a fungal infection that can affect the skin, nails, and mucous membranes. The infection is caused by the Candida fungus, which is normally present in the body in small amounts. Candidiasis can cause red, itchy, and flaky skin, as well as small pimple-like bumps. Candidiasis is more commonly seen in individuals with poorly controlled diabetes, as high blood sugar levels can create an ideal environment for fungal growth.

It is important to note that not all skin lesions are caused by diabetes, and not all individuals with diabetes will develop skin lesions. However, if you notice any of the above skin lesions, it is important to talk to your healthcare provider to determine the cause.

For more Skincare news and Beauty latest updates please Like and Follow our Facebook Page and Instagram account…

Natural Facial Hair Removal: 3 Easy Home Treatments You Need to Try

0

Facial hair can be a source of embarrassment and frustration for many people, especially women. While there are several options available for facial hair removal, such as waxing, threading, and laser treatments, these can be expensive and time-consuming. Fortunately, there are also several effective home remedies for facial hair removal that are easy to use and budget-friendly. In this article, we’ll explore three such treatments that you should know about.

  1. Turmeric and Milk

Turmeric is a natural ingredient that has been used for centuries for its medicinal properties. It is also a popular ingredient in many beauty treatments, including facial hair removal. Turmeric contains a compound called curcumin, which has anti-inflammatory and antioxidant properties that can help reduce facial hair growth.

To make a turmeric and milk facial hair removal treatment, you will need the following ingredients:

  • 1 tablespoon of turmeric powder
  • 2 tablespoons of milk
  • 1 teaspoon of honey (optional)

Mix the turmeric powder and milk in a bowl to form a paste. If you have dry skin, you can add honey to the mixture to moisturize your skin. Apply the paste to your face and leave it on for 20-30 minutes or until it dries. Once the paste is dry, gently scrub it off with a damp cloth. Rinse your face with warm water and pat it dry with a clean towel.

Repeat this treatment 2-3 times a week for best results. Over time, you should notice a reduction in facial hair growth, as well as a brighter and more even skin tone.

  1. Sugar and Lemon

Sugar and lemon is another popular home remedy for facial hair removal. Sugar is a natural exfoliant that can help remove dead skin cells, while lemon juice contains natural bleaching agents that can lighten facial hair and make it less noticeable.

To make a sugar and lemon facial hair removal treatment, you will need the following ingredients:

  • 2 tablespoons of sugar
  • 2 teaspoons of lemon juice
  • 10 teaspoons of water

Mix the sugar, lemon juice, and water in a bowl to form a thick paste. Apply the paste to your face and massage it in circular motions for a few minutes. Leave the paste on for 15-20 minutes or until it dries. Once the paste is dry, gently scrub it off with a damp cloth. Rinse your face with cold water and pat it dry with a clean towel.

Repeat this treatment once a week for best results. You should notice a reduction in facial hair growth over time, as well as smoother and softer skin.

Natural Facial Hair Removal: 3 Easy Home Treatments You Need to Try

  1. Egg White and Cornstarch

Egg white and cornstarch is a simple and effective home remedy for facial hair removal. Egg white contains proteins that can help nourish and tighten the skin, while cornstarch helps absorb excess oil and impurities from the skin.

To make an egg white and cornstarch facial hair removal treatment, you will need the following ingredients:

  • 1 egg white
  • 1 tablespoon of cornstarch
  • 1 tablespoon of sugar (optional)

Whisk the egg white in a bowl until it becomes frothy. Add the cornstarch and sugar (if using) to the egg white and mix well to form a paste. Apply the paste to your face and leave it on for 15-20 minutes or until it dries. Once the paste is dry, gently peel it off from your face. Rinse your face with cold water and pat it dry with a clean towel.

Repeat this treatment once a week for best results. You should notice a reduction in facial hair growth over time, as well as smoother and firmer skin.

For more Skincare news and Beauty latest updates please Like and Follow our Facebook Page and Instagram account…