Home Blog Page 37

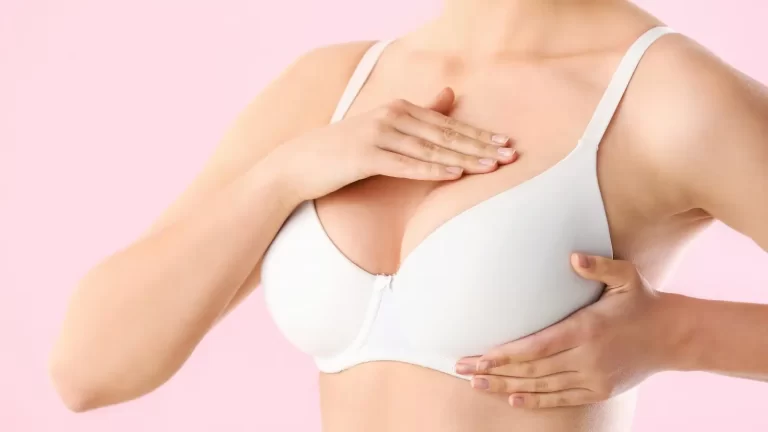
Firm Up: How Exercise and Bra Fit Can Prevent Breast Sagging

0

Breast sagging is a natural process that occurs as women age, but there are several factors that can contribute to the sagging of breasts, including pregnancy, weight loss, and genetics. While there is no way to completely prevent breast sagging, there are two activities that can help maintain your body shape and slow down the process of sagging: regular exercise and wearing a well-fitted bra.

Regular exercise is an important part of maintaining overall health, but it can also help prevent breast sagging by toning the muscles that support the breasts. The pectoral muscles are the main muscles that support the breasts, and exercising them can help keep them firm and lifted. There are several exercises that can target these muscles, including push-ups, chest presses, and dumbbell flys.

Push-ups are a classic exercise that can help strengthen the chest and pectoral muscles. To perform a push-up, start in a plank position with your hands shoulder-width apart and your toes on the ground. Lower your body down to the ground, keeping your elbows close to your body, and then push back up to the starting position. Repeat for several sets of 10-15 reps.

Firm Up: How Exercise and Bra Fit Can Prevent Breast Sagging

Chest presses are another effective exercise that can help tone the pectoral muscles. To perform a chest press, lie on your back with your knees bent and your feet on the ground. Hold a dumbbell in each hand and extend your arms straight up, so the dumbbells are above your chest. Slowly lower the dumbbells down towards your chest, keeping your elbows close to your body, and then press them back up to the starting position. Repeat for several sets of 10-15 reps.

Dumbbell flys are a third exercise that can help tone the pectoral muscles. To perform dumbbell flys, lie on your back with your knees bent and your feet on the ground. Hold a dumbbell in each hand and extend your arms straight up, so the dumbbells are above your chest. Slowly lower the dumbbells out to the sides, keeping a slight bend in your elbows, and then bring them back up to the starting position. Repeat for several sets of 10-15 reps.

In addition to regular exercise, wearing a well-fitted bra is also important for maintaining breast shape and preventing sagging. A bra that fits properly can provide support to the breasts, reducing the amount of stress on the skin and ligaments that can contribute to sagging. When shopping for a bra, it is important to find one that fits snugly around the band and cups, with no gaps or bulges. The straps should be adjusted so they are comfortable and provide support without digging into the shoulders.

There are also different types of bras that can provide additional support for the breasts. For example, a sports bra can provide extra support during exercise, while a push-up bra can provide a lift for a more flattering shape. A minimizer bra can help reduce the appearance of larger breasts, while a balconette bra can provide support and lift for a more youthful look.

In addition to regular exercise and wearing a well-fitted bra, there are several other lifestyle changes that can help prevent breast sagging. One important factor is maintaining a healthy weight, as excess weight can put additional stress on the skin and ligaments that support the breasts. It is also important to stay hydrated and eat a balanced diet rich in fruits, vegetables, and lean protein.

Avoiding smoking and excessive alcohol consumption can also help prevent breast sagging, as these habits can damage the skin and contribute to premature aging. Finally, it is important to practice good posture, as slouching can put additional stress on the breasts and contribute to sagging.

For more Skincare news and Beauty latest updates please Like and Follow our Facebook Page and Instagram account…

Toenail Troubles: Everything You Need to Know About Ingrown Toenails

0

Ingrown toenails, also known as onychocryptosis, are a common condition in which the toenail grows into the surrounding skin. This condition can cause pain, discomfort, and even infection if left untreated. In this article, we will explore the causes, symptoms, diagnosis, and treatment options for ingrown toenails.

Causes

Ingrown toenails are caused by a variety of factors, including:

  1. Poorly fitting shoes: Tight shoes can cause the toenail to grow into the skin.
  2. Trauma: Injury to the toe can cause the toenail to grow abnormally.
  3. Improper nail trimming: Cutting the toenails too short or rounding the edges can cause them to grow into the skin.
  4. Genetics: Some people may be more prone to ingrown toenails due to their genetics.
  5. Nail conditions: Certain nail conditions, such as fungal infections or thickened nails, can cause the toenail to grow into the skin.

Symptoms

The most common symptoms of an ingrown toenail include:

  1. Pain: Ingrown toenails can cause significant pain, especially when pressure is applied to the affected area.
  2. Redness and swelling: The skin around the ingrown toenail may become red, swollen, and tender to the touch.
  3. Infection: If the skin around the ingrown toenail becomes infected, it may become warm, swollen, and pus-filled.
  4. Difficulty walking: Severe cases of ingrown toenails can make it difficult to walk or wear shoes.

Diagnosis

Diagnosing an ingrown toenail is typically straightforward and can be done by a healthcare provider. The provider will perform a physical exam of the affected toe and may ask questions about the patient’s symptoms and medical history.

In some cases, the healthcare provider may order imaging tests, such as an X-ray or ultrasound, to rule out other conditions, such as a bone infection or a foreign object in the toe.

Toenail Troubles: Everything You Need to Know About Ingrown Toenails

Treatment

There are several treatment options available for ingrown toenails, depending on the severity of the condition. These options include:

  1. Home remedies: Mild cases of ingrown toenails can often be treated at home. Soaking the affected foot in warm water several times a day and applying an over-the-counter antibiotic ointment can help alleviate symptoms and promote healing.
  2. Nail trimming: If the ingrown toenail is caused by improper nail trimming, the healthcare provider may be able to trim the nail properly and apply a bandage to prevent further irritation.
  3. Antibiotics: If the skin around the ingrown toenail becomes infected, the healthcare provider may prescribe antibiotics to treat the infection.
  4. Partial nail removal: In more severe cases, the healthcare provider may need to remove part of the toenail to relieve pressure on the affected area. This procedure is typically done under local anesthesia and involves cutting away a portion of the nail and applying a chemical to prevent the nail from growing back.
  5. Total nail removal: In rare cases, the healthcare provider may need to remove the entire toenail. This procedure is typically reserved for severe cases of ingrown toenails that do not respond to other treatments.

Prevention

There are several steps you can take to prevent ingrown toenails from developing:

  1. Wear properly fitting shoes: Choose shoes that fit well and provide adequate room for your toes.
  2. Trim your toenails properly: Cut your toenails straight across and avoid rounding the edges.
  3. Practice good foot hygiene: Keep your feet clean and dry, and avoid going barefoot in public places.
  4. Seek prompt treatment: If you notice any signs of an ingrown toenail, seek treatment as soon as possible to prevent the condition from worsening.
  5. Consider regular foot care: For individuals who are prone to ingrown toenails, regular foot care from a podiatrist or healthcare provider may be beneficial in preventing future episodes.

Conclusion

Ingrown toenails can be a painful and uncomfortable condition, but with prompt treatment and proper prevention measures, they can be effectively managed. If you are experiencing symptoms of an ingrown toenail, it is important to seek prompt medical attention to prevent complications and promote healing. With proper care, you can keep your feet healthy and free from ingrown toenails.

For more Skincare news and Beauty latest updates please Like and Follow our Facebook Page and Instagram account…

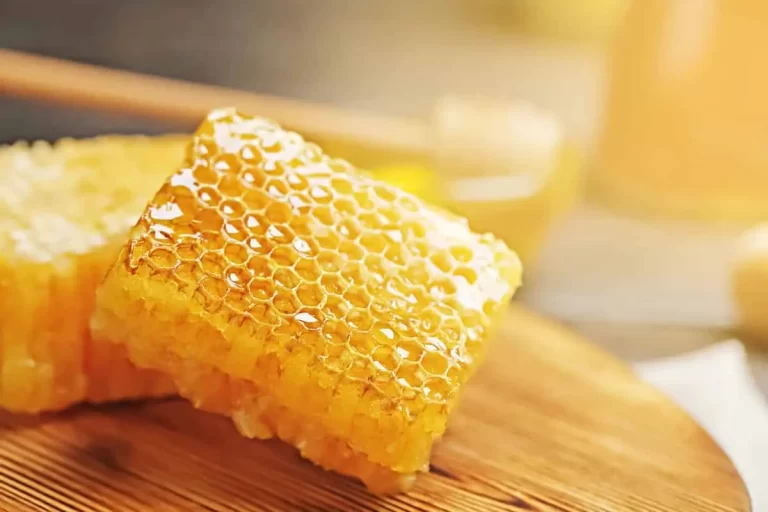
The Sweet Truth: Surprising Health Benefits of Eating Honeycomb

0

Honeycomb is a natural product that has been used for centuries for its many health benefits. Honeycomb is the waxy structure that bees create to store their honey. The honeycomb is made up of hexagonal cells that are filled with honey, pollen, and bee larvae. While honey itself is known for its health benefits, it may actually be even more beneficial. In this article, we will explore some of the surprising health benefits of eating honeycomb.

  1. Rich in Nutrients

It is a rich source of nutrients, including vitamins, minerals, and antioxidants. The honeycomb cells contain bee pollen, which is a source of protein, vitamins, and minerals. Bee pollen has been shown to have anti-inflammatory and antioxidant properties, which can help to reduce inflammation and oxidative stress in the body.

It is also rich in enzymes, which are essential for digestion. Enzymes help to break down food and make it easier for the body to absorb nutrients. It contains enzymes that can help to improve digestion and support overall digestive health.

  1. Boosts Immunity

It has been shown to have immune-boosting properties. The bee pollen found in honeycomb contains compounds that can help to stimulate the immune system and protect against infections. It also contains propolis, a resinous substance that bees use to seal their hives and protect against pathogens. Propolis has antibacterial and antiviral properties, which can help to boost the immune system and protect against infections.

  1. Helps with Allergies

It may also help to alleviate allergies. Bee pollen found in honeycomb can help to reduce inflammation in the body, which can alleviate allergy symptoms. Eating honeycomb may help to desensitize the body to pollen and reduce the severity of allergic reactions.

  1. Good for the Skin

It can also be beneficial for the skin. The antioxidants found in honeycomb can help to protect the skin from damage caused by free radicals. It can also help to moisturize the skin and improve its overall appearance. Some people even use honeycomb as a natural exfoliant to remove dead skin cells and reveal smoother, more radiant skin.

The Sweet Truth: Surprising Health Benefits of Eating Honeycomb

  1. Provides Energy

It is a natural source of energy. The honey found in honeycomb is rich in carbohydrates, which can provide a quick source of energy. It also contains enzymes that can help to break down carbohydrates and make them more easily absorbed by the body. Eating honeycomb before a workout or physical activity can help to boost energy levels and improve performance.

  1. Soothes Sore Throats

It can also be helpful in soothing sore throats. The antibacterial and anti-inflammatory properties of honeycomb can help to reduce inflammation in the throat and alleviate pain. Eating honeycomb or mixing it with warm water and lemon juice can help to soothe sore throats and promote healing.

  1. Supports Heart Health

It may also support heart health. The antioxidants found in honeycomb can help to reduce inflammation and protect against cardiovascular disease. It can also help to lower LDL (bad) cholesterol levels and increase HDL (good) cholesterol levels, which can reduce the risk of heart disease.

  1. Helps with Weight Loss

It may also be helpful for weight loss. The enzymes found in honeycomb can help to improve digestion and increase the metabolism. It is also a natural sweetener, which can be used in place of sugar to reduce calorie intake. Eating honeycomb as a snack can help to curb cravings and promote feelings of fullness, which can help to reduce overall calorie intake.

For more Skincare news and Beauty latest updates please Like and Follow our Facebook Page and Instagram account…
Unlock the Benefits of a Laser Carbon Peel: A Comprehensive Guide

0

When it comes to facial treatments, the options are vast and varied, ranging from the traditional cleansing and moisturizing to the more modern laser treatments. One of the latest treatments gaining popularity is the laser carbon peel, also known as the carbon laser peel or the China doll peel. In this article, we will discuss everything you need to know about this treatment, including what it is, how it works, and its benefits.

What is a Laser Carbon Peel?

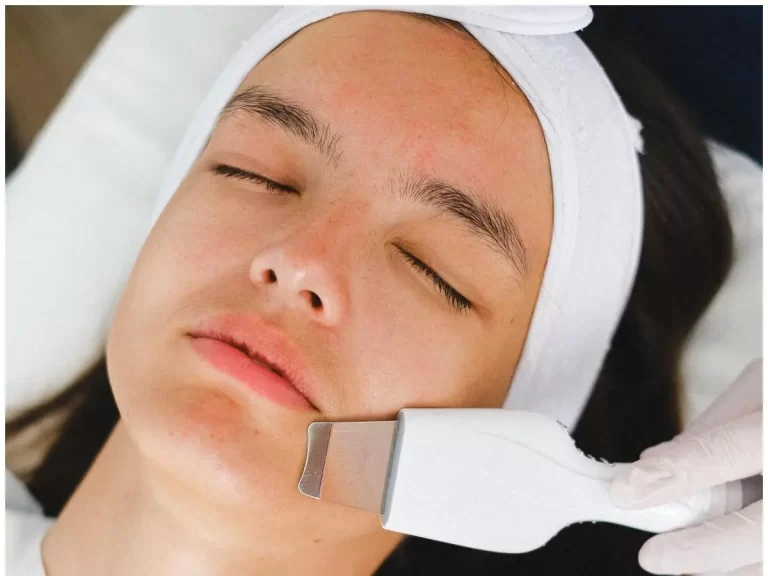
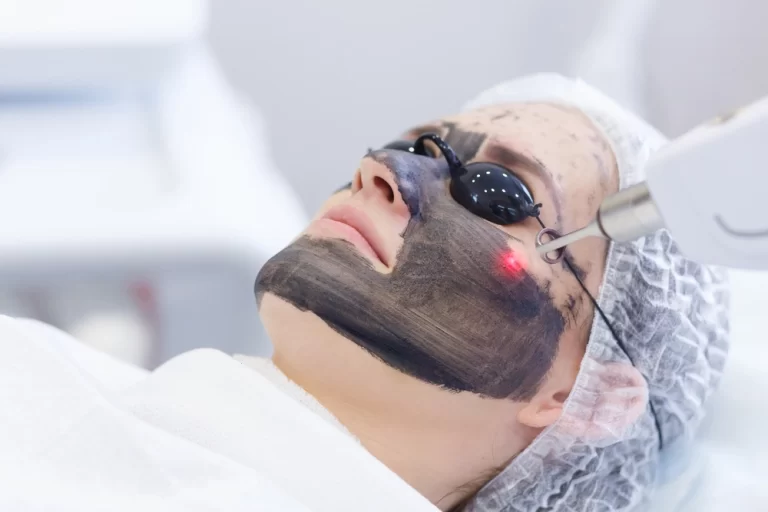
A laser carbon peel is a non-invasive treatment that uses a laser to remove dead skin cells, unclog pores, and stimulate collagen production. The treatment involves applying a layer of liquid carbon to the skin, which penetrates deep into the pores. Once the carbon has been absorbed, a laser is used to heat and vaporize the carbon, along with any impurities and dead skin cells it has picked up along the way. The result is smoother, more radiant skin.

How does it work?

The laser carbon peel works by using a specialized laser that emits short pulses of light energy. When this energy is absorbed by the carbon, it heats up and vaporizes, taking with it any dirt, oil, and dead skin cells that are stuck to the surface of the skin. The heat generated by the laser also helps to stimulate collagen production, which is important for maintaining healthy, youthful-looking skin.

The treatment is quick and painless, and most patients report feeling only a slight warming sensation as the laser is applied. Depending on the severity of the skin issues being treated, multiple treatments may be necessary to achieve optimal results.

What are the benefits of a Laser Carbon Peel?

There are several benefits to getting a laser carbon peel. Here are just a few:

  1. Smoother, more radiant skin: The laser carbon peel can help to improve the texture and tone of your skin, leaving it looking smoother, brighter, and more youthful.
  2. Unclogged pores: By removing dirt and oil from your pores, the laser carbon peel can help to reduce the appearance of blackheads and other blemishes.
  3. Improved collagen production: Collagen is essential for maintaining healthy, youthful-looking skin. By stimulating collagen production, the laser carbon peel can help to reduce the appearance of fine lines and wrinkles.
  4. No downtime: Unlike other laser treatments that may require days of downtime, the laser carbon peel is a non-invasive treatment that allows you to get back to your daily activities immediately.
  5. Safe and effective: The laser carbon peel is a safe and effective treatment that can be used on all skin types.

Unlock the Benefits of a Laser Carbon Peel: A Comprehensive Guide

Who is a good candidate for a Laser Carbon Peel?

The laser carbon peel is a great option for anyone looking to improve the overall health and appearance of their skin. However, it is especially beneficial for those with:

  1. Acne-prone skin: The laser carbon peel can help to reduce the appearance of acne by unclogging pores and reducing inflammation.
  2. Dull or tired-looking skin: If your skin is looking dull or tired, the laser carbon peel can help to rejuvenate it, leaving you with a brighter, more refreshed complexion.
  3. Fine lines and wrinkles: By stimulating collagen production, the laser carbon peel can help to reduce the appearance of fine lines and wrinkles.
  4. Uneven skin tone and texture: If you have uneven skin tone or texture, the laser carbon peel can help to even it out, leaving you with smoother, more radiant skin.

It is important to note that while the laser carbon peel is safe for all skin types, it may not be suitable for those with certain skin conditions or medical histories. It is always best to consult with a dermatologist or aesthetician before undergoing any new treatment.

For more Skincare news and Beauty latest updates please Like and Follow our Facebook Page and Instagram account…

DIY Hair Spa: Tips and Tricks for Relaxing at Home

0

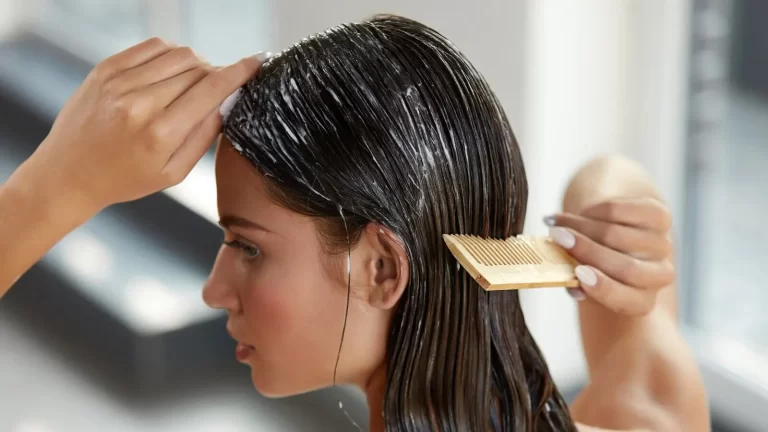
Who doesn’t love a good hair spa? It’s a perfect way to relax and rejuvenate your hair after a long week of work. But not everyone has the time or the budget to visit a salon for a hair spa. The good news is that you can perform an easy hair spa at the comfort of your home, and it’s not as difficult as it may sound. With a few simple tips and tricks, you can give your hair the TLC it deserves without leaving your house.

Here are some tips on how to perform an easy hair spa at the comfort of your home:

  1. Pre-treat your hair: The first step to a successful hair spa is to pre-treat your hair. You can use natural oils like coconut oil, almond oil, or olive oil to massage your hair and scalp. These oils are rich in nutrients and vitamins that will help nourish and strengthen your hair. Massage your hair and scalp gently for 10-15 minutes and leave the oil on for at least an hour before washing it off. You can also use a hair mask or a deep conditioner for added nourishment.
  2. Choose the right shampoo and conditioner: The next step is to choose the right shampoo and conditioner for your hair type. If you have dry hair, go for a moisturizing shampoo and conditioner. If you have oily hair, go for a clarifying shampoo that will help remove excess oil and dirt from your scalp. Use a wide-toothed comb to detangle your hair and apply the conditioner from mid-length to the ends of your hair.
  3. Steam your hair: Steaming your hair is an essential part of a hair spa. It helps open up your hair follicles and allows the hair products to penetrate deeper into your hair. You can use a steamer, a hot towel, or simply run hot water over your hair for a few minutes to steam your hair. Make sure to cover your hair with a shower cap while steaming.
  4. Massage your scalp: Massaging your scalp is another important step in a hair spa. It helps improve blood circulation to your scalp and promotes hair growth. Use your fingertips to massage your scalp in circular motions for 5-10 minutes. You can also use a scalp massager for added relaxation.  DIY Hair Spa: Tips and Tricks for Relaxing at Home
  5. Rinse and dry your hair: After steaming and massaging your hair, rinse it off with lukewarm water. Make sure to rinse off all the hair products from your hair and scalp. Use a microfiber towel to gently pat your hair dry. Avoid rubbing your hair vigorously with a towel as it can cause hair breakage.
  6. Style your hair: The final step is to style your hair as per your preference. You can blow-dry your hair or air-dry it. If you are blow-drying your hair, use a heat protectant spray to protect your hair from heat damage. You can also apply a serum or a hair oil to add shine and manageability to your hair.

For more Skincare news and Beauty latest updates please Like and Follow our Facebook Page and Instagram account…
Detoxify Your Body and Mind with the Power of Lava Shell Massage Therapy

0

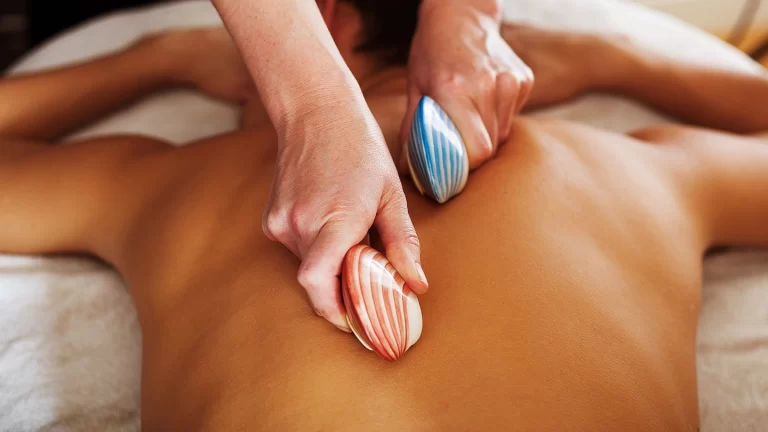
Lava Shell Massage is a massage therapy that has been gaining popularity in recent years, and for good reason. This unique massage technique uses heated shells to provide a deep tissue massage that is both relaxing and therapeutic. Lava Shell Massage therapy is a type of hot stone massage, but with a unique twist. The shells used in this massage are actually made from real shells harvested from the Philippines. Here are some reasons why you should consider falling in love with Lava Shell Massage.

  1. Natural and Sustainable

One of the main reasons to love Lava Shell Massage is that it is a natural and sustainable therapy. The shells used in this massage are harvested from the Philippine Sea, and are a renewable resource. The shells are cleaned and polished to create a smooth surface that is perfect for massage. The shells are then filled with a mixture of minerals and salts, and heated to the perfect temperature for a relaxing massage. Unlike other hot stone therapies that use synthetic stones, Lava Shell Massage is an all-natural therapy that is good for both your body and the environment.

  1. Relaxation and Stress Relief

Lava Shell Massage is an excellent therapy for relaxation and stress relief. The heat from the shells helps to relax your muscles and increase blood flow to the areas being massaged. The massage also helps to release tension in your body, which can reduce stress and anxiety. The combination of heat and massage creates a deep sense of relaxation that can last long after the massage is over.

  1. Deep Tissue Massage

Lava Shell Massage is also a great therapy for deep tissue massage. The shells used in this massage are heated to the perfect temperature to penetrate deep into your muscles. The therapist can apply more pressure with the shells than they could with their hands, which can help to break up knots and relieve tension in your muscles. This type of massage is great for athletes or anyone who suffers from chronic pain or tension in their muscles.

Detoxify Your Body and Mind with the Power of Lava Shell Massage Therapy

  1. Improves Circulation

Another benefit of Lava Shell Massage is that it can help to improve circulation. The heat from the shells helps to dilate your blood vessels, which can increase blood flow to the areas being massaged. This increased blood flow can help to deliver more oxygen and nutrients to your muscles, which can improve their overall health and function.

  1. Detoxifying

Lava Shell Massage is also a great therapy for detoxifying your body. The minerals and salts used in the shells can help to draw out toxins from your body, which can improve your overall health and wellbeing. The massage also helps to stimulate your lymphatic system, which can help to flush out toxins and waste products from your body.

  1. Versatile

Lava Shell Massage is a very versatile therapy. It can be used to target specific areas of your body, such as your back or legs, or it can be used for a full-body massage. The therapist can adjust the pressure and heat of the shells to meet your specific needs, making it a great therapy for people of all ages and fitness levels.

  1. Natural Pain Relief

Lava Shell Massage is also a great therapy for natural pain relief. The heat from the shells helps to increase blood flow to the areas being massaged, which can reduce inflammation and swelling. The massage also helps to release endorphins, which are natural painkillers produced by your body. This combination of heat and massage can help to reduce pain and improve your overall quality of life.

For more Skincare news and Beauty latest updates please Like and Follow our Facebook Page and Instagram account…

How to Use a Facial Brush for a Deep Cleanse

0

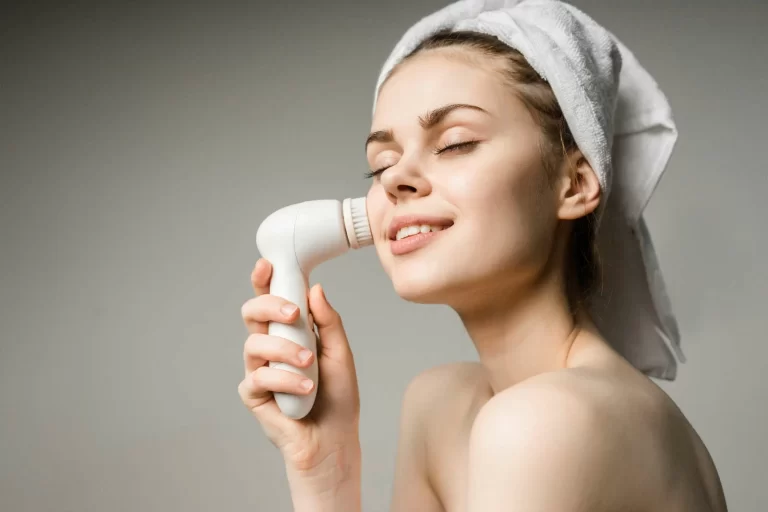
Facial brushes are becoming increasingly popular in the world of skincare, and it’s easy to see why. These brushes are designed to deep clean your skin, exfoliate away dead skin cells, and unclog your pores, leaving you with smooth, glowing skin. However, as with any skincare tool, it’s important to use a facial brush correctly to get the best results and avoid damaging your skin. In this article, we’ll go over the correct way to use a facial brush to get the most out of this powerful tool.

Step 1: Choose the Right Brush for Your Skin

Before you start using a facial brush, it’s important to choose the right brush for your skin type. There are a variety of facial brushes available, from soft bristle brushes to silicone brushes, so take some time to research which one will work best for you. Soft bristle brushes are great for those with sensitive skin, while silicone brushes are gentle yet effective for all skin types. Make sure you read reviews and do your research before making a purchase to ensure you choose the best brush for your skin.

Step 2: Wet Your Face and the Brush

Once you have your facial brush, it’s time to start using it. Begin by wetting your face and the brush with warm water. This will help to soften your skin and make it easier for the brush to glide over your face. It’s important to use warm water, as hot water can damage your skin and cause irritation.

Step 3: Apply Cleanser to the Brush

Next, apply your favorite facial cleanser to the brush. You only need a small amount of cleanser, as the brush will help to distribute it evenly across your face. Be sure to choose a gentle cleanser that won’t strip your skin of its natural oils.

Step 4: Start Brushing

Now it’s time to start brushing. Begin at the center of your face and work your way outwards in circular motions. Be gentle and don’t apply too much pressure, as this can damage your skin. Focus on areas where you have the most congestion, such as around your nose, forehead, and chin.

Step 5: Rinse Your Face and the Brush

Once you’ve finished brushing, rinse your face and the brush thoroughly with warm water. Be sure to remove all traces of cleanser from your face and the brush.

Step 6: Pat Your Face Dry

Finally, pat your face dry with a clean towel. Avoid rubbing your face with the towel, as this can cause irritation and damage your skin.

How to Use a Facial Brush for a Deep Cleanse

Tips for Using a Facial Brush

Now that you know the correct way to use a facial brush, here are some additional tips to help you get the most out of this powerful tool:

  1. Start Slowly: If you’re new to using a facial brush, start slowly and only use it once or twice a week. As your skin gets used to the brush, you can gradually increase the frequency.
  2. Don’t Overdo It: It’s important not to overuse your facial brush, as this can cause irritation and damage your skin. Stick to using it once or twice a week to avoid over-exfoliating.
  3. Clean Your Brush: After each use, be sure to clean your brush thoroughly to remove any bacteria and buildup. You can use a gentle soap or brush cleaner to do this.
  4. Replace Your Brush: Over time, the bristles on your facial brush will begin to wear down. Be sure to replace your brush every three to six months to ensure you’re getting the best results.

For more Skincare news and Beauty latest updates please Like and Follow our Facebook Page and Instagram account…
How to Use Facial Massaging Tools Safely and Effectively at Home

Facial massaging tools are a great way to give yourself a relaxing and rejuvenating spa-like experience in the comfort of your own home. They are designed to improve circulation, reduce puffiness and promote lymphatic drainage, leading to improved skin tone and texture. However, using facial massaging tools can be tricky, and it’s important to know how to use them properly to avoid causing any harm to your skin. In this article, we’ll explore some tips on how to use facial massaging tools at home.

  1. Understand your skin type

Before using any facial massaging tool, it’s important to understand your skin type. If you have sensitive skin, you should be careful with the amount of pressure you apply. If you have oily skin, you should avoid using heavy oils or creams during your facial massage. Similarly, if you have dry skin, you should choose a tool that’s gentle on your skin.

  1. Cleanse your skin

Before starting your facial massage, make sure your skin is clean and free of any makeup or dirt. Use a gentle cleanser to remove any impurities from your skin. This will ensure that your facial massaging tool is able to penetrate your skin and work its magic.

  1. Choose the right tool

There are a variety of facial massaging tools available on the market, including jade rollers, gua sha stones, and facial massage wands. Choose a tool that’s appropriate for your skin type and concerns. For example, if you have puffy eyes, a cooling metal roller can help reduce inflammation and promote lymphatic drainage.

  1. Apply a serum or oil

To enhance the benefits of your facial massage, apply a serum or oil to your skin before using the tool. This will provide some slip to your skin and help the tool glide smoothly across your face. Make sure to choose a serum or oil that’s suitable for your skin type.

How to Use Facial Massaging Tools Safely and Effectively at Home

  1. Use gentle pressure

When using a facial massaging tool, it’s important to use gentle pressure. Applying too much pressure can cause redness and irritation, and may even damage your skin. Use a light touch and let the tool do the work.

  1. Follow a pattern

To get the most out of your facial massage, it’s important to follow a pattern. Start at the center of your face and work your way outwards. Use long strokes and gentle pressure. You can use the tool in an upward or outward motion, depending on the area you’re targeting. For example, if you’re massaging your cheeks, use an upward motion to promote lymphatic drainage.

  1. Don’t forget your neck and jawline

When massaging your face, don’t forget to include your neck and jawline. These areas can also benefit from a facial massage and can help reduce tension and promote relaxation.

  1. Clean your tool

After each use, make sure to clean your facial massaging tool. Use a gentle cleanser and warm water to remove any dirt or oil. Let the tool air dry before storing it away.

  1. Use regularly

To see the best results, it’s important to use your facial massaging tool regularly. Incorporate it into your daily or weekly skincare routine to see the benefits over time.

For more Skincare news and Beauty latest updates please Like and Follow our Facebook Page and Instagram account…

Laser Hair Removal: Types of Devices and Which One is Right for You

0

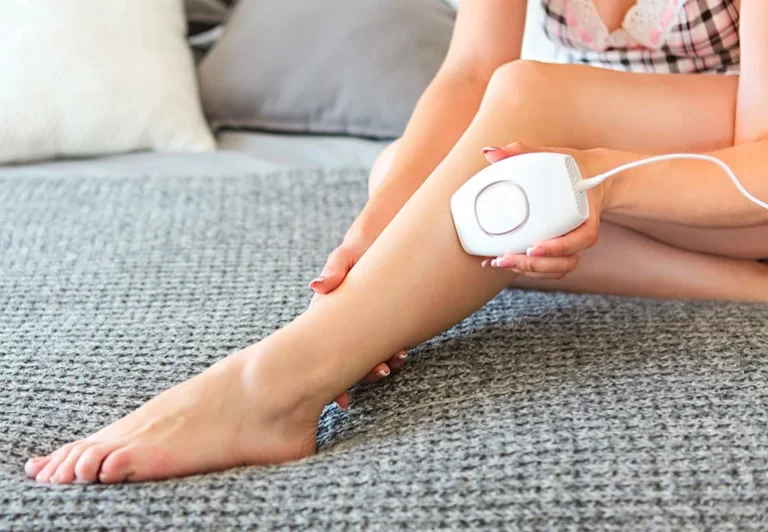
Laser hair removal has become a popular and effective way to get rid of unwanted hair. It is a safe and permanent solution that can be done at home or in a salon or clinic. The device used for laser devices emits a beam of light that targets the hair follicle and destroys it, leading to long-term hair reduction.

There are several types of laser devices available on the market, each with its own unique features and benefits. In this article, we’ll explore the different types of laser hair removal devices and how many sessions are typically needed to see results.

Types of Laser Hair Removal Devices:

  1. Diode Laser Hair Removal Devices: Diode lasers are one of the most commonly used types of laser devices. They emit a focused beam of light that penetrates the skin and targets the hair follicle. Diode lasers are effective on all skin types and can be used on large areas of the body, making them a popular choice for full-body hair removal.
  2. Nd:YAG Laser Hair Removal Devices: Nd:YAG lasers are another type of laser device that can be used on all skin types, including darker skin tones. They emit longer wavelengths of light that are less likely to be absorbed by the skin, reducing the risk of burns or other skin damage. Nd:YAG lasers are also effective on fine or light-colored hair, making them a good choice for people with these hair types.
  3. Alexandrite Laser Hair Removal Devices: Alexandrite lasers are fast and effective at removing hair on fair to olive skin tones. They emit a shorter wavelength of light that is well-absorbed by melanin, the pigment that gives color to hair and skin. Alexandrite lasers are also relatively painless, making them a good choice for people with sensitive skin.
  4. IPL (Intense Pulsed Light) Hair Removal Devices: IPL hair removal devices are not technically lasers, but they use a similar technology to remove hair. They emit a broad spectrum of light that targets the hair follicle and destroys it. IPL devices are generally less expensive than laser devices, but they may require more treatments to achieve the same level of hair reduction.

How Many Sessions are Needed to See Results?

The number of laser hair removal sessions needed to see results can vary depending on several factors, including the area of the body being treated, the type of laser device used, and the individual’s skin and hair type. In general, most people require between 6 and 8 laser hair removal sessions to achieve the desired level of hair reduction.

During each session, the laser device is used to target the hair follicles in the treatment area. The laser energy heats up the hair follicles, which damages or destroys them, preventing further hair growth. After each session, the treated hair will gradually fall out over the next few weeks.

It’s important to note that laser hair removal is not a one-time treatment. Hair growth occurs in cycles, and laser hair removal is most effective during the anagen phase of hair growth, when the hair follicle is actively producing hair. Because not all hair follicles are in the anagen phase at the same time, multiple sessions are needed to target all of the hair follicles in the treatment area.

The time between sessions can vary depending on the area of the body being treated, but most people will require treatment sessions every 4 to 6 weeks. This allows enough time for the hair to enter the anagen phase and be targeted by the laser device.

For more Skincare news and Beauty latest updates please Like and Follow our Facebook Page and Instagram account…
The Power of Nature: 5 Ingredients for Healthy Hair

0

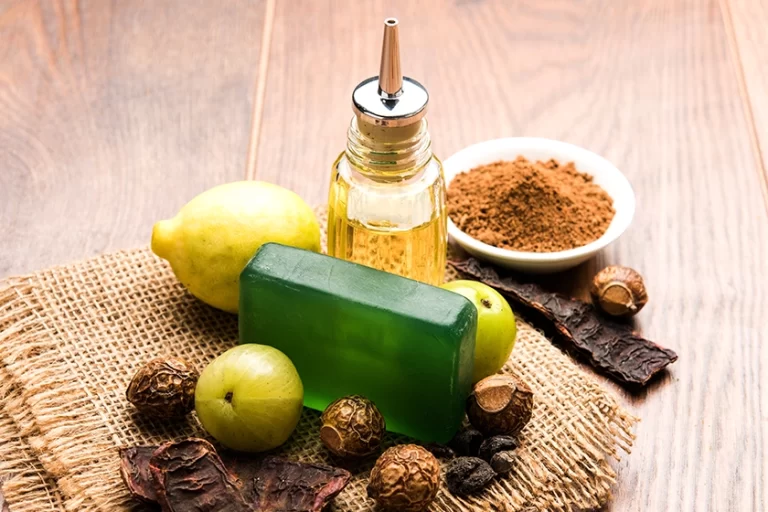
Shiny, strong, and healthy hair is an indication of good health and beauty. However, several factors, including stress, pollution, and unhealthy lifestyle habits, can weaken your hair and lead to hair fall, breakage, and other hair problems. Fortunately, nature has provided us with several ingredients that can help strengthen hair and promote healthy hair growth. Here are five top ingredients to strengthen your hair:

  1. Biotin

Biotin, also known as vitamin B7 or H, is an essential water-soluble vitamin that plays a vital role in maintaining healthy hair, skin, and nails. Biotin is required for the synthesis of keratin, a protein that makes up the structure of hair, skin, and nails. A deficiency of biotin can lead to hair loss, brittle nails, and dry skin.

You can find biotin in several foods, including egg yolks, liver, nuts, and whole grains. However, taking biotin supplements can also be an effective way to ensure that you are getting enough of this vital nutrient. Experts recommend a daily intake of 30 mcg of biotin for adults.

  1. Collagen

Collagen is a protein that makes up a significant portion of our skin, hair, and nails. As we age, the production of collagen in our body decreases, leading to thinning hair, wrinkles, and other signs of aging.

Adding collagen to your diet can help strengthen your hair and promote healthy hair growth. Collagen supplements come in various forms, including powders, capsules, and gummies. You can also find collagen in foods such as bone broth, chicken, and fish.

  1. Omega-3 Fatty Acids

Omega-3 fatty acids are essential fatty acids that play a crucial role in maintaining healthy hair, skin, and nails. These fatty acids cannot be synthesized by our body and must be obtained through our diet. Omega-3 fatty acids help keep our scalp hydrated and reduce inflammation, which can lead to hair loss and other scalp problems.

The Power of Nature: 5 Ingredients for Healthy Hair

You can find omega-3 fatty acids in foods such as fatty fish (salmon, sardines, and mackerel), flaxseed, chia seeds, and walnuts. If you are not getting enough omega-3 fatty acids through your diet, you can also take supplements.

  1. Vitamin D

Vitamin D is a fat-soluble vitamin that plays a vital role in the growth and maintenance of healthy hair follicles. Studies have shown that a deficiency of vitamin D can lead to hair loss and other hair problems.

Your body can produce vitamin D when your skin is exposed to sunlight. However, several factors, including living in areas with limited sunlight, using sunscreen, and covering your skin, can lead to vitamin D deficiency.

You can find vitamin D in foods such as fatty fish, egg yolks, and mushrooms. However, taking vitamin D supplements can also be an effective way to ensure that you are getting enough of this vital nutrient.

  1. Zinc

Zinc is an essential mineral that plays a crucial role in maintaining healthy hair and promoting healthy hair growth. Zinc helps keep the oil glands around our hair follicles functioning correctly and ensures that our hair strands are adequately nourished.

A deficiency of zinc can lead to hair loss, dry scalp, and other hair problems. You can find zinc in foods such as oysters, beef, pumpkin seeds, and lentils. However, taking zinc supplements can also be an effective way to ensure that you are getting enough of this vital nutrient.

For more Skincare news and Beauty latest updates please Like and Follow our Facebook Page and Instagram account…