Home Blog Page 35

Say Goodbye to Butt Rashes with These Easy Home Remedies

0

Butt rashes can be a common and uncomfortable problem for many people. They can be caused by a variety of factors, including sweat, tight clothing, and allergies. Fortunately, there are many home remedies that can help relieve the symptoms of butt rashes and promote healing. In this article, we will explore some of the most effective home remedies for butt rashes.

  1. Keep the affected area clean and dry

The first and most important step in treating a butt rash is to keep the affected area clean and dry. This means washing the area with mild soap and water and drying it thoroughly with a clean towel. Avoid using harsh soaps or scrubbing the area too vigorously, as this can irritate the skin further.

  1. Apply a cold compress

A cold compress can help reduce itching and inflammation associated with butt rashes. Simply wrap a clean cloth around an ice pack or a bag of frozen vegetables and apply it to the affected area for 10-15 minutes at a time. Be sure to wrap the compress in a towel or cloth to avoid direct contact with the skin, which can cause frostbite.

  1. Use a barrier cream

Applying a barrier cream, such as zinc oxide or petroleum jelly, can help protect the skin and promote healing. These creams create a protective barrier between the skin and irritants, such as sweat and friction. Apply a thin layer of the cream to the affected area after washing and drying it thoroughly.

  1. Use aloe vera

Aloe vera has natural anti-inflammatory properties and can help soothe irritated skin. Apply aloe vera gel directly to the affected area and leave it on for 10-15 minutes before washing it off with lukewarm water. Repeat this process 2-3 times a day for best results.

  1. Use tea tree oil

Tea tree oil has natural antibacterial and anti-inflammatory properties and can help reduce itching and inflammation associated with butt rashes. Mix a few drops of tea tree oil with a carrier oil, such as coconut oil or olive oil, and apply it to the affected area. Leave it on for 10-15 minutes before washing it off with lukewarm water. Repeat this process 2-3 times a day for best results.

Say Goodbye to Butt Rashes with These Easy Home Remedies

  1. Use oatmeal

Oatmeal has natural anti-inflammatory properties and can help soothe irritated skin. Mix a cup of oatmeal with enough water to make a paste and apply it to the affected area. Leave it on for 10-15 minutes before washing it off with lukewarm water. Repeat this process 2-3 times a day for best results.

  1. Use baking soda

Baking soda can help reduce itching and inflammation associated with butt rashes. Mix a tablespoon of baking soda with enough water to make a paste and apply it to the affected area. Leave it on for 10-15 minutes before washing it off with lukewarm water. Repeat this process 2-3 times a day for best results.

  1. Use apple cider vinegar

Apple cider vinegar has natural antibacterial and anti-inflammatory properties and can help reduce itching and inflammation associated with butt rashes. Mix equal parts apple cider vinegar and water and apply it to the affected area with a cotton ball. Leave it on for 10-15 minutes before washing it off with lukewarm water. Repeat this process 2-3 times a day for best results.

  1. Wear loose-fitting clothing

Tight clothing can trap sweat and irritate the skin, making butt rashes worse. Wear loose-fitting clothing made from breathable fabrics, such as cotton, to allow air to circulate around the affected area and promote healing.

  1. Stay hydrated

Drinking plenty of water can help keep the skin hydrated and promote healing. Aim for at least eight cups of water per day to keep your skin and body healthy.

In conclusion, butt rashes can be uncomfortable and even painful, but there are many home remedies that can help relieve the symptoms and promote healing. Remember to keep the affected area clean and dry, use barrier creams, and try natural remedies like aloe vera, tea tree oil, oatmeal, baking soda, and apple cider vinegar. Additionally, wearing loose-fitting clothing and staying hydrated can help prevent butt rashes from occurring in the first place. If your butt rash persists or becomes severe, consult a healthcare professional for further treatment.

For more Skincare news and Beauty latest updates please Like and Follow our Facebook Page and Instagram account…
Dealing with Nose Piercing Bumps: A Complete Guide

Nose piercings have become increasingly popular in recent years, with many people choosing to adorn their noses with a sparkling stud or hoop. However, one potential downside to this fashionable trend is the development of a nose piercing bump. This small bump can be both unsightly and uncomfortable, and many people wonder what it is and how to get rid of it. In this article, we’ll explore what nose piercing bumps are, their causes, and the various ways to treat and prevent them.

What is a Nose Piercing Bump?

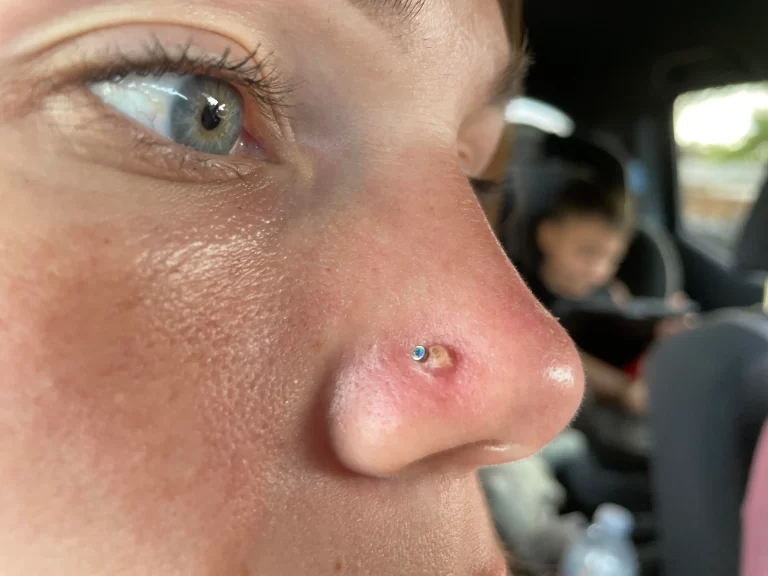
A nose piercing bump is a small, raised lump that appears near the site of a nose piercing. It is typically red, swollen, and may feel tender to the touch. Nose piercing Bumps can occur on either side of the piercing and may vary in size and appearance. In some cases, the bump may appear as a pimple-like lesion filled with pus. These bumps are often referred to as keloids or hypertrophic scars.

Causes of Nose Piercing Bumps

There are several potential causes of nose piercing bumps. The most common causes include:

  1. Infection: A nose piercing is essentially an open wound, making it susceptible to infection. Infections can cause the formation of a bump as the body tries to fight off the bacteria or virus.
  2. Trauma: Any trauma to the nose, such as accidentally knocking or pulling on the piercing, can cause the formation of a bump.
  3. Allergic Reaction: Some people may have an allergic reaction to the metal in their nose ring, which can cause inflammation and the formation of a bump.
  4. Improper aftercare: Failure to clean the piercing regularly, or using harsh or irritating products can lead to the formation of a bump.

Dealing with Nose Piercing Bumps: A Complete Guide

Treatment and Prevention

There are several ways to treat and prevent nose piercing bumps. Here are some of the most effective methods:

  1. Keep the piercing clean: The most important thing you can do to prevent and treat nose piercing bumps is to keep the piercing clean. Clean the area around the piercing twice a day with a saline solution, which can be purchased at most drugstores. Avoid using harsh or irritating products, such as hydrogen peroxide or alcohol, which can cause further irritation.
  2. Use warm compresses: Applying a warm compress to the bump can help reduce inflammation and encourage drainage. To make a warm compress, soak a clean cloth in warm water and hold it against the bump for 5-10 minutes, several times a day.
  3. Avoid touching or picking at the bump: It can be tempting to touch or pick at a nose piercing bump, but this can make it worse. Touching the bump can introduce more bacteria and increase inflammation, making it harder for the bump to heal.
  4. Use tea tree oil: Tea tree oil has natural antibacterial and anti-inflammatory properties and can be effective in treating nose piercing bumps. Dilute a few drops of tea tree oil in a carrier oil, such as coconut or jojoba oil, and apply to the bump twice a day.
  5. Change your jewelry: If you suspect an allergic reaction to the metal in your nose ring, consider changing it to a hypoallergenic material such as titanium or surgical steel.
  6. Consult with a piercer or doctor: If the bump does not improve with home treatment, it may be time to seek professional advice. A piercer or doctor may be able to recommend additional treatments, such as steroid injections or removal of the piercing.

For more Skincare news and Beauty latest updates please Like and Follow our Facebook Page and Instagram account…

The Pros and Cons of Mesotherapy for Hair Loss Treatment

0

Hair loss is a common concern that affects millions of people around the world. While it is a natural part of aging, it can also be caused by a variety of factors such as stress, genetics, hormonal imbalances, and medical conditions. There are several hair loss treatments available on the market, and one of them is mesotherapy. In this article, we will explore what mesotherapy is and whether it is an effective hair loss treatment.

What is Mesotherapy?

Mesotherapy is a non-surgical cosmetic treatment that involves injecting a combination of vitamins, minerals, amino acids, and medications directly into the mesoderm layer of the skin. This layer of the skin is just beneath the epidermis and is rich in blood vessels, lymphatic vessels, and nerves. The purpose of mesotherapy is to deliver the nutrients and medications directly to the hair follicles to stimulate hair growth and improve hair quality.

Mesotherapy was first developed in France in the 1950s by Dr. Michel Pistor. It was originally used to treat a variety of medical conditions such as arthritis, sports injuries, and circulation disorders. However, over the years, it has gained popularity as a cosmetic treatment for skin rejuvenation, fat reduction, and hair loss.

How Does Mesotherapy Work for Hair Loss?

Mesotherapy works by delivering a customized cocktail of nutrients and medications directly to the hair follicles. The ingredients in the solution vary depending on the patient’s specific needs and the cause of their hair loss. Some of the common ingredients used in mesotherapy for hair loss include vitamins B and D, biotin, amino acids, and minoxidil.

The injections are administered using a specialized mesotherapy gun that uses a series of micro-needles to penetrate the skin. The injections are typically administered every two to four weeks for several months, depending on the severity of the hair loss.

The goal of mesotherapy is to stimulate blood flow to the hair follicles, which helps to nourish the follicles and promote hair growth. It also helps to reduce inflammation in the scalp, which can contribute to hair loss.

Is Mesotherapy Effective for Hair Loss?

There is limited scientific research on the effectiveness of mesotherapy for hair loss. However, there have been some small studies and anecdotal evidence that suggest mesotherapy may be effective for certain types of hair loss.

One study published in the Journal of Cutaneous and Aesthetic Surgery in 2013 found that mesotherapy was effective for androgenetic alopecia, which is the most common type of hair loss in both men and women. The study involved 50 patients who received mesotherapy for hair loss. After six sessions of mesotherapy, the researchers found a significant improvement in hair density, hair thickness, and hair growth.

Another study published in the Journal of Cosmetic Dermatology in 2015 found that mesotherapy was effective for telogen effluvium, which is a type of hair loss that is caused by stress, hormonal imbalances, and nutritional deficiencies. The study involved 20 patients who received mesotherapy for hair loss. After four sessions of mesotherapy, the researchers found a significant improvement in hair density and hair growth.

While these studies suggest that mesotherapy may be effective for certain types of hair loss, it is important to note that the studies were small and had limitations. More research is needed to determine the long-term effectiveness of mesotherapy for hair loss.

Potential Risks and Side Effects of Mesotherapy

Like any cosmetic treatment, mesotherapy comes with potential risks and side effects. The most common side effects of mesotherapy include pain, redness, swelling, and bruising at the injection site. These side effects are usually mild and go away within a few days.

There is also a risk of infection, scarring, and allergic reactions. It is important to choose a qualified and experienced provider for mesotherapy treatments to minimize the risks of complications. Patients should also disclose any medical conditions or medications they are taking before undergoing mesotherapy to ensure that it is safe for them.

In addition, it is important to have realistic expectations about the results of mesotherapy for hair loss. While some patients may experience significant improvements in hair growth and quality, others may not see any noticeable changes. It is important to have a thorough consultation with a qualified provider to discuss the potential benefits and risks of mesotherapy for hair loss and to determine if it is the right treatment option for your individual needs.

For more Skincare news and Beauty latest updates please Like and Follow our Facebook Page and Instagram account…

Acids and Deeper Skin Tones: What You Need to Know

When it comes to skincare, acids are a popular ingredient that can provide a range of benefits. From exfoliating dead skin cells to promoting a brighter complexion, there are a variety of acids that can work wonders for different skin types and concerns. However, for people with deeper skin tones, there are some specific considerations to keep in mind when incorporating acids into their skincare routine. In this article, we’ll explore how to use acids in skincare for deeper skin tones.

Understanding Skin Tone

Before we dive into the specifics of how to use acids in skincare for deeper skin tones, it’s important to understand the basics of skin tone. The Fitzpatrick Scale is a commonly used classification system that categorizes skin tone based on its response to sunlight. The scale ranges from Type I, which refers to very fair skin that burns easily and never tans, to Type VI, which describes very dark skin that never burns and always tans. People with deeper skin tones typically fall into the Type IV to Type VI range.

Acids and Deeper Skin Tones: What You Need to Know

Deeper skin tones tend to have more melanin, which provides natural protection against sun damage and reduces the appearance of fine lines and wrinkles. However, this doesn’t mean that deeper skin tones are immune to other skincare concerns. In fact, people with deeper skin tones are more prone to developing dark spots, hyperpigmentation, and uneven skin tone due to factors such as acne, inflammation, and sun damage.

Using Acids in Skincare

Acids are a popular skincare ingredient because they can provide a range of benefits. Here are some of the most commonly used acids and their benefits:

  1. Alpha-hydroxy acids (AHAs): These acids, which include glycolic acid and lactic acid, are water-soluble and work by exfoliating the surface of the skin. AHAs can help to brighten the complexion, reduce the appearance of fine lines and wrinkles, and improve skin texture.
  2. Beta-hydroxy acids (BHAs): These acids, which include salicylic acid, are oil-soluble and work by penetrating the pores and exfoliating deep within the skin. BHAs are particularly effective for people with oily or acne-prone skin because they can help to unclog pores and reduce inflammation.
  3. Polyhydroxy acids (PHAs): These acids, which include gluconolactone and lactobionic acid, are similar to AHAs but have larger molecules, which means they are gentler on the skin. PHAs can help to exfoliate and hydrate the skin, making them a good choice for people with sensitive skin.

When using acids in skincare, it’s important to start slowly and gradually increase the frequency and concentration over time. This will help to minimize the risk of irritation and ensure that your skin is able to tolerate the acid. It’s also important to use a sunscreen with a high SPF during the day, as acids can increase the skin’s sensitivity to sunlight.

Using Acids for Deeper Skin Tones

When it comes to using acids in skincare for deeper skin tones, there are some specific considerations to keep in mind. Here are some tips to help you get the most out of your acid-based skincare products:

  1. Start with a low concentration: Deeper skin tones tend to be more sensitive to irritation and inflammation, so it’s important to start with a low concentration of acid and gradually increase it over time. For example, you might start with a glycolic acid toner that has a concentration of 5% and gradually work up to a concentration of 10%.
  2. Look for products with added ingredients: Some acids, such as AHAs, can be more irritating for deeper skin tones. Look for products that contain added ingredients such as niacinamide or vitamin C, which can help to reduce inflammation and improve the overall health of the skin. These ingredients can also help to brighten the complexion and reduce the appearance of dark spots and hyperpigmentation.
  1. Use acids in combination with other skincare products: Acids can be a powerful tool in your skincare arsenal, but they shouldn’t be the only product you use. Make sure to use acids in combination with other skincare products such as moisturizers and serums to help hydrate and nourish the skin.
  2. Be mindful of the pH level: The pH level of your skincare products can affect how effective the acids are at exfoliating the skin. Look for products with a pH level of 3 to 4 for AHAs and 4 to 5 for BHAs to ensure that they are able to effectively penetrate the skin.
  3. Consider professional treatments: If you’re looking for more dramatic results, consider professional treatments such as chemical peels or laser resurfacing. These treatments can provide a deeper exfoliation and help to improve the overall health and appearance of the skin.

For more Skincare news and Beauty latest updates please Like and Follow our Facebook Page and Instagram account…

QWO: The New Cellulite Treatment You Need to Know About

Cellulite is a common problem that affects a large number of women. It is the dimpled appearance of skin, commonly found on the thighs, buttocks, and hips. This condition is caused by the accumulation of fat cells beneath the skin, and it is notoriously difficult to get rid of. Despite numerous treatments and products that claim to reduce cellulite, many women continue to struggle with the condition. However, there is a new cellulite treatment that has been gaining popularity recently.

This new cellulite treatment is called QWO, and it is the first injectable treatment that has been FDA-approved for the treatment of moderate to severe cellulite in the buttocks of adult women. QWO is an injectable drug that contains a combination of three enzymes called collagenase clostridium histolyticum-aaes. These enzymes work to break down the fibrous bands that are responsible for causing cellulite. By breaking down these bands, the fat cells are able to redistribute and the skin appears smoother.

One of the key benefits of QWO is that it is a non-surgical and non-invasive treatment option. Unlike other treatments for cellulite, QWO does not require any incisions or anesthesia. This makes it a more comfortable and convenient option for those who may not be interested in undergoing a more invasive procedure.

QWO: The New Cellulite Treatment You Need to Know About

The treatment process for QWO involves three separate injections spaced out over a period of 21 days. Each injection session takes only a few minutes to complete, and patients are able to resume their normal activities immediately following the treatment. Most patients will require a total of three treatment sessions to achieve the desired results.

One of the other benefits of QWO is that it has been shown to produce long-lasting results. In clinical trials, patients who received QWO treatments showed a significant improvement in the appearance of their cellulite that lasted for up to one year. This is significantly longer than other cellulite treatments that may only provide temporary results.

Another benefit of QWO is that it is a relatively safe treatment option. While all treatments carry some level of risk, QWO has been shown to be well-tolerated by patients. The most common side effects reported include mild to moderate pain at the injection site, bruising, and swelling. These side effects typically resolve on their own within a few days following the treatment.

It is important to note that QWO is not a weight loss treatment. It is designed to specifically target cellulite in the buttocks of adult women who are at or near their ideal body weight. Patients who are interested in QWO should have a consultation with a qualified healthcare provider to determine if they are a good candidate for the treatment.

For more Skincare news and Beauty latest updates please Like and Follow our Facebook Page and Instagram account…
The Benefits of Chemical Exfoliation: A Comprehensive Guide

Chemical exfoliation has become a popular skincare technique in recent years, and for good reason. This process involves using chemical compounds to remove dead skin cells, revealing fresher, brighter, and smoother skin. Unlike physical exfoliation, which involves scrubbing the skin with abrasive particles, chemical exfoliation is gentler and more effective. In this comprehensive guide, we will explore the benefits of chemical exfoliation, the different types of chemical exfoliants, and how to use them for optimal results.

The Benefits of Chemical Exfoliation

One of the primary benefits of chemical exfoliation is that it can help to improve the texture and appearance of your skin. By removing dead skin cells, chemical exfoliants can make your skin look smoother and more radiant. They can also help to unclog pores, which can reduce the appearance of acne and blackheads.

Another benefit of chemical exfoliation is that it can help to reduce the appearance of fine lines and wrinkles. As we age, our skin’s natural exfoliation process slows down, which can lead to a buildup of dead skin cells. Chemical exfoliants can help to speed up this process, revealing fresher, more youthful-looking skin.

Chemical exfoliation can also help to improve the absorption of other skincare products. When dead skin cells build up on the surface of the skin, they can prevent other products from penetrating deeply. By removing these dead skin cells, chemical exfoliants can help other products to absorb more effectively.

The Benefits of Chemical Exfoliation: A Comprehensive Guide

Types of Chemical Exfoliants

There are several different types of chemical exfoliants, each with their unique properties and benefits. The three main types of chemical exfoliants are alpha-hydroxy acids (AHAs), beta-hydroxy acids (BHAs), and enzymes.

Alpha-hydroxy acids (AHAs) are water-soluble acids that are derived from fruits and milk. These acids are particularly effective at exfoliating the surface of the skin, making them ideal for those with dry, dull skin. Some common types of AHAs include glycolic acid, lactic acid, and mandelic acid.

Beta-hydroxy acids (BHAs) are oil-soluble acids that are particularly effective at penetrating deep into the pores. This makes them ideal for those with oily or acne-prone skin. Salicylic acid is the most common type of BHA used in skincare products.

Enzymes are another type of chemical exfoliant that work by breaking down the bonds between dead skin cells. These exfoliants are particularly gentle and are ideal for those with sensitive skin. Some common types of enzymes used in skincare products include papain (derived from papaya) and bromelain (derived from pineapple).

How to Use Chemical Exfoliants

When using chemical exfoliants, it is important to start slowly and build up gradually. Begin by using the product once or twice a week, and gradually increase the frequency as your skin becomes accustomed to it.

Before using a chemical exfoliant, it is important to cleanse your skin thoroughly. This will help to ensure that the exfoliant can penetrate deeply and work effectively. After cleansing, apply the exfoliant to your skin and leave it on for the recommended amount of time. This can vary depending on the product, so be sure to read the instructions carefully.

Once the recommended time has elapsed, rinse your skin thoroughly with warm water. It is important to avoid using hot water, as this can strip your skin of its natural oils. After rinsing, gently pat your skin dry with a clean towel.

After using a chemical exfoliant, it is important to apply a moisturizer to your skin. This will help to soothe and hydrate your skin, preventing it from becoming dry or irritated.

For more Skincare news and Beauty latest updates please Like and Follow our Facebook Page and Instagram account…

Microneedling: The Good, the Bad, and the Ugly

0

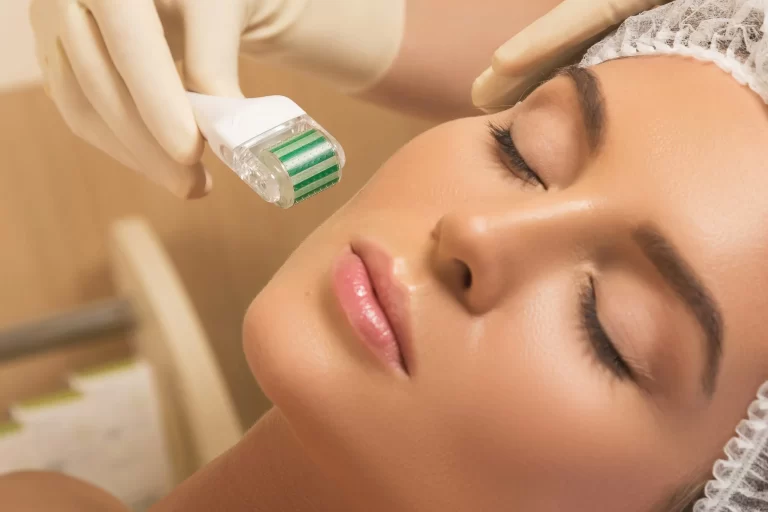
Microneedling, also known as collagen induction therapy, is a minimally invasive cosmetic procedure that has gained popularity in recent years. The procedure involves using a device with tiny needles to create micro-injuries on the skin, which stimulates the body’s natural healing process and promotes collagen production. Microneedling has become a popular option for people who are looking to improve the appearance of their skin without resorting to more invasive treatments like surgery. However, like all cosmetic procedures, microneedling has both advantages and disadvantages. In this article, we will explore the pros and cons of microneedling.

Advantages of Microneedling

  1. Improves Skin Texture and Tone: Microneedling is an effective treatment for improving the texture and tone of the skin. The micro-injuries created by the needles stimulate the production of collagen and elastin, which helps to reduce the appearance of fine lines, wrinkles, and scars. The treatment also helps to improve the overall texture of the skin, making it smoother and more even.
  2. Safe for All Skin Types: Unlike other cosmetic procedures that can be risky for people with certain skin types, microneedling is safe for all skin types. It is a non-invasive procedure that does not involve the use of harsh chemicals or heat, making it a great option for people with sensitive skin.
  3. Minimal Downtime: One of the biggest advantages of microneedling is the minimal downtime it requires. Unlike more invasive treatments like surgery, which can require weeks of recovery time, microneedling only requires a few days of downtime. Most people experience mild redness and swelling for a day or two after the procedure, but this typically resolves quickly.
  4. Cost-Effective: Compared to other cosmetic procedures, microneedling is relatively affordable. While the cost can vary depending on the location and the practitioner, it is generally less expensive than more invasive procedures like laser treatments or surgery.
  5. Can be Combined with Other Treatments: It can be combined with other cosmetic treatments to enhance its benefits. For example, it is often used in conjunction with platelet-rich plasma (PRP) therapy, which involves injecting a patient’s own blood platelets into the skin to promote healing and regeneration.

Microneedling: The Good, the Bad, and the Ugly

Disadvantages of Microneedling

  1. Can be Painful: Microneedling involves using a device with tiny needles to create micro-injuries on the skin, which can be painful for some people. While most practitioners will use a topical numbing cream to minimize discomfort, some people may still experience pain during the procedure.
  2. Can Cause Infection: There is a risk of infection with any cosmetic procedure that breaks the skin, and microneedling is no exception. If the needles used during the procedure are not properly sterilized or if the patient does not properly care for the treated area after the procedure, there is a risk of infection.
  3. Can Cause Skin Irritation: Microneedling can cause skin irritation, especially in people with sensitive skin. The micro-injuries created by the needles can cause redness, swelling, and itching, which can be uncomfortable for some people.
  4. Not Suitable for Active Acne or Skin Inflammation: Microneedling is not suitable for people with active acne or skin inflammation. The procedure can aggravate these conditions and make them worse.
  5. Results May Vary: The results of microneedling can vary from person to person. While many people experience significant improvement in the appearance of their skin after the procedure, some people may not see much of a difference. It is important to have realistic expectations about what microneedling can do for your skin.

For more Skincare news and Beauty latest updates please Like and Follow our Facebook Page and Instagram account…
Bright Eyes: The Ultimate Guide to Getting Rid of Dark Circles and Bags

0

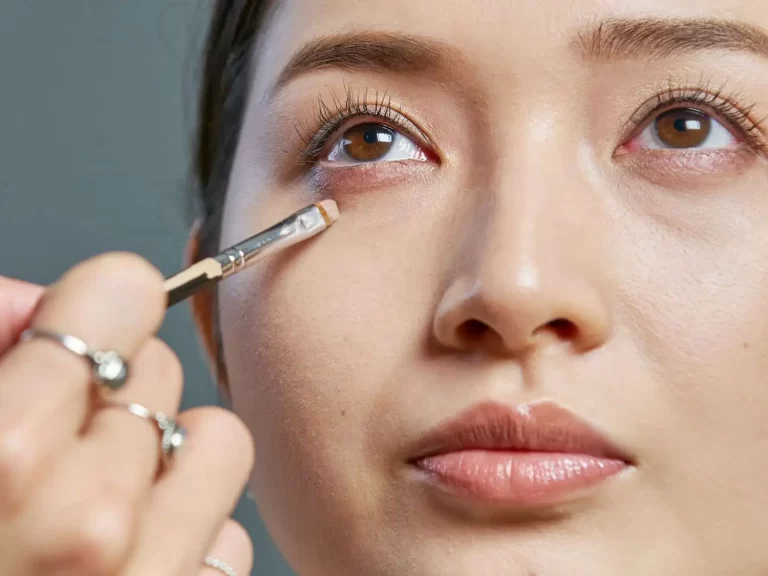
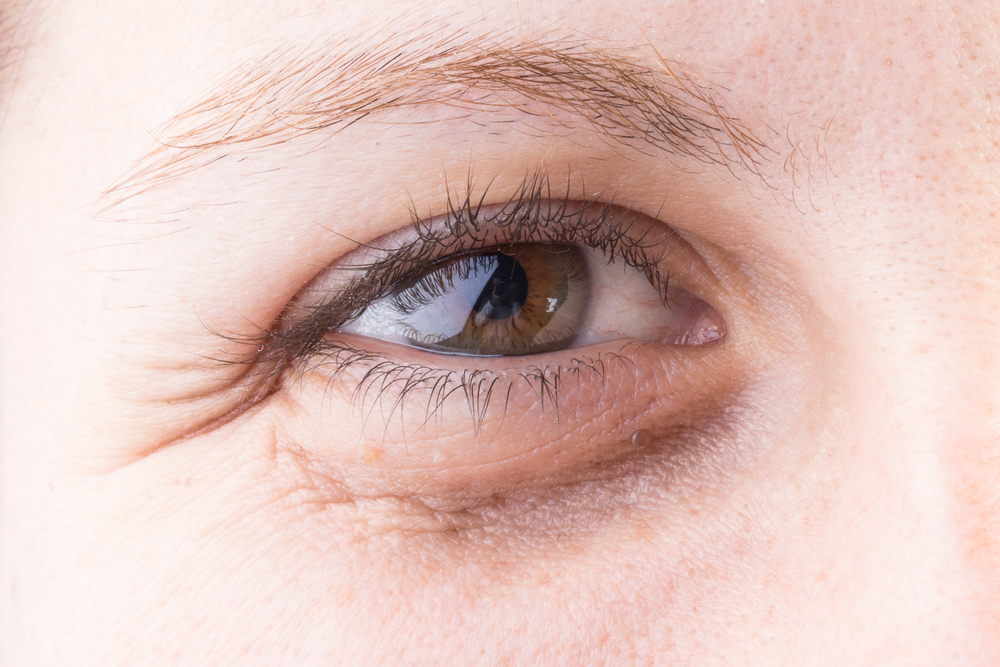
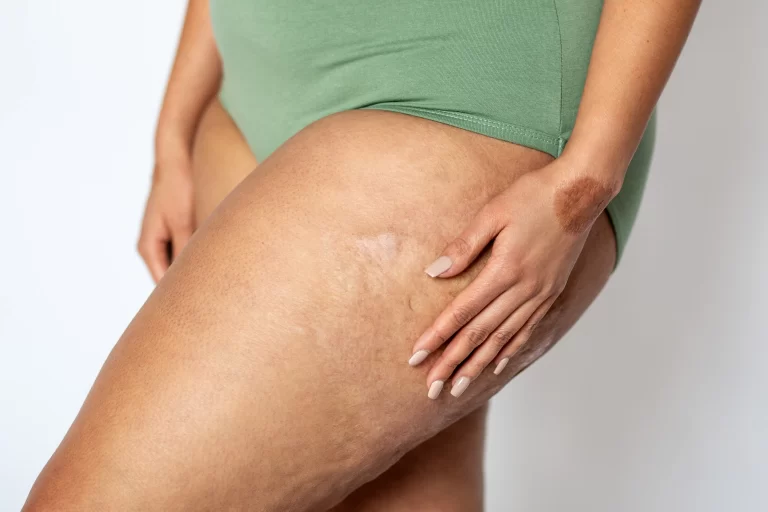
Dark circles and bags under the eyes can make you look tired, stressed, and older than your actual age. There are several causes of these under-eye issues, including genetics, lack of sleep, allergies, dehydration, and aging. Fortunately, there are several ways to get rid of dark circles and bags under your eyes. In this article, we will discuss some effective methods to help you achieve a refreshed and youthful appearance.

  1. Get Enough Sleep

Lack of sleep is one of the leading causes of dark circles and bags under the eyes. It is recommended that adults get at least 7-8 hours of sleep every night to help the body recover from the day’s stress and recharge for the following day. A lack of sleep can cause the skin to become pale, which makes the blood vessels more visible, leading to dark circles. Therefore, getting enough sleep is essential to reduce the appearance of dark circles and bags under your eyes.

  1. Use Cucumber Slices

Cucumbers contain antioxidants and flavonoids that can help soothe the skin and reduce inflammation. They also have a high water content, which helps to hydrate and nourish the skin. To use cucumbers for under-eye issues, slice them thinly and place them over your closed eyes for 10-15 minutes. This will help reduce puffiness and brighten the skin under the eyes.

  1. Apply Cold Compresses

Cold compresses can help reduce swelling and inflammation, making them a useful remedy for dark circles and bags under the eyes. You can use a cold compress made from a washcloth dipped in cold water or a bag of frozen peas. Apply the compress to your eyes for 10-15 minutes, several times a day. Be sure to wrap the compress in a soft cloth to avoid direct contact with your skin.

Bright Eyes: The Ultimate Guide to Getting Rid of Dark Circles and Bags

  1. Drink Plenty of Water

Dehydration can make the skin appear dull and tired, which can make dark circles and bags more noticeable. Drinking plenty of water can help keep your skin hydrated, plump, and healthy. It is recommended that you drink at least eight glasses of water per day. If you find it challenging to drink enough water, try adding flavorings like lemon, cucumber, or mint to your water to make it more enjoyable.

  1. Use Tea Bags

Tea bags contain caffeine and antioxidants that can help reduce puffiness and tighten the skin under the eyes. To use tea bags for under-eye issues, steep two tea bags in hot water for 3-5 minutes, then let them cool in the refrigerator. Once the tea bags are cool, place them over your closed eyes for 10-15 minutes. This will help reduce puffiness and brighten the skin under the eyes.

  1. Use Eye Creams

Eye creams are specifically designed to target under-eye issues such as dark circles and bags. They contain ingredients like caffeine, retinol, and vitamin C, which can help reduce puffiness, brighten the skin, and improve the appearance of dark circles. When using an eye cream, be sure to apply it gently with your ring finger, as this finger is the weakest and least likely to cause damage to the delicate skin under the eyes.

  1. Get Allergy Treatment

Allergies can cause under-eye issues, including dark circles and bags. If you have allergies, getting treatment can help reduce these symptoms. Over-the-counter antihistamines can help reduce allergy symptoms like sneezing and itching, which can help reduce the appearance of dark circles and bags. If your allergies are severe, you may need prescription medication from your doctor.

  1. Avoid Smoking and Alcohol

Smoking and alcohol can have a negative impact on your skin’s health, leading to premature aging, wrinkles, and under-eye issues like dark circles and bags. Smoking reduces blood flow and oxygen to the skin, making it look dull and tired. Alcohol dehydrates the body, leading to dry skin and the appearance of fine lines and wrinkles. Therefore, avoiding smoking and limiting alcohol consumption can help improve the overall health and appearance of your skin, reducing the appearance of dark circles and bags under the eyes.

  1. Use Sunscreen

Sun damage can contribute to the appearance of dark circles and bags under the eyes. UV rays can damage the delicate skin under the eyes, leading to discoloration and wrinkles. To prevent sun damage, it is essential to wear sunscreen with an SPF of at least 30 every day. Apply sunscreen to your face and under-eye area before going outside, even on cloudy days.

  1. Practice Stress Management

Stress can have a negative impact on your overall health and appearance, including the appearance of dark circles and bags under the eyes. To reduce stress, try practicing relaxation techniques like meditation, yoga, or deep breathing exercises. Taking breaks throughout the day to stretch, walk, or engage in a relaxing activity can also help reduce stress and improve your overall well-being.

For more Skincare news and Beauty latest updates please Like and Follow our Facebook Page and Instagram account…

The Pros and Cons of Polygel Nails Extension: What You Need to Consider

0

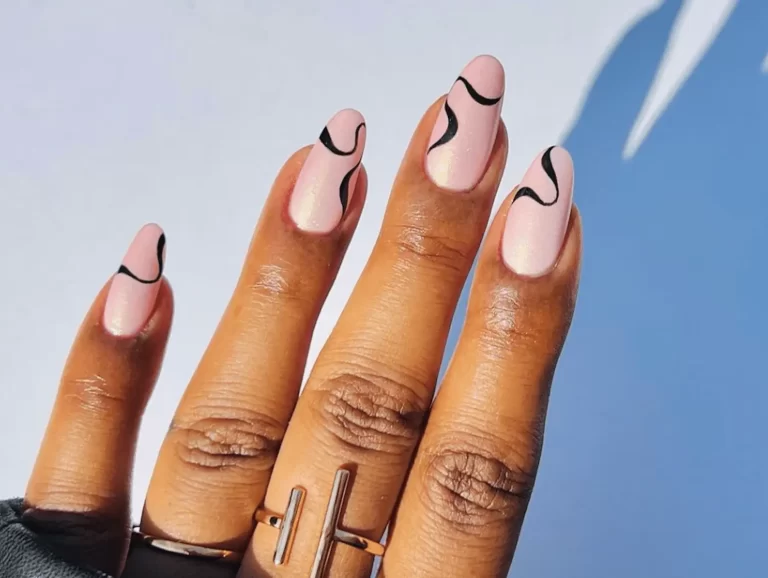
Polygel nails extension have been gaining popularity among the beauty industry in recent years. It’s a new type of nail extension that has been taking the world by storm. Many people prefer polygel nails as they’re a combination of acrylic and gel, which makes them more durable and long-lasting. This article will cover everything you need to know about polygel nails extension.

What is Polygel?

Polygel is a type of nail enhancement that’s made of a combination of acrylic and gel. It’s applied to the nails using a brush, which makes it easier to control the application. Polygel has a thick consistency, making it easy to mold and shape on the nails. It’s also lightweight, so you won’t feel any heavy sensation on your nails.

Polygel nails are perfect for those who want to have longer and stronger nails without damaging their natural nails. It’s also a great alternative to acrylic nails as it’s less harsh on the nails and doesn’t require any strong chemicals.

How are Polygel Nails Applied?

Polygel nails are applied in a few simple steps. First, the nail technician will clean your nails and apply a base coat. Then, they’ll use a brush to apply the polygel to your nails. Once the polygel is applied, the nail technician will use a UV light to cure it.

After curing the polygel, the nail technician will shape and file your nails to the desired length and shape. They’ll then apply a top coat to add shine to your nails. The entire process can take between 1 to 2 hours, depending on the complexity of the design.

Advantages of Polygel Nails

There are several advantages of getting polygel nails extension:

  1. Durable: Polygel nails are more durable than other types of nail extensions. They’re less prone to chipping, cracking, or breaking, making them long-lasting.
  2. Lightweight: Polygel is lightweight, so you won’t feel any heavy sensation on your nails. It’s comfortable to wear and doesn’t put any strain on your natural nails.
  3. Natural Look: Polygel nails look natural and don’t have a bulky appearance like acrylic nails. They’re perfect for those who want to have longer nails without it being too noticeable.
  4. Customizable: Polygel nails can be customized to your desired shape and length. You can also add different designs or colors to make them unique and personalized.
  5. Easy to Remove: Polygel nails are easy to remove, and the process doesn’t damage your natural nails. The nail technician will use acetone to remove the polygel, and your nails will remain healthy and intact.

Disadvantages of Polygel Nails

There are a few disadvantages of getting polygel nails extension:

  1. Cost: Polygel nails can be expensive compared to other types of nail extensions. The cost varies depending on the complexity of the design and the location of the salon.
  2. Requires Professional Application: Polygel nails require professional application, and you can’t do it yourself at home. It’s essential to find a qualified nail technician who has experience in applying polygel nails.
  3. Time-consuming: The process of getting polygel nails can be time-consuming. It can take between 1 to 2 hours to apply the polygel, shape and file your nails, and apply the top coat.
  4. Requires Maintenance: Polygel nails require maintenance every two to three weeks. You’ll need to visit the salon to get them filled, which can be time-consuming and expensive.

The Pros and Cons of Polygel Nails Extension: What You Need to Consider

How to Take Care of Polygel Nails

Taking care of your polygel nails is essential to ensure they last longer. Here are some tips to help you take care of your polygel nails:

  1. Avoid using your nails as tools: Don’t use your nails to open packages or scratch surfaces. Polygel nails are strong, but they can still break or chip if they’re used as tools.
  1. Use cuticle oil: Apply cuticle oil to your nails and cuticles daily to keep them hydrated. This will prevent your nails from becoming brittle and breaking.
  2. Wear gloves: When doing household chores or other activities that involve water or chemicals, wear gloves to protect your nails. This will prevent the polygel from lifting or peeling off.
  3. Don’t pick or peel the polygel: If the polygel starts to lift or peel off, don’t pick at it. This can cause damage to your natural nails. Instead, visit the salon to get it fixed.
  4. Avoid harsh chemicals: Avoid using harsh chemicals, such as acetone or bleach, on your nails. These can damage the polygel and cause it to lift or peel off.

For more Skincare news and Beauty latest updates please Like and Follow our Facebook Page and Instagram account…
ECG Interpretation Made Easy: The App That Will Help You Ace It

Electrocardiogram or ECG is a medical test that measures the electrical activity of the heart. It is an essential tool used in diagnosing heart diseases and monitoring heart function. However, an ECG interpretation can be quite challenging and requires extensive knowledge and training.

Fortunately, with the advancement of technology, an ECG interpretation guide app has been developed to help healthcare professionals and students become proficient in reading ECGs. This app is designed to provide a comprehensive ECG guide that includes the basics of ECG, normal ECG patterns, and abnormal ECG findings.

The ECG interpretation guide app is a user-friendly application that can be installed on a smartphone or tablet. The app is designed to be easy to use, with a simple interface that allows users to navigate through the different ECG interpretations easily. It is also equipped with various features that make ECG interpretation easier and more accurate.

ECG Interpretation Made Easy: The App That Will Help You Ace It

One of the features of the app is the ability to view ECG images in high resolution. This feature is especially useful for students who are just starting to learn ECG interpretation. By being able to view high-quality ECG images, students can easily identify the different components of the ECG and understand their significance.

The app also provides a detailed explanation of the different ECG components, such as the P wave, QRS complex, and T wave. Each component is explained in simple terms, making it easy for users to understand their function and significance in ECG interpretation.

In addition to the basics of ECG interpretation, the app also provides a guide to the different ECG patterns. This includes normal ECG patterns as well as abnormal ECG findings. The app includes a wide range of abnormal ECG patterns, including arrhythmias, conduction abnormalities, and ischemic changes.

The interpreting an ECG guide app also includes a feature that allows users to test their knowledge of ECG interpretation. The app includes quizzes and flashcards that cover the different ECG components and patterns. By using this feature, users can test their understanding of ECG interpretation and identify areas that need improvement.

One of the benefits of using interpreting an ECG guide app is that it allows healthcare professionals to interpret ECGs more accurately and efficiently. With the app, healthcare professionals can quickly identify abnormal ECG findings and make appropriate diagnoses and treatment decisions. This can ultimately lead to better patient outcomes and improved quality of care.

Another benefit of the app is that it can be used by healthcare professionals and students alike. Whether you are a medical student or an experienced healthcare professional, the app provides a comprehensive interpreting an ECG guide that can help you become proficient in reading ECGs.

Overall, interpreting an ECG guide app is a valuable tool for anyone who needs to interpret ECGs. The app is easy to use, comprehensive, and equipped with various features that make ECG interpretation easier and more accurate. By using this app, healthcare professionals and students can become proficient in ECG interpretation and provide better patient care.

For more Skincare news and Beauty latest updates please Like and Follow our Facebook Page and Instagram account…