Home Blog Page 372

HOW TO PICK THE RIGHT MOISTURISER FOR OILY SKIN

THE RIGHT MOISTURISER : Finding the perfect moisturiser for your oily skin can be a real struggle. Picking just about any product from the skincare aisle will not only leave your skin feeling greasy and icky but also clog your pores, leading to acne flare-ups and inflammation. Hence, you need to be extremely picky when it comes to choosing a moisturiser for your oily skin.

Pick an oil-free formula

The best tip to keep in mind when moisturising oily skin is that you already have enough natural oils present in your skin, and don’t want to add to it. Therefore, choose an oil-free, water-based formula to hydrate your skin without clogging it. A water-based formula such as the Pond’s Super Light Gel Oil-free Moisturiser will hydrate your skin and prevent it from producing more oil, thus helping regulate sebum production over time.

Choose the right ingredients

The ingredients in your moisturiser play an important role in controlling excess oil production. Look for ingredients such as niacinamide, glycerine, salicylic acid and hyaluronic acid, as all of them work to control sebum production, reduce inflammation and effectively hydrate oily skin.

Look for ‘non-comedogenic’ on the label

Clogged pores are one of the major causes of blackheads and acne. Using thick, creamy moisturises will clog your pores and lead to acne, or worsen your existing acne woes. Hence, look for products labelled ‘non-comedogenic’ as these are specifically formulated to reduce blockage of pores and are generally oil-free.

Read More

Also Read: SULPHUR FOR SKIN: HERE’S HOW THIS INGREDIENT CAN BE USED TO DEAL WITH ACNE WOES

SULPHUR FOR SKIN: HERE’S HOW THIS INGREDIENT CAN BE USED TO DEAL WITH ACNE WOES

SULPHUR FOR SKIN: When it comes to dealing with acne, some of the most common ingredients prescribed and used are salicylic acid and benzoyl peroxide. But you’d be surprised to know that sulphur (yes, that foul-smelling chemical from science class) can also be used to address your acne woes. Surprised?

Whiteheads and blackheads

While some people may not consider whiteheads and blackheads as acne, they are indeed the mildest form of acne. It occurs when oil and dead skin cells get trapped in the hair follicle. If the top of this pore is open, it is a blackhead and if the top is closed, it’s a whitehead.

Papules and pustules

Papules and pustules are moderate forms of acne that are usually filled with pus or have a yellow head. Both occur when the pore wall breaks down and gets exposed to more dirt and bacteria. With time these pores get inflamed and become painful.

Sulphur may not work for moderate acne as it is not as strong as other acne-treating ingredients like benzoyl peroxide. However, those with sensitive skin may want to consider this as an option.

Acne scars

Those with a history of acne and breakouts may have some or the other form of scars on the face that are difficult to get rid of. Some stubborn scars take months to fade making your skin look dull and lifeless.Enter: sulfur. This ingredient has the ability to get rid of dead skin cells and boost new skin cells’ growth. Using a sulfur-based topical treatment can give you clear and flawless skin.

Read More

Also Read: Sour Cream Facial For Dry Skin

Get the goodness of neem leaves in this easy DIY face mask you can make at the comfort of your home

0
Skincare: Get the goodness of neem leaves in this easy DIY face mask you can make at the comfort of your home
A natural ingredient that our ancestors swore by, neem leaves have great medicinal properties. Find out how you can include it in your masking routine.

Neem has been one of the most reputed natural ingredients to solve various skin issues. For centuries now, neem has been known for its medicinal properties and hence is used in quite a lot of skincare products. One of the best ways to use neem is by crushing the leaves into a paste and applying it directly on the affected areas. But, we’ve come up with something that works best on the skin and helps pamper it in all its glory.

All you need:

10-12 neem leaves

2 tablespoons of yogurt

Water

½ teaspoon of turmeric

How to: 

  1. Wash your neem leaves to get rid of dirt and bacteria present on them.
  2. In a bowl, take a few tablespoons of water and soak the neem leaves in it.
  3. After 15 minutes of soaking it, grind the leaves into a paste.
  4. Mix the paste with yogurt and turmeric.
  5. Apply it in the face and leave it on for 15 minutes.
  6. Rinse off with warm water.
  7. Moisturise your face.

Benefits: 

– Neem has various medicinal and anti-bacterial properties that help in getting rid of acne. It also works well to diminish the signs of ageing while also clearing scars and rashes for a brighter, clear complexion.

– Yogurt is a great natural moisturiser and helps in getting rid of any dry patches present on the skin. It also tightens the skin and shrinks pores for clear skin.

– Just like neem, turmeric is used as an age-old remedy to get clear skin. It works best on acne while leaving a healthy tint on the face!

……Read More….

Read Also: Homemade DIY Masks To Get Rid Of Dark Circles

Sour Cream Facial For Dry Skin

0

Sour cream for your skin?! You bet! Like most dairy products, sour cream contains lactic acid which is a key ingredient in helping to retain skin’s moisture and is also a natural exfoliator. Lactic acid also helps to boost the production of collagen, which is the main structural protein which forms the connective tissue that supports the skin.

As such, lactic acid can be found in a number of skin care products and beauty products alike such as cream, lotions, shampoos and conditioners, and many more! So how can a sour cream facial help YOUR skin? Because it contains lactic acid, sour cream can repair damaged skin, impart and retain moisture, and exfoliate all at the same time!

Sour Cream Facial Mask for Dry Skin:

  • 2 tbsp cream
  • half a banana, mashed
  • 1 tbsp honey

Mix the ingredients well together and pulsate a few times in a food processor or blender until you get a thick, mask-like consistency. Apply to cleansed skin and leave on for about 20 minutes. Wash off with warm water and pat dry. Can be used once or twice a week for best results.

Bananas are packed full of magnesium and help the reduce inflammation and kill bacteria.
Honey brightens, hydrates, and cleanses the skin.

Sour Cream Facial Mask To Lighten & Exfoliate Skin:

  • 3 tbsp cream
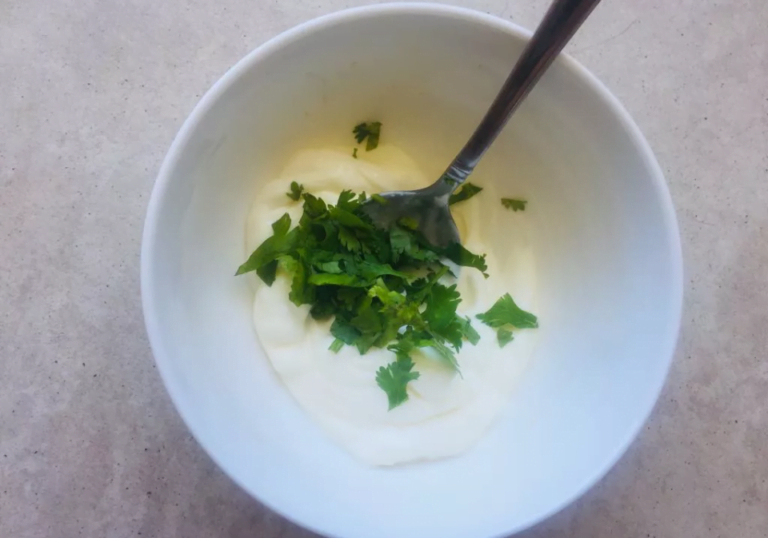
  • 2 tbsp fresh chopped parsley
  • half a mashed cucumber

To a blender or food processor add all of the ingredients and pulsate until a thick mask-like consistency forms. Apply to cleansed skin and leave on for 15 minutes. Rinse off with cold water and pat dry. Use once or twice a week. This mask can be kept in the fridge for about 2 days!

Parsley is a natural exfoliant and lightener.
Cucumber is cooling and healing. Read More…….

Also Read: How to Do Hair Spa At Home – Pamper Yourself with Natural Spa Treatment

Homemade DIY Masks To Get Rid Of Dark Circles

0

Homemade DIY Masks To Get Rid Of Dark Circles

The skin around the eyes is the thinnest; almost 40 per cent thinner and delicate compared to the skin on other parts of the body. Hence, it easily gets dehydrated, eventually leading to dark circles, puffiness, fine lines, wrinkles as well as other signs of ageing. Therefore, the under-eye area needs to be well hydrated.

Dark circles are a common issue; often, it is inherited by many. There are several reasons for under eye dark circles, right from lack of sleep or at times oversleeping, too much caffeine, lack of water, stress etc. Under-eye skincare requires specific serum/creams and some DIY remedies at home.

DIY Cold Compress

A cold compress helps to contract the blood vessels. Many times the blood vessels close to your eyes widen, and as the skin around the eyes is thin, a shadow appears as dark circles.

Use cold compress washcloth or frozen spoons, frozen peas bag, chilled water, cold tea bags, cold cucumber, ice pack, or anything which is chilled, as a cold compress. Place it onto the eye area, relax for 10-15 minutes and repeat for 2-3 times and once or twice a week for better results.

DIY Hydrating Veggie Juice

All you need is two staples from your pantry cabinet—tomato and potato. Both tomato and potato have natural bleaching agents, which helps to lighten any dark spot and dark circle.

  1. Peel potato skin. Blend potato and tomato into a smooth puree. Add a little water if required.
  2. Strain smooth puree through a muslin cloth.
  3. Pour the juice into an ice tray, freeze and store it for a week or two.
  4. Place a cube directly on to the eye area or wrap it a muslin cloth.
  5. Repeat every 3-4 times a week for a better result.

DIY Baking Soda Mask

Baking soda and sodium bicarbonate are alkaline. Either use cold water or cold milk to form a paste. Milk, of course, has its benefit; it contains lauric acid, which helps to combat puffiness and soothe the skin.

  1. Take one teaspoon of baking soda, pour cold milk or cold water and mix it well till you form a smooth paste.
  2. Apply it underneath your eye area, let it rest for about 15-20 minutes. Gently remove it with a wet washcloth or wash your face with cold water.
  3. Follow with an under eye cream or serum to maintain moisture.

….Read More….

Also Read:  Remove Blackheads In Only 10 Minutes

Tanned Skin?? Try These Quick And Easy Tan Removal Face Packs Now

Tanned or dark skin due to sun exposure is one of the horrible nightmares for some people. During summers we confront too much sun and heat which damages the outer layer of our skin, making it dark and uneven.

Why Skin Gets Tanned?

In this busy world, we cannot minimize our outings and exposure to sun and pollution. This continuous exposure makes our skin to produce melanin, a compound which protects the skin from the harsh sun. This melanin sits below the epidermis, making it look dark.

Natural Coffee Face Packs To Remove Tan Completely At Home:

To prepare coffee tan removal face pack, you either use grinded coffee beans or instant coffee powder.

In my opinion, freshly ground coffee beans work better than instant coffee powder, but you should use whatever you have.

1. Coffee Powder Tan Removal Face Pack

Yes, you read it right. Coffee which we used as a beverage is highly beneficial in the removal of the suntan. Coffee contains caffeine that is highly anti-inflammatory in nature.

Ingredients Required:

Coffee Powder

Honey

Lemon Juice

Procedure:

Take a full tablespoon of Coffee powder in a bowl.

Now add 1 tablespoon of honey and a few drops of lemon to it.

Mix this mixture well to form a paste.

Apply this face pack to your face and neck and leave it there for around 15-20 minutes.

Read More

Also Read: Remove Blackheads In Only 10 Minutes

How to Do Hair Spa At Home – Pamper Yourself with Natural Spa Treatment

No doubt, the idea of a day at the spa where others pamper your hair feels great and tempting. But, it also comes with the hassle of taking an appointment, travelling all the way to the salon, and the exuberant cost. But that doesn’t mean you give up on your hair-care requirements. What you could do instead is replicate that within your home and try out a home hair spa treatment.

The steps to do hair spa at home are quite simple and entirely doable. Here are a few basic guidelines:

  1. Begin by applying a good quality natural oil like coconut or olive oil and gently massage your scalp.
  2. Then, wrap your hair in a warm towel to steam it.
  3. Use a mild shampoo to wash the oil off your hair.
  4. Then, use a conditioner to soften your hair. Ensure that you use lukewarm or cold water to wash your hair, as hot water damages the roots.
  5. Lastly, use any natural hair mask and rinse it off after 20 minutes. Your hair spa is done!

Is Hair Spa Treatment Safe for Your Hair?

Yes. Hair spa treatment nourishes your hair from the roots and makes them stronger and glossier. You will also have reduced hair fall after a good, natural spa. Having said this, hair spa treatments are of various kinds, each using different ingredients. The treatments that use chemicals may affect your scalp adversely. However, natural treatments are devoid of any side-effects and can be easily incorporated for healthy hair.

What are The Benefits of Hair Spa?

The benefits of a hair spa are plenty and can keep your hair looking silky and glossy at all times.

1. Deep Conditioning

The ingredients used in hair spa treatments can condition the roots of your hair, strengthen the hair follicles, and keep your scalp moisturized, thus preventing dryness. It also clears out any dirt and residues off your scalp, making it easier for the roots to absorb the goodness of hair oils.

2. Prevents Dandruff

Hair spa treatments that use lemon or henna can get rid of dandruff from your hair, reducing hair fall and giving you thick and shiny hair texture. Read More…..

Also Read: 9 Ideas for Removing Nail-Paint Without Using Remover

Remove Blackheads In Only 10 Minutes

Its time to get rid of the pesky, unwanted dark spots once and for all. This scrub is the absolute best for reversing blackheads and other blemishes that just don’t seem to go away no matter what we try. Blackheads make our skin look dirty and clog our pores to bring us pimples and irritation. They are made of dust and dirt that fly around in the air like little particles and get stuck in our pores. Excess oil and sebum also clog our pores and gives us itchy, unforgiving black and white heads that can seem almost impossible to get rid of. Thankfully, there ARE ways to remove blackheads, and this particular remedy can do so in under 10 minutes!

How to Remove Blackheads Completely in Only 10 Minutes:

You’ll Need:

  • 1 tsp Toothpaste – Pretty much any toothpaste you have at home will work. One that is made for ‘deep cleaning’ would be best.
  • A few drops of warm water
  • 1 tsp baking soda – A natural exfoliant as well as a deep cleanser and bleaching agent.

Directions:

  1. Mix the toothpaste and baking soda together with a few drops of warm water.
  2. Wash your face thoroughly with your favorite cleanser and warm water before applying the paste.
  3. Apply the paste to the desired area.
  4. Gently scrub with the toothbrush for a minute or two.
  5. Wash with a soft soap and rinse with cool water.

Aftermath

Once done, let the skin air out and rest. After a few minutes, apply a smooth moisturizer.

Your pores will be tiny and you will have brushed away most of the protruding blackheads. This paste is also great at disinfecting the area as well as preventing future breakouts.

Disclaimer: the baking soda is a strong substance and can cause irritation to sensitive dry skin. Please test on a patch of skin, use with caution and wash off or discontinue use if any unwanted burning or reaction occurs. Do not leave on for long periods of time. Read more

Also read: Bedtime Routine for Pristine Beauty Sleep

Coffee for Hair – Benefits, Tips, and Side Effects

Coffee for Hair – Benefits, Tips, and Side Effects

We have good news for all coffee lovers out there. If your day starts with a cup of coffee and you just need another reason to buy coffee, we have got one for you. Coffee is very good for your hair. It promotes hair growth and also prevents hair damage. Read this article to find out how coffee can be beneficial for your hair.

How Is Coffee Good for Your Hair?

Mentioned below are some miraculous benefits of coffee:

1. Promotes Hair Growth

Coffee is highly beneficial for your hair. It nullifies the effects of DHT which is the prime cause of abnormal hair loss and damaged hair follicles in both men and women. It prevents damaging of the hair and promotes hair growth.

2. Fights Hair Loss

Weak hair follicles lead to abnormal hair loss and may result in baldness. Coffee helps stimulate hair follicles which fight hair loss and make your hair thicker and stronger. So next time opt for coffee for all your hair-related woes.

3. Improves Hair Texture

Using coffee on your hair will strengthen it from within and make your makes hair smoother and softer. Coffee is useful for treating dry, damaged, and unmanageable hair.

4. Improves Blood Circulation

The grainy texture of coffee helps improve the blood circulation in the scalp. Rubbing it thoroughly onto the scalp will promote blood circulation and help in hair growth.

5. Exfoliates the Scalp

Whenever you feel that your scalp is oily and greasy, use a coffee hair mask. Washing your hair with coffee will also keep it clean and fresh. Coffee helps remove the dead skin cells and augments the growth of new hair follicles which helps in strengthening the roots of the hair.

6. Improves the Natural Hair Colour

Coffee is a simple, chemical-free, and effective home remedy to darken the colour of your hair. If you have black or brown hair colour, then coffee is perfect for enhancing the colour of your hair. However, it’s not advised to use coffee if you have light-coloured hair.

How to Use Coffee on Your Hair

Here we have some easy and quick DIYs you can experiment at home using coffee:

1. Coffee Oil

Coffee oil can help increase the blood circulation to the scalp and stimulate the hair follicles. The phytosterol in coffee promotes moisture retention and absorption.

Read more 

Also read  10 Best Essential Oils For Hair Problems

Bedtime Routine for Pristine Beauty Sleep

0

It may sound like a simple thing to do, but a bedtime routine is super important and something that we don’t think about too often. There are so many different aspects that can affect how you wake up in the morning and taking care of yourself the night before can make a huge difference. Getting the right amount of sleep, and prepping your skin and mind for the next day are all huge factors in how you’ll feel when you wake up! These bedtime routines will ensure you wake up feeling fresh and energized each and every single time!

Bedtime Routine for Pristine Beauty Sleep

For your outside, from inside

  1. Drink water. Right before bed, drink a glass or two of water and watch your face be full of life in the morning. You can add a little lime or apple cider vinegar to flush out any impurities from the day. These two substances calm the stomach and get rid of waste and bad bacteria. Most blemishes and impurities are our body’s way of saying something is backed up.
  2. Eat well and light for dinner. Eating a bunch of sugar and/ or meat right before sleeping is sure to give you some unwanted blemishes. As said above, our bodies show what’s going on inside so its a good idea to have a light dinner and eat no more than 3 hours before sleeping. (Don’t forget your vitamins and minerals!)
  3. Get sufficient sleep. Sleeping too much or too little will cause exhaustion in our mind and skin. Getting just enough, about 6-8 hours, is ideal. Our bodies do most of its repairing and regenerating while we are sleeping so it’s important to make sure you’re giving your cells the right dose of dreams.

For your outside, from outside

  1. Wash your face before going to bed. Leaving makeup and dirt and oil on our faces overnight can cause serious irritation and gnarly pimples. Remember to always wash your face before laying down.
  2. Brush your hair and put it up. Sleeping on tangled hair will only cause hair loss and split ends from all the friction of tugging and pulling your hair on your pillows. Your best bet is to gently comb your hair and tie it in a bun on the very top of your head. A great idea is to use the 6+ hours you won’t be seeing anyone apply a homemade hair mask. Applying your favorite oil or product all over your head and letting it get deep into the roots and strands overnight will give you prime hair care.
  3. Use a moisturizer if you want super smooth skin overnight.  This could be as simple as a body lotion or an aloe face mask.
  4. Make sure sheets and pillowcases are CLEAN. So much of the blemishes we get can be avoided just by changing out pillowcases more often. All of the oils, dust, and dirt from our days get plastered onto our sheets and we forget and disregard it because we are ‘clean’ when we get into bed (hopefully.) This can happen no more! Please for the love of good skin, change your sheets at least twice a week. Read more