Home Blog Page 373

10 Best Essential Oils For Hair Problems

Slow growing, damaged, thin hair? We’ve compiled our 10 favorite and best essential oils for hair problems! These essential oils can be purchased at your local health store or online, and, when used regularly, can completely transform your hair!

#1. Lavender Oil

One of the most popular essential oils in the world, lavender oil has many properties including encouraging hair growth. Research has shown that lavender oil can generate the growth of cells and reduce stress. It also has antimicrobial and antibacterial properties which can improve the health of the scalp.

Use lavender essential oil for hair growth by mixing 3-4 drops with 3 tbsp of your favorite carrier oil such as olive oil or coconut oil. Apply directly to the scalp and leave on for at least 10 minutes. Wash out and repeat 2-3 times a week.

#2. Rosemary Oil

Rosemary oil has help thicken hair as well as encourage fast, healthy growth, due to its ability to improve cellular regeneration.

Do this by mixing 3-4 drops with 3 tbsp of your favorite carrier oil such as olive oil or coconut oil. Apply directly to the scalp and leave on for at least 10 minutes. Wash out and repeat 2-3 times a week.

#3. Thyme Oil

Thyme is one of the best essential oils to use for hair loss and hair thinning. Like rosemary and essential oils, thyme can also help regenerate cells, heal the scalp, and impart moisture.

Because thyme is a particularly strong essential oil, mix only 2 drops of it with 2 tbsp of your favorite carrier oil such as olive or coconut and massage into the scalp. Leave on for 10 minutes and rinse out.

#4. Tea Tree Oil

Tea tree oil is a powerful oil that is cleansing, antibacterial, and antimicrobial. This oil actually helps to unclog clogged pores in the scalp and improve hair growth.

Mix about 10 drops of tea tree essential oil into your shampoo or conditioner and use daily. Alternatively, you can also mix 2 drops with 2 tbsp of your favorite carrier oil and massage into the scalp. Leave on for 10 minutes and rinse out.

#5. Ylang Ylang Oil

Those with oily scalp and hair should avoid ylang-ylang oil, but those with a dry scalp should definitely give it a go! This oil improves the texture of hair, repairs damage, and encourages sebum production.

Mix 5 drops of ylang-ylang oil with 2 tbsp of warm oil (olive or coconut). Massage into the scalp, and wrap the hair with a warm towel. Leave on for about 30 minutes and wash out!

#6. Horsetail Plant Oil

Horsetail plant oil contains silica which is known to improve hair growth and strength. It also helps with reducing the amount of dandruff, and boosts circulation to the scalp.

Mix 2 drops of horsetail plant oil with 2 tbsp of your favorite carrier oil. Massage into scalp and leave on for 10 minutes. Rinse out.

#7. Cedarwood Oil

By balancing the oil production glands in the scalp, cedarwood oil can help promote hair growth as well as stop hair loss. It also has antifungal and antibacterial properties which aid with hair loss and other hair problems.

Mix 2 drops with your favorite carrier oil and massage into scalp. Leave on for 10 minutes and rinse out.

#8. Peppermint Oil

Peppermint oil is a powerful hair growth essential oil because it increases circulation to the scalp. Many studies have found that peppermint oil can strengthen and thicken hair over a short period of time.

Mix 2 drops of peppermint essential oil with 2 tbsp of your favorite carrier oil. Massage into scalp and leave on for 10 minutes. Rinse out.

Read more 

Also read  Baking Soda and Lemon Face Mask

9 Ideas for Removing Nail-Paint Without Using Remover

Sometimes the best manicure and pedicure can go the wrong way and before you know it, you’re dying to change your look. On one hand, you don’t want to chip your nails and on the other – you don’t have a take off  nail polish remover around you..

Here are 9 DIY ways to take nail polish off without using a remover. These are safe, easy to use, and don’t take a lot of time either.

1. Toothpaste Remedy

Toothpaste has ethyl acetate, a chemical compound that’s commonly used in commercial nail polish removers. This works like a charm and it is also a nail polish remover without acetone.

  • Toothpaste

How To Use It

  • Get a toothbrush and apply a pea-sized dollop of toothpaste on it
  • Gently scrub it over your fingers, let it sit for a few seconds, and rinse while scrubbing the polish away

2. Lemon Water

Lemon has alkalizing properties and goes easy on your nails. All it takes is a few scrubs and you’re done! It helps in removing nail polish naturally at home.

What You Will Need

  • Lukewarm soapy water
  • One slice of lemon

How To Use It

  • Soak your nails in soap water for five minutes
  • Take the lemon slice and scrub it over them gently
  • Apply nail oil afterwards to keep your nails in good shape once you remove the polish

3. Alcohol

If you’re worried about nail infections and don’t have other alternatives lying around the house, try using some regular alcohol. It works and is much more effective than commercial nail polish removers

What You Will Need

  • Rubbing alcohol
  • Lukewarm water
  • Cotton balls

How To Use It

  • Soak your nails in lukewarm water for a few minutes
  • Take the cotton balls and dip them in the rubbing alcohol. Work over your nails by rubbing them gently to remove the nail polish
  • Finish the wiping by applying some cuticle oil to your nails

4. Hand Sanitizer

This one is another natural home remedy that works extremely well. Here is how you use it.

What You Will Need

  • Hand sanitizer
  • Cotton balls

How To Use It

  • Spray a bit of hand sanitizer over your nail polish, making sure not to spray too much
  • Rub cotton balls on your nails after spraying and wipe away the nail polish
  • Spray a little bit at a time and keep rubbing. Repeat until the polish comes off
  • Rinse your nails thoroughly with water afterwards and dry  Read More………

Also Read: Garlic for Hair Growth: How it Works

Garlic for Hair Growth: How it Works

0

How does garlic for hair growth work? Hair loss and thinning are usually caused by a deficiency in the body, so how can garlic replenish that? We know that garlic in nail polish works to strengthen nails, but what can it do for your hair and how exactly does it work? We’re here to answer all of these questions and more! Keep reading to find out how garlic for hair growth works, how to use it, and why you should!

As we already know, garlic is an essential part of most dishes and most cultures. It adds flavor, it’s good for you, and it’s one of the most widely used vegetables in the world. But did you know that in many cultures, and for thousands of years, garlic has been used as a medicinal ingredient? Known for its powerful antiseptic and antimicrobial properties, garlic can cure a number of ailments, including – you guessed it – hair loss and hair thinning!

According to a study that was published in the Indian Journal of Dermatology, Venerology, and Leprology, applying a five percent garlic gel to the area of hair loss will help hair to regrow. This is because garlic contains selenium and sulphur, which help fortify the hair’s structure. This means that garlic can not only regrow hair, but also strengthen it. Those with hair loss and thin hair can greatly benefit from the amazing properties of garlic.

Garlic Benefits for Hair

  • Antimicrobial: The antimicrobial properties of garlic help to kill germs and bacteria, which are responsible for causing scalp issues, and therefore hindering growth.
  • Rich in Vitamin C: Vitamin C is found in garlic, and as such, can help boost collagen production which stimulates hair growth.
  • Rich in Selenium: As we mentioned above, garlic is rich in selenium which helps boost blood circulation. This in turn helps with hair loss and thinning hair.
  • Cleanses: Garlic helps to cleanse the hair and scalp, meaning there is more opportunity for hair growth because it unclogs pores.
  • Treats Dandruff: Garlic has properties that not only can help hair growth but can also stop dandruff in its tracks!
  • So is garlic good for hair growth then? The answer is absolute yes! There are a few different ways you can incorporate garlic into your life not only to help with hair growth but treat a number of different ailments. Garlic supplements are easily available to purchase and they can help cure a common cold, lower cholesterol, and reduce the risk of heart disease.If you don’t consume enough garlic, a garlic supplement may be the answer for you! Additionally, you can also purchase garlic ointment which can be applied topically to the skin, as well as to the hair, especially where hair loss is prevalent. Lastly, you can make your own garlic concoctions which can be applied to the scalp to treat dry scalp, dandruff, and hair loss and hair thinning. Let’s take a look at some of these homemade garlic hair recipes!

    Garlic Hair Mask Recipes

  • Garlic & Honey Hair Mask for Growth

    This combination of garlic combined with honey is truly a powerhouse to combat microbes and fungus. It’s especially great for those who suffer from scalp issues and can help promote hair growth when used on a regular basis.

    In a mortar and pestle add a few cloves of garlic and a teaspoon of honey. Mash until it becomes a paste-like consistency. Alternatively, you can also use a food processor to make the paste. Apply all over scalp and hair and leave on for at least 30 minutes. Rinse out and follow up with a natural shampoo and conditioner. Use 2-3 times a week for several months.

    Coconut Oil & Garlic

    This coconut oil and garlic hair mask are perfect for those with dry hair, as the coconut oil gently hydrates and moisturizes a dry scalp, while the garlic promotes growth and health.

    Grab a few garlic cloves and mash them well. To that, add a little bit of coconut oil to make a paste. Apply all over scalp and hair and massage gently for several minutes. Leave on for at least 30 minutes. Rinse out and follow up with a natural shampoo and conditioner. Use 2-3 times a week for several months.

    Garlic Infused Oil

    Not to be confused with garlic essential oil, garlic-infused oil is simply garlic cloves that have been added to the oil. You can add several crushed cloves to any carrier oil of your choices such as olive oil or coconut oil. Let this mixture infuse for a night or two and apply it to the scalp and hair. Massage gently into the scalp for about 5 minutes. Leave on for at least 30 minutes. Rinse out and follow up with a natural shampoo and conditioner. Use 2-3 times a week for several months.

    Ginger & Garlic Hair Mask

    Ginger has some great antiseptic and antibacterial properties, much like garlic. It’s no wonder then that the two combined make for a powerful hair mask that can cure a multitude of scalp issues. Read more

Also read: How to Determine Your Eyebrow Shape Based on Your Face Shape

Baking Soda and Lemon Face Mask
0

To get rid of blackheads, whiteheads, dark spots, and pimples, this baking soda and lemon face mask is your go-to! The baking soda acts almost like a chemical peel, but is much less abrasive, while the lemon gets rid of scars, discoloration, and dark spots. Use this mask once a week for clear, smooth, and younger looking skin.

This baking soda and lemon face mask is one of our favorite home remedies because it’s so incredibly easy to make and it actually works!

Homemade Baking Soda and Lemon Face Mask
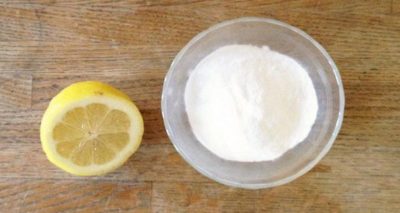
baking soda and lemon juice

Before making this mask, please note that if you have very sensitive skin, you may want to do a patch test first as both baking soda and lemon can be pretty tough on the skin.

You’ll Need:

  • 1 tsp freshly squeezed (preferably organic) lemon juice
  • 2 tsp baking soda

Why This Mask Works:

Lemon juice is a natural bleaching agent, which means it will help get rid of dark spots, acne scars, age spots, and skin spots. Additionally, lemon juice also helps to balance the pH level in the skin, making it less oily.

Baking soda is a natural exfoliant. It will help get rid of dead skin cells which prevents the formation of excess oil and breakouts. Baking soda also lightens dark spots and acne scars, and gets rid of blackheads and whiteheads.

The Drill:

In a small bowl, mix the lemon juice and the baking soda until it forms a runny paste. You will notice that it fizzes, and that is the lemon juice reacting with the baking soda. Apply the mask all over your face and neck, making sure to avoid the eyes. Rub the mask in slow, circular motions around the T-zone. Let the mask sit for 15 minutes (no more). When time is up, wet a washcloth with warm water and place it over your face, leaving it there for a few seconds. Then, use the facecloth to remove the mask, and rinse off with cold water. Follow up with a moisturizer.

Alternative Uses:

Spot Treatment:

You can also use this mask as a spot treatment. Simply dip a cotton pad into the mixture and apply directly to affected areas, such as pimples or acne scars. Let sit for at least 10 minutes and rinse off. Pat dry and follow up with your favorite moisturizer.

Facial Scrub

Alternatively, you can also use this as a quick scrub to rid the skin of dirt, impurities, and blackheads. Make the paste and slowly and gently massage into wet skin in slow, circular motions. Leave on for 1-2 minutes and rinse off with warm water. You’ll notice skin will immediately feel smoother and cleaner.

Substitutions:

If you have very sensitive or dry skin, we recommend against using lemon juice. Instead, substitute it for water. It will be much gentler on the skin, and will still work just as well to cleanse, exfoliate, and get rid of blackheads.

Read more 

Also read  5 Fruits for Glowing Skin

How to Determine Your Eyebrow Shape Based on Your Face Shape

0

Today we’ll show you how to determine your eyebrow shape based on your face shape! Believe it or not, not all brows are created equal! And of course, not all faces are created equal either. So having said that, it’s only natural that our brows need to accentuate our faces in the best way possible. What works for you, may not work for someone else, and vice versa!

So how to determine your eyebrow shape based on your face shape? First, we’ll have to figure out your face shape. To do that, you can click here to a post of mine where I explain the different types of face shapes and how to determine yours. Shape your brows according to what your face shape is for the most flattering look. You’re now on your way to getting perfect eyebrows!

Alternatively, you can also check out the chart above. Before you determine the shape of your face, make sure your hair is completely pulled back so you can get a really good look! Ok, so did you find out the shape of your face? Good! Let’s see what your brows SHOULD look like!

Round Face Shape

Round shaped faces should go for high, sharp brows that will cut away from the round, curvy shape. For those with a round face shape, a structured brow with angled arches and longer ends is the way to go. This will slim the face, and give it a more oval shape, resulting in some pretty perfect brows!

Oval Face Shape

For oval shaped faces, go for a moderate arch instead of a high one. You don’t want to elongate the face even longer. The oval face shape is actually known as the “perfect” face shape because almost anything goes! For those with an oval face shape, well-balanced and contoured brows is the way to go! If you have a longer forehead or a long face, we suggest thicker brows, but if you have smaller facial features, thinner brows are the way to go.

Triangle Face Shape

Triangle shaped faces look well with long brows that frame the eyes and fills out the shape face’s wider forehead, making it look smaller. For triangle shapes, you can go with either thin brows or thick brows, it’s completely up to you!

Heart Face Shape

You’ll want a moderately high arch that rounds out at the tail. This will balance a wide forehead. Create soft, rounded brows to complement the sharp angles of a heart shaped face. Read more

Also Read: DIY Peel Off Lip Stain

5 Fruits for Glowing Skin

Fruits are some of the best things for your skin because they contain so many antioxidants, vitamins, and nutrients. Today we’ll show you 5 fruits for glowing skin that will give you the perfect complexion! And whether you consume these foods or apply them topically to your skin, they’ll do wonders. Try to incorporate each one of these fruits into your diet at least once a week, as well as making a face mask with any or ALL of these fruits.

Best Fruits For Glowing Skin

#1. Bananasbananas

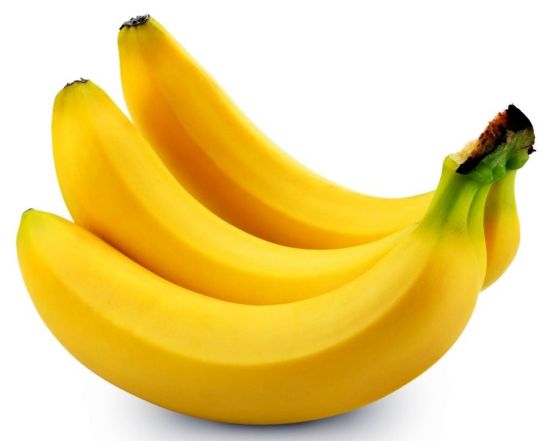
Bananas are super rich in vitamins A, B, & E, which is a trifecta for combating aging skin, wrinkles, and dark spots. Use a banana peel and just rub it all over your face and neck every morning or night. Rinse off after 20 minutes. When consumed, you always get tons of fiber, minerals, magnesium, and potassium, which gets the blood circulation going.

#2. Lemons

lemons

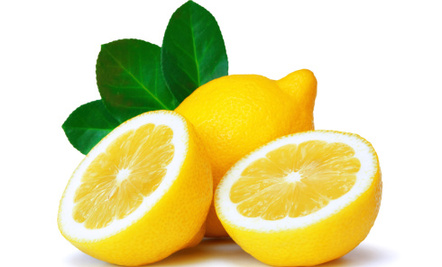
Lemons are high in vitamin C and have great bleaching properties. When rubbed onto the skin, lemons can get rid of dark spots and scars. When consumed, lemons brighten the skin from within and give you a healthy dose of vitamin C which your body needs.

#3. Oranges

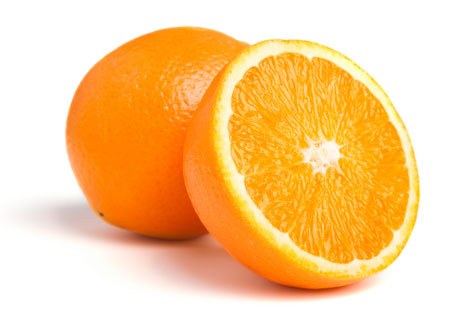
oranges

Like lemons, oranges are also high in vitamin C, and consuming them on a regular basis can slow down the process of aging. Dry orange skins and powder them. Use this powder once a week as a scrub to get rid of dead skin cells, and reveal youthful, glowing skin.

#4. Apples

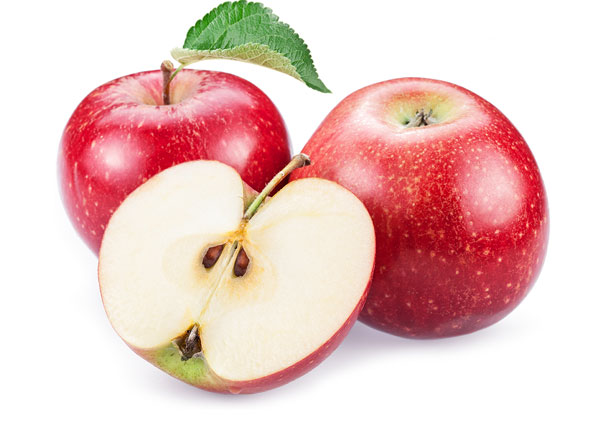
apples

Apples are high in antioxidants and prevent cell and tissue damage, slowing down aging. Consume an apple a day to keep the doctor away! Also, make an apple mask by mixing apple juice with honey and applying to your face. Let it dry, and wash off.

Read more 

Also read  7 Foundations with Natural, Clean and Good-for-Skin Ingredients

DIY Peel Off Lip Stain

0

This DIY peel off lip stain is super easy to make, will save you a ton of money, and will give your lips an all day lip tint!

Peel off lip stains have taken the beauty world by storm, and while they may sound confusing, the concept is actually pretty simple! Just swipe the liquid on your lips, let it dry, and peel off to reveal a 24-hour lasting lip stain! These lip stains are great not only because they give you a super long lasting color, but they also exfoliate as you peel it off!

Unfortunately, peel off lip stains are not easily found in stores, and this is because they’re mainly a Korean beauty product. The problem with that is that the shipping can cost you a ton…not to mention the wait time! So what’s a girl to do? Make her own of course!

This DIY peel off lip stain is easy to make (so easy in fact even a CHILD could make it), takes only minutes to whip up, and will give your lippies a last color all day long! Even cooler is that you can apply this lip stain pretty much anywhere on your body!

DIY Peel Off Lip Stain Recipe

This lip stain peel only requires two simple ingredients: school glue and food coloring. Can you say easy?!

You’ll Need:

  • Elmer’s School Glue (non toxic)
  • food coloring

Directions:

Now here is where you can get SUPER creative! You can literally make almost ANY lip color you want simply by adding extra food coloring or mixing different colors!

Fill a clean container with the school glue (you don’t need a lot, just a teaspoon should be more than enough for one application!).

Now, add in (one drop at a time) some food coloring. The color choice is completely up to you. The more you add, the darker the color will be, and the less you add, the lighter the color! Mix the glue with the food coloring really well until you’ve achieve the color you want!

Dip a clean lip brush into the mixture and apply to your lips, just like you would any lipstick.

Wait 2-3 minutes for it to dry and slowly peel off. Make sure you’re very gentle when pulling off the lip stain peel, as it may hurt a little bit. Also, please do not use this if you have any irritation or open sores. Check your lips carefully and closely beforehand.

And voila there you have it! A DIY peel off lip stain that took you seconds to make!

To remove this semi permanent lip stain peel, simply rub lips with a homemade lip scrub.

How to Prep Your Lips for a Lip Stain Peel:

  • Make sure to regularly (once a week) scrub your lips to remove dead skin cells. This will ensure easy lipstick application and smoother, softer lips.
  • Apply a moisturizing lip balm every night before bed. Your lips can get very dry, very quickly, and it’s very important to keep them hydrated. Read more

Also read:Milk & Oats Hand and Foot Soak

Top 8 Foods That Will Heal and Soothe Your Dry Skin

Food not only provides us with nutrition, but it also keeps various ailments and health conditions at bay. When there is a dearth of nutrition in the body, you can suffer from various health issues or conditions, and one of the most common issues is dry skin. What goes inside you can have a significant effect on how your skin behaves and looks. Therefore, if you are battling this skin condition, you can try incorporating certain food items in your diet to soothe your dry skin. If you wish to learn about all these foods in detail, we recommend that you go through this article!

Best Foods to Cure Dry Skin

Let us take a look at some best foods that can help you have beautiful and healthy skin:

1. Pomegranates

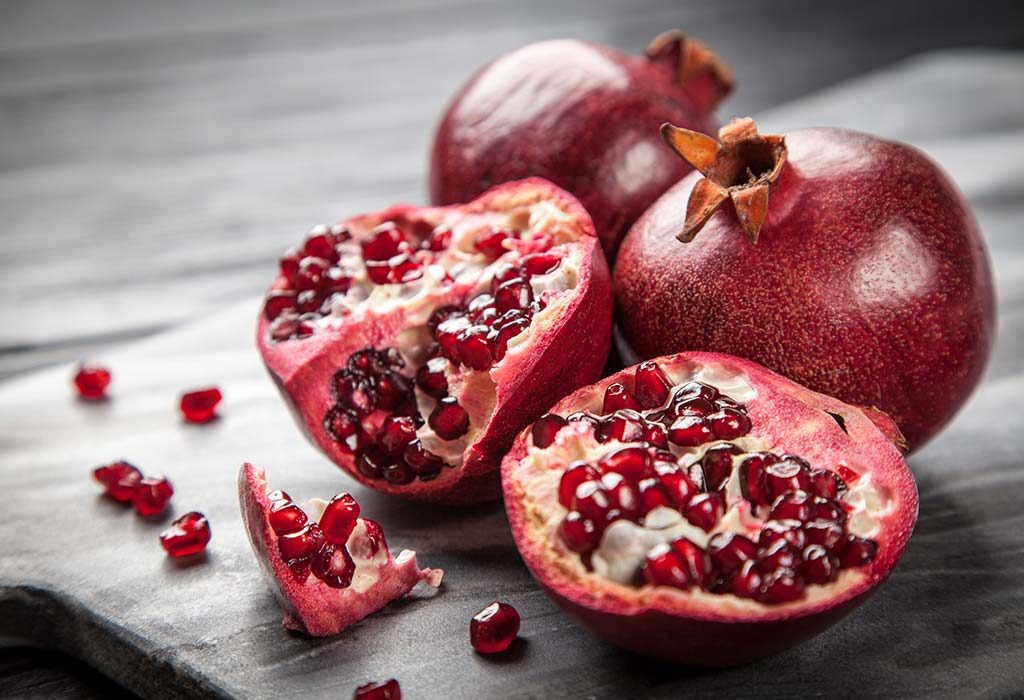
Pomegranate is one of the best fruits for dry skin as it provides hydration to the skin cells and also helps in flushing out toxins from the body. Being rich in vitamin A and C, pomegranate contains a high amount of water and other essential vitamins and minerals. It also helps in reducing itching and inflammation and it also aids in improving the elasticity of the skin. This fruit is also loaded with anti-microbial, anti-inflammatory and anti-bacterial properties, which help in maintaining good skin health.

How to Use It 

Include half a cup of pomegranate in your daily breakfast meals.

  • Alternatively, you can mix pomegranate oil with olive oil and apply it on your skin. Leave it on for 15-20 minutes and wash it off with warm water.

pomegranate

2. Eggs

One of the most effective foods to prevent dry skin is eggs. Eggs are loaded with fat-soluble vitamins that are beneficial in maintaining the membrane integrity of the skin cells. Eggs are also power-packed with vitamin A, D and E, omega-3 and omega-6 fatty acids, protein, folate and other such vital nutrients which benefit the skin. Never discard the egg yolks when you are having eggs because the yolk contains the maximum nutritional content your skin requires.

How to Use It 

You can consume one or two eggs for breakfast every day. Have them in boiled, poached, single-fired, scrambled or in any other form.

  • Apply egg yolk directly on the skin for 10 to 15 minutes, and wash it off with lukewarm water.

Read more 

Also read  DIY Serum for Oily Skin

Milk & Oats Hand and Foot Soak

For soft, smooth hands and feet, try this soothing milk & oats hand and foot soak!

I love hot oatmeal with milk and brown sugar in the morning. But this tasty, wholesome combination doesn’t have to be just a breakfast item. It also makes for a great way to nourish dried, cracked skin particularly on hands and feet. And, with just three basic ingredients, this is all too easy to throw together and enjoy while watching a tv show or listening to music.

Although milk (and dairy in general) has been getting some bad press lately as to whether or not we should be drinking it, it still stands as a tried and true topical remedy for a multiple numbers of skin ailments including sunburns, rashes, itchiness and irritation, darkened skin and premature aging. The lactic acid dissolves dead skin cells while moisturizing and lightening brown spots and sun-damaged areas and the proteins help firm the skin and reduce wrinkles by boosting collagen.

Oats are antioxidant and anti-inflammatory which aid in soothing dry, irritated skin while exfoliating and leaving skin nourished and rejuvenated. Oats also contain saponins, a compound that removes dirt and unclogs pores.

Vanilla further promotes healthy skin and is aromatically yummy!

Hand and Foot Soak Recipe

What You Need:

Directions:

First, pour the milk in a saucepan and heat on low for a couple of minutes. Don’t let the milk come to a boil as that will deplete some of the vital vitamins, instead just warm the milk to a comfortable temperature for yourself. Then, combine the milk, oats and vanilla in a bowl large enough to fully submerge both hands or both feet. Allow hands or feet to soak for 15 minutes. For hands, it is beneficial to rub hands together during this time for a more thorough exfoliation. After soaking, rinse with warm water and moisturize with a natural oil such as almond or jojoba.  Read more

Also read: 10 Step Korean Skin Care Routine