

Home Blog Page 370

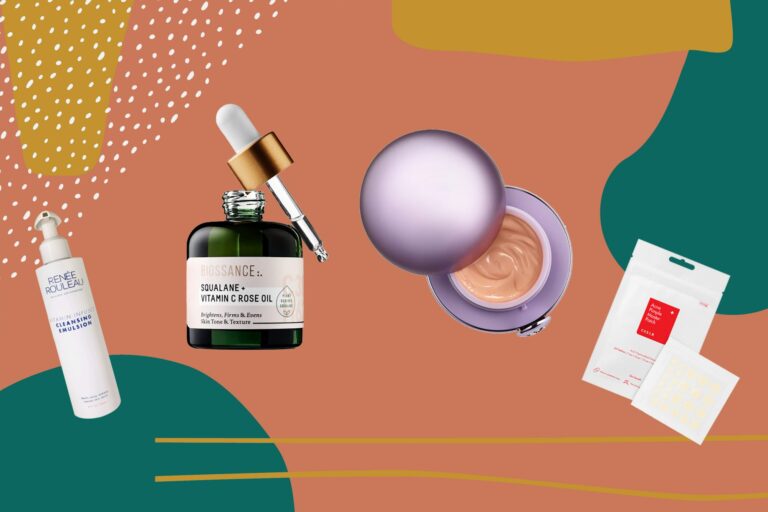
The Correct Order of Skin Care Products

What IS the correct order of skin care products? Does it matter if you apply eye cream before moisturizer, or should it be the other way around? We’re here to answer all of these questions and more!

Day Time Skin Care Routine

Step 1: Cleanser

Choose a cleanser that’s designed for your skin type. For example, if you have oily and/or acne prone skin, wash your face with an acne-targeted facial cleanser such as Neutrogena Oil Free Acne Wash. Start by splashing your face with warm water and apply a small amount of the cleanser into your hands. Rub your face in slow, circular motions. Rinse off and pat dry.

Step 2: Toner

Again, choose a toner that’s designed for your skin type. Although toners were thought to be useless for the skin, that is not the case anymore. Toners have come a long way, and keep help balance the skin’s pH, help beauty products to better absorb into the skin, deliver nutrients to the skin, and remove any leftover dirt or debris your facial cleanser may have missed.

Step 3: Serum

A serum is a crucial part of any beauty regimen, especially for those with aging skin. Serums are generally super concentrated skin nutrients that target specific skin concerns. For daytime, you should use an antioxidant serum which protect your skin from the sun’s harmful UV rays as well as environmental pollutants.

Step 4: Eye Cream

An eye cream is an extremely important part of any skin care routine, especially starting in your 20s. The skin around the eye is the thinnest part of the skin on your face, and therefore will start loosing elasticity first. It’s crucial that you apply a good quality eye cream every night before bed or even in the mornings to keep the skin thick and taut. Try using an eye cream with an SPF, which can further protect the delicate skin around the eyes.

Step 5: Spot Treatments

Prescription spot treatments such as a acne treatments should be applied every day. Depending on what type of treatment you’re using, it’s best to speak to your dermatologist about how exactly to apply the treatment and how often.

Step 6: Moisturizer

Applying a moisturizer is crucial, even if you have oily skin. For best results, choose a moisturizer to fit your skin type. Those with acne and oily prone skin, should opt for gel-based moisturizers. Massage the moisturizer gently into the skin in slow, circular motions. If you’ve applied a spot treatment, do not apply moisturizer on top of the treatment. Read More………..

Also Read: Homemade Coffee Scrub
Homemade Coffee Scrub

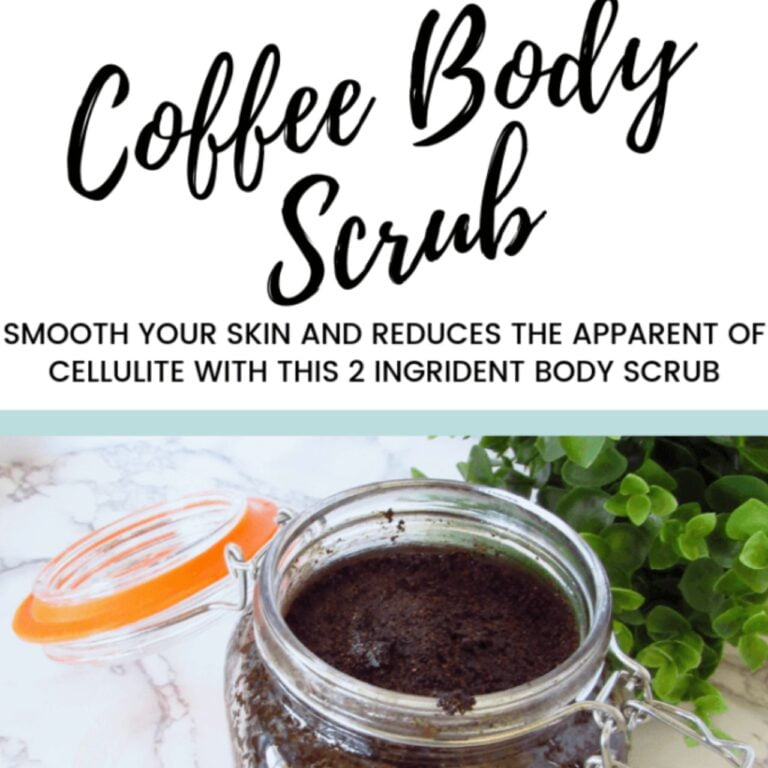
Homemade Coffee Scrub: The DIY Cellulite Ninja made with three simple ingredients you most likely already have in your kitchen!

Ahhh coffee, the favorite waker-upper for your mug, can also be one of your best combats against the dreaded cellulite. While there is no elimination cure-all for cellulite, a homemade coffee scrub made from your leftover grounds along with coconut oil and a coarse sugar can help reduce the appearance of those pesky dimples.

Not only does caffeine wake up your brain, when applied to your skin, it also helps to wake up blood vessels increasing circulation and firming the skin. In addition, the coffee grounds and sugar exfoliate and remove dead skin, while the coconut oil hydrates and nourishes leaving your skin happy and silky smooth. So, after you’ve slurped down your morning coffee, instead of throwing out the grounds consider using them to effectively rally against cellulite!

And, as many of us are making coffee every day, you even have the option to make small, fresh batches as needed, or save time and potential hassle by making a larger batch to store in the refrigerator.

Homemade Coffee Scrub

How to Make:

Ingredients:

  • 1 cup coffee grounds
  • ½ cup coarse sugar (such as raw sugar or coconut sugar)
  • ½ cup coconut oil

Directions:

First, heat the coconut oil to melt it down to liquid form. Next, add all three ingredients together in a bowl and stir until well mixed but still maintaining a crumbly consistency. Store in an airtight container in the refrigerator for up to 3 months.

How to use:

Using coffee scrubs can be a messy process so it is recommended to use in the shower. Simply apply by massaging with pressure onto legs and buttocks and rinse with warm water. This can be done after your regular washing or before if you don’t care for the oily residue left from the coconut oil. Repeat 2 to 3 times per week. Read more

Also read: DIY Setting Spray: How to Make Your Own Makeup Setting Spray

Homemade Lemon Sugar Scrub

  • This heavenly smelling homemade lemon sugar scrub is one of my all-time favorite DIY scrub recipes! It combines all natural ingredients including coconut oil and lemon essential oil which is a great energizer and pick-me-up! Especially during the cold winter months, having a great scrub can mean a world of difference for dry, parched skin. Removing the top layer of dead skin cells allows for the skin to breathe and also lets your moisturizer penetrate much easier and deeper. You can make this homemade lemon sugar scrub super quick and you’ll also save a ton of money as opposed to buying an actual scrub which is often packed with preservatives and other damaging chemicals.

    DIY Lemon Sugar Scrub

    This scrub is so simple to make and will leave your skin extremely soft. Because it contains coconut oil, it will give your skin a big moisturizing boost which it needs during the winter months. Coconut oil also produces collagen and encourages cell growth, which is great for dry and aging skin. As well, coconut oil also reduces inflammation, redness, and gets rid of dark spots and/or acne scars.

    Lemon essential oil brings in an energizing and waking scent to this scrub, but is also anti-microbial and anti-fungal, getting rid of blackheads, acne, and other dirt and debris. Finally, the addition of sugar is to scrub away the dead skin cells which will clear up skin, and allow for other ingredients to penetrate much easier.

    You’ll Need:

    homemade lemon sugar scrub

    • 1 cup sugar
    • 1/4 cup to 1/2 cup coconut oil
    • lemon essential oil
    • Yellow food coloring (optional)
    • 8oz mason jar with lid or other container

    Directions:

    1. In a medium sized bowl, combine your sugar and coconut oil and mix well until well incorporated.
    2. Add in a few drops of essential oil. This is completely up to you how much you want to add! Keep adding until you get the aroma you want!
    3. Then, add a drop or two of yellow food coloring if you wish! If not, the mixture will be an off-white.
    4. Mix well together and scoop out into a mason jar or container.
    5. Use in the shower all over body scrubbing in slow, circular motions.
    6. You can also use on the face, just make sure not to rub too hard!

Read more 

Also read  11 Herbs and Spices That Are Good for Your Skin 

11 Herbs and Spices That Are Good for Your Skin

0

We all want glowing skin.

A lot of people invest a lot of money in skincare products to get younger-looking skin. If you also have spent a lot of money on beauty products but didn’t get the desired result, it’s time that you look for solutions in your home. Yes, you should try herbs, spices, and other natural remedies for your skin problems. Read this article to find out which herbs are good for your skin.

Many herbs hold therapeutic advantages for your skin. In addition to successfully tackling skin issues, they can greatly improve the cellular firmness and health of the skin. Below is a list of herbs, spices, and some other options that are nature’s gift:

1. Chamomile

Chamomile

Chamomile contains alpha-bisabolol, an influential compound which can diminish the development of wrinkles. It also heals skin irritations like burns and acne faster. Chamomile can be taken in the form of tea or you can use it as a face wash. However, it may not suit everybody’s skin and body. So use it with caution.

2. Calendula

Calendula

It is one of the most effective herbs for dry skin. It has antimicrobial, anti-inflammatory, antiviral properties which can enhance the health of the skin considerably. The oil-soluble compound carotenoids present in calendula work wonder for your skin. It heals inflammation, psoriasis, rashes, age spots, dermatitis, varicose veins, stretch marks, and warts.

3. Holy Basil

Holy basil

Holy Basil is a culinary herb which has antifungal and antibiotic properties. It is very good for the skin. It is a wonderful skin tone booster which can revive dull looking skin. It can also help in soothing, healing, and rejuvenating the skin. Being rich in antioxidants and Vitamins A and C, this herb destroys the harmful free radicals and gives wonderful skin.

4. Aloe Vera

Aloe vera

It is called the “Plant of immortality” owing to the numerous benefits it offers for the skin. Its anti-inflammatory properties can heal our skin. It can deeply moisturise the skin and acts as a protective barrier saving the skin from environmental damage. Its beneficial enzymes make it one of the finest herbs for skin. Aloe vera can treat blemishes, cleanse dead skin, and combat acne.

5. Turmeric

Turmeric

Read more 

Also read  Hyaluronic Acid Foods: Natural Sources of HA


Hyaluronic Acid Foods: Natural Sources of HA

You may already be using skin care products that contain hyaluronic acids (HA) or a hyaluronic acid serum, but what about hyaluronic acid foods? They do in fact exist, and if you’re a fan of healthy eating, you should definitely take a look at these natural sources of HA. It is naturally occurring in the body and is responsible for retaining moisture and also attracting it. Without HA, your skin can become dry, flaky, and also show early signs of aging. HA also helps to improve cell turnover and improve collagen synthesis, which can help prevent the formation of wrinkles and improve the skin’s texture. So, if you’re looking to get beautiful skin, you may want to add some of these hyaluronic acid foods into your diet along with some HA skin products!

Benefits of Hyaluronic Acid

Hyaluronic acid is a vital component to fighting premature aging and wrinkles. If you’re looking for beautiful, youthful skin, It is then super important. Here are some benefits:

  • Hydrates and moisturizes the skin
  • Prevents wrinkles and fine lines
  • Reduces redness
  • Helps with dermatitis
  • Reduces inflammation
  • Prevent dryness
  • Keeps skin supple
  • Softens skin
  • Reduces the appearance of dark spots and age spots
  • Plumps skin up
  • Can reverse wrinkles and crows feet

What Foods Contain Hyaluronic Acid?

Foods high in they are plentiful, and as you may have already guessed, they’re also some of the healthiest foods. Not only do these hyaluronic acid foods help you feel better, but some of them also help increase hyaluronic acid production. Plus, these foods are also rich in vitamins and minerals which is just an added bonus!

#1. Bone Broth

You may have heard about the miraculous benefits of bone broth. Plenty of people consume bone broth for a number of different reasons, but mainly for health reasons. Also, it’s at the top of our list as it contains the highest amount of HA of any foods. This is because bone broth is made from animal cartilage and bones (sounds gross, yes). These parts are then simmered in water for at least 24 hours so that all of the nutrients, including hyaluronic acid, are extracted into the water. Consuming one cup a day can have extraordinary benefits not only for your skin but your overall health.

#2. Soy Foods

Soy based foods such as tofu, edemame, and tempeh, all contain some level of estrogen in them. It has been proven that an increase in estrogen may help the production of  acid by the body. If that wasn’t enough to get you going on the soy train, they’re also chock-full of protein, vitamins, and minerals. Read More…..

Also Read: Everything you Need to Know About Dip Powder Nails

Everything you Need to Know About Dip Powder Nails

0

Dip powder nails have taken the nail salon industry by storm. Everybody is talking about it and everybody is trying it: making dip powder the new trend. But actually, the dip manicure has been around since the 80s and just recently came back on-trend. Let’s talk about what is dip powder and its details.

What Are Dip Powder Nails?

Dip powders are a combination powder and a glue liquid that hardens when the air hits, leaving a long-lasting color on your nails. There is no need to use ultraviolet (UV) lights when applying this type of powder, while gel nails DOES require UV lights.

Also known as SNS nails, (Signature Nail Systems), dip powder nails are a better option than gel nails due to its simple application. All you need to do is dip your nail into a powder of your choice and seal it with a coat of polish. You’ll also need a base coat and a top coat.

How Are Dip Nails Applied?

As we said before, the application is pretty easy but it all depends on the method your nail salon uses. There are two techniques of dip powder nail application:

#1. Dipping Technique:

Some nail technicians use this method which consists of dipping the nails (hence the name) in the powder after applying a layer of polish like glue. The dipping process will continue depending on how deep you want the color to be.

This technique has been proven not to be the most healthy one. When you dip your nail into the powder you are exposed to germs, if the powder isn’t changed constantly this can be quite unsanitary.

#2. Painting the Powder Technique:

The safest method to apply dip powder is to paint the powder with a brush onto the nails. This way the amount of powder used will be controlled and exclusive for you.

Just like the dipping technique, apply a coat of the glue polish and then paint/brush the powder. Apply another layer of glue polish and continue applying color until the color desired is reached. If you are doing this at home always be careful and clean the edges.

Pros and Cons of Dip Nails

Pros:

  1. Every girl dreams of the perfect manicure that lasts a long time, well, dip powders gives you just that. Dip powder manicures last for almost a month.
  2. You will be rocking your natural nails!! The powder goes on top of your natural nails so there is no need to get fake nails. Whether your nails are long or short, dip powder is for every type of nail.
  3. Dip powder actually protects your nails, using it allows the nail to have an extra layer of protection to prevent breakage and allow the nail to grow without any complications.
  4. No more chipped nails! Since it last longer and thanks to the glue-like polish, dip powder manicure won’t chip or peel like regular polishes after a few days.
  5. You can do it at home! Yes, dip powder manicure is so easy that you can do it yourself. Purchase a starter kit online and you are good to go but remember to be careful since you will be dealing with glue polish.

Cons:

  1. As we said before, the dip powder manicure can be kind of unsanitary since some salon uses the dipping methods. Imagine having 10 different people dipping their nails in the same powder, yes – no good – the amount of bacteria risk is huge. If you decide to get your dip powder manicure in a salon try to go to one that uses the painting powder technique instead.
  2. The removal process can be a bit long if you are not careful enough. To remove dip nails, you need to follow every step carefully and not pick your nails. Luckily, removing your dip powder at home is possible, look into our nail section to find more about it.
  3. It can be a bit more expensive than other manicures, this is due to how trending it is and not a lot of people know the techniques.
  4. Dip powder manicure can cause some temporary damage in the nails and also tend to dehydrate them. It doesn’t cause permanent damage though, so don’t worry too much! Read More……….

Also Read: Homemade Lipstick Recipe – How to Make Your Own Lipstick

14 Skin Care Tips Every Woman Over 50 Should Know

0

For every woman out there over age 50 who knows that beauty comes from within, but who also wants to look the best you can, this article is for you. And, for those of you curious about plastic surgery, Botox injections, and fillers, so we’ll cover that as well. There aren’t many miracle fixes in these 14 tips, but there is a lot of advice I swear by, a few decent recipes, and an attitude that the years after age 50 are full of wonder and beauty.

(1) Wear Sunscreen Every Day

I know it’s tedious to constantly hear about the importance of sunscreen, but if there is one beauty rule I’d tell my 15-year-old self it’s to wear a decent sunscreen every day. Nothing damages your skin more than exposure to the sun. It’s the number one cause of brown spots, wrinkles, and skin cancer.1

Here’s the catch: not all sunscreens are equal. You should choose a sunscreen of at least 30 SPF and you should choose one that blocks UVA and UVB rays.2

Three things to remember once you’ve found the right a sunscreen:

    1. You should wear it rain or shine. UV rays break through cloud cover and it’s important to make a habit of using sunscreen daily.2 And don’t worry, it won’t clog your pores as long as you cleanse your face at night. Woman
    2. Reapply throughout the day. The renowned dermatologist Patricia Wexler insists that all women (whatever their skin tone) reapply sunscreen throughout the day.
    3. Slather some on top of your hands. Dermatologists say they can tell a woman’s age by looking at her hands, in addition to her neck.

Product recommendations: I prefer tinted sunscreen because it doesn’t leave a white cast on my face and it evens out my skin tone. Neutrogena makes a good drugstore version or you can buy it from Amazon. However, my favorite (recommended by my dermatologist) is the pricey but fabulous La Roche Posay tinted sunscreen (also available at Amazon). Apply sunscreen with a foam sponge for a more even application.

Read More

Also Read: An Overview On Bumpy And Rough Skin

Homemade Lipstick Recipe – How to Make Your Own Lipstick

Love making your own cosmetics? Then you’ll love this simple homemade lipstick recipe that uses natural ingredients that are actually good for you! This recipe is really great because you actually customize your colors and get super creative by coming up with some new colors!

Homemade Lipstick Recipe

Ingredients Needed:

Makes 2 tubes of lipstick

  • 1 tsp beeswax
  • One tsp cocoa butter
  • 1 tsp coconut oil
  • 4 drops essential oils of your choice (peppermint, grapefruit, lemon, etc…)

Color Options:

You can add any of the color options below, OR you can forego the color option altogether and make a homemade lip balm!

  • Reds: 1 tsp beetroot powder and 1/4 tsp alkanet root powder
  • Browns/Nudes: 1/2 tsp (or more) cocoa powder and a small pinch of cinnamon or turmeric powder until you get the shade you want!
  • Matte: add 1/2 tsp bentonite clay to any of the above color options for a matte finish.

Directions:

  1. To a double boiler, add all ingredients and gently melt. Only add the first set of ingredients, not the color options!
  2. Add the color options. Play around with this until you get your desired shade!
  3. Remove from heat and let cool a few minutes.
  4. Add in the essential oil and stir well.
  5. Pour into lip balm tubes, lipstick tubes, or pots.
  6. Allow to cool and hard for at least 1 hour.

NOTES:

  • While the mixture is still wet, it will look dark, but will lighten as it hardens!
  • Test a skin patch before applying to lips, just like with anything else!

How to Make Pigmented Lipstick

Just because you’re making lipstick at home doesn’t mean that you should have to compromise on the quality and result of it. For maximum color payoff, consider using colorants like red carmine, beetroot, gremil colorant or red oxides. These will take your product pigmentation to a whole new level and help you achieve that vibrant pop of red color. Read More………

Also Read: An Overview On Bumpy And Rough Skin

An Overview On Bumpy And Rough Skin

0

Rough skin can affect women and men of all ages and the areas like face, hands, feet, neck, legs and other parts of the body also. This rough skin is generally due to the dryness and the dead skin cells.

What Is Rough Skin?

Sometimes the skin feels uneven, irregular and rugged to touch, especially on the feet, hands and also on the face, which is often caused due to the build-up of the dead skin cells and dryness. The natural process of renewal of the skin slows down with the age. But there are many factors that can contribute to the accumulation of the dead skin cells and can expedite bumpy and rough skin.

Causes Of Rough Skin

Sebum (oil) is produced by the skin naturally. When there is excess production of natural oil, it leads to pimples and acne. But sebum production is also beneficial as it protects the skin from infection and keeps the skin hydrated.

Dryness can be there if the skin is not replenishing and producing enough of the sebum.

Dryness can lead to bumpy, flaky, itchy and also red patches. It lacks water and appears dull and rough. The dry rough patches, tiny bumps, usually on the thighs, cheeks or upper harms is known as keratosis pilaris. It is a common skin condition and can be treated with creams containing lactic acid, alpha hydroxy acids and salicylic acid.

Possible Causes Of Rough And Dry Skin:

  • Smoking
  • Diabetes
  • Hypothyroidism
  • Cold weather
  • Dry air
  • Unstable skin pH
  • Excessive washing of the skin
  • Over going out in the sun
  • Various skin condition like seborrheic dermatitis, psoriasis and atopic dermatitis
  • Uncontrolled exposure to harsh chemicals

Rough Skin On Different Areas

  • Feet

There is a limited number of oil glands present on the feet, which generally means the skin is more thick and dry on the feet. Rough skin on the feet is accompanied by calluses which are caused by the friction created due to cracked heels, or by wearing shoes that result from the feet holding up the weight of the body.

  • Hands

The roughness in the hands is generally caused by the dryness of the skin. The hands are more susceptible to dryness because of the presence of fewer oil glands and hands are exposed to a number of grating factors. Contact with harsh chemicals, extreme weather conditions, and frequent washing of the hands reduces the moisture level from the skin and leads to rough skin on hands.

  • Face

If the moisturizer that you are using for the face is unable to improve the dry rough patches on the skin and other areas on the face like eyebrows, around the nose, then your skin condition is solely responsible for the rough skin on the face. The red, rough skin on the cheeks is mainly due to eczema while irritated rough skin with thick scales is generally due to psoriasis.

…..Read More…..

Read Also: 6 benefits of having soaked Fenugreek water

6 benefits of having soaked Fenugreek water

0

6 benefits of having soaked Fenugreek water

1. benefits of having soaked fenugreek water

Fenugreek seeds  have numerous health benefits. From giving your food an excellent flavour, Fenugreek seeds helps in reliving various common ailments. Today, in this article, we tell you why having soaked Fenugreek seeds is good for your health.

2. ​Acts as antacid

People who have the problem of acidity can try having soaked fenugreek seeds empty stomach in the morning. Have one teaspoon of soaked fenugreek seeds every day in the morning to relieve the problem of acidity.

3. ​Helps in controlling diabetes

Soaked fenugreek seeds work wonders in regulating blood sugar levels. One can also have fenugreek water to control their blood sugar level. You can also try having sprouted fenugreek seeds as they have 30 – 40 per cent more nutrients than just soaked fenugreek seeds.

4. Aids digestion

Soaked fenugreek seeds help keep acidity away, which in turn also promotes good digestion.

5. Lowers cholesterol

People battling with high cholesterol should definitely try having soaked fenugreek seeds to solve the problem. Even soaked fenugreek seeds can help a great deal in lowering cholesterol.

6. ​The right way to have fenugreek seeds

A tablespoon of soaked fenugreek seeds should be consumed first thing in the morning empty stomach. If you do not like the taste, you can add them to your curries.

…..Read More….

Read Also: HOW TO CREATE THE CLASSIC ROSEBUD LIP LOOK….