Home Blog Page 341

Wine Color Nails: A Must Have Nail Color!

0

You already know about wine hair…but wine color nails?! Call them burgundy, dark red, or maroon, but we prefer to refer to them as wine nails…because wine not? Wine color nails are the hottest nail trend this year and for good reason too! This easy-to-find nail color is a classic but with a new twist: a deep, burgundy color that will pair perfectly with a Cabernet Sauvignon on your next wine tour!

These wine nail looks are perfect all year round and they’ll give your manicure a super classy AND classic look. Whether you decide to go for matte wine colors or glossy wine colors, the choice is all yours – this wine look is here to stay…at least for the foreseeable future! Burgundy nail designs, or wine nail designs, are always classy and are perfect for almost any occasion. They work on long nails and short nails, and give your manicure a nice and polished look.

Wine Nails

#1. Wine Glass Nails

Have a glass of wine with these wine glass nails that are perfect for a weekend vineyard tour! Have a friend replicate the wine glass or head on over to your local nail salon.

#2. Dark Wine

This deep burgundy nail polish looks amazing on all nail shapes and length. Be sure to add a shiny top coat to get this effect. Definitely makes us crave a glass of red wine!

#3. Wine & Pink Nails

Who knew pink and burgundy would go so well together? This accent nail design is great all year round. Be sure to add tons of sparkles and a shiny top coat.

#4. Tribal Wine

Bring out your inner tribal child with this super cool tribal pattern nail design. This nail art can be a little hard to pull off, so bring this picture to your nail salon. Read more 

Also read: 11 Home Remedies for Cystic Acne

Seasonal Fruit Masks to Hydrate Your Skin

Oiliness, heat rashes, pigmentation and pimples are just a few of the summer skincare woes that one has to deal with. While it may seem that hiding away in your houses is the best way to protect yourself from sun damage, there is a lot more that you can do. Turn to seasonal fruit masks for help! Eating the seasonal fruits is just one way to aid your skin. You can also use these fruits to create natural, home-made remedies in the form face masks. These fruit packs will quickly boost your lusterless skin and leave you glowing from within. They can deeply cleanse, stimulate and give you a radiant complexion, all naturally!

Mango and Chia Hydrating Mask

This mask is suitable for all skin types, it revitalizes and rejuvenates by balancing and moisturizing your skin.

Ingredients –

  • Two Tablespoons of mango pulp
  • One teaspoon of chia seeds
  • One teaspoon of aloe vera gel

Directions –

  • Blend or mash half a mango until smooth and creamy. Do not mash the mango with peels.
  • Soak the chia seeds in one tablespoon of cool water. Mix with a whisk and let it stand for a few minutes.
  • Whisk again, and let stand for 10 minutes. Whisk the mixture again and let it sit in the refrigerator for 15 minutes or till they expand into a gel.
  • Scrape the gel fresh from the inside of aloe vera leaves.
  • Combine all the ingredients in a clean and dry mixing bowl and you can add or decrease the chia seeds gel according to the consistency you want for the mask.
  • Apply it on your face and leave on for about 15 minutes.
  • Use a warm and moist washcloth to remove the mask gently. Follow up with a splash of cool water on the face to rinse completely and pat dry with a soft towel. Read More……………..

Also Read: New insights into how skin can regenerate after severe burns

New insights into how skin can regenerate after severe burns

People who suffer severe burns or extensive skin injuries are often left to live with extreme scarring, disfigurement, and skin that feels chronically tight and itchy. That’s because the body’s healing processes have evolved to focus on preventing infection by quickly closing up wounds, rather than regenerating or restoring normal skin tissue.

New research led by Dr. Jeff Biernaskie, PhD, has made an exciting leap forward in understanding how skin heals, which could lead to drug treatments to vastly improve wound healing. The study, published in the scientific journal Cell Stem Cell, was co-led by Dr. Sepideh Abbasi, PhD, Sarthak Sinha, MD/PhD candidate and Dr. Elodie Labit, PhD, postdoctoral fellow.

“We identified a specific population of progenitor cells that reside within the dermis, the deep connective tissue of the skin. Progenitor cells, are unique in that they are able to undergo cell division and generate many new cells to either maintain or repair tissues. Following injury, these dermal progenitors become activated, proliferate and then migrate into the wound where they generate nearly all of the new tissue that will fill the wound, both scar and regenerated tissue,” says Biernaskie, professor of stem cell biology in the University of Calgary Faculty of Veterinary Medicine (UCVM), and the Calgary Firefighters Burn Treatment Society Chair in Skin Regeneration and Wound Healing.

Biernaskie’s intensive study, five years in the making, offers new knowledge on why certain dermal cells are able to regenerate new skin, rather than disfiguring scar tissue. Using cutting-edge genomics techniques to profile thousands of individual cells at different times after injury, the research team compared scar-forming versus regenerative zones within skin wounds.

“Remarkably, we found that although these cells come from the same cellular origin, different microenvironments within the wound activate entirely different sets of genes. Meaning, the signals found within ‘regenerative zones’ of the wound promote re-activation of genes that are typically engaged during skin development. Whereas, in scar-forming zones these pro-regenerative programs are absent or suppressed and scar-forming programs dominate.”

Working with these findings, the researchers then showed it’s possible to modify the genetic programs that govern skin regeneration. Read more

Read also: DIY Hair Color Like a Pro


DIY Hair Color Like a Pro

The thought of dying your own hair might seem intimidating — after all, it is permanent or semipermanent — but the pros say it’s possible to have salon-quality results at home if you stick to some guidelines. Of course, stylists want you to come see them in a perfect world, but many acknowledge box color has its place.

“At-home color is good for people who have a lot of gray or those who can’t get to the salon easily,” says Doug Macintosh, color director at Kieran McKenna Salon in New York City. “Coming into a salon isn’t always convenient or affordable and that’s when a box color is helpful.”Here are top salon colorists’ advice for making the most of DIY permanent color so you have the best results at home.

Know When You Have to Go to the Salon

There are some color jobs that require a pro. “The further away you want to go from your natural color, the bigger reason you need to go to a professional,” says Colin Lively, a colorist at Eddy’s on Coventry in Cleveland, OH. Macintosh says that going more than two shades lighter or darker than your natural color sets you up for unpredictable results.

Bleaching or lightening your hair can also be a challenging job for an amateur. “Without knowledge of how color lifts, the density of hair and hair texture, it’s hard to gauge how long to leave on bleach to get the result you’re looking for,” says Nicole Brumley, owner of Kiiro Hair Lab in Springfield, MO. “I’ve had to fix quite a few mistakes with DIY bleaching, so I wouldn’t do home lightening.”

Select the Right Shade

To match your color, standing under the store’s lights won’t help much. “It’s essential to go outside to see the true color and take a close-up picture of your hair,” says Jet Rhys, president of Jet Rhys Hair Salon in Solana Beach, CA. Having that image of your shade in daylight will be helpful to match with the picture on the box, she explains. Read more

Read also: Incredible Benefits Of Castor Oil For Skin And Hair


Incredible Benefits Of Castor Oil For Skin And Hair

0

Castor oils is a vegetable oil derived from the seeds of the oil plant Ricinus communis. This oil plant is primarily grown in Africa, South America, and India and oil is produced by cold-pressing castor seeds and then applying heat.

Benefits of castor oil for skin and hair

The problem with most beauty products is that they strip the oil out of your skin. Your skin is robbed of oil, it compensates for the lack of moisture by producing more oil.

2. Gives Healthy, Shiny Hair

This oil is the best oil to enrich your scalp and contains ricinoleic acid and omega-6 fatty acids .When massaged onto the scalp it helps in increasing the blood circulation which improves hair growth and this oil also moisturizes and conditions your hair naturally.

3. Prevents Hair Fall

You can apply castor oils once a week mixed with methi seed powder and use it as a hair mask along with steam. This prevents hair fall and also makes the roots stronger.

4. Treats Wrinkles

It can be a great natural remedy for wrinkles and penetrates into the skin and boosts the production of collagen which softens and hydrates the skin. It rejuvenates the skin by making it softer and smoother. Apply a small amount of castor oil over the wrinkled area and leave it overnight. Read More…….

Also Read: Unleash the Power of Honey for Skin and Health

The 7 Best Weight Loss Tips You’ll Ever Read

We asked seven dietitians for the single most important weight loss tip they share with patients. May their tips offer you some inspiration:

Tip 1: Don’t let hunger deter you from sticking with your diet.

Whatever diet you choose — and many different diets can help you lose weight — don’t give up because you get too hungry.

“Hunger is one reason many people don’t stick with a weight loss plan for more than a few weeks. When you eat less, your fat cells release more hunger hormones, which increases your appetite,” says Dawn Noe, RD, LD, CDE. “Higher-protein, lower-carbohydrate meal plans are best for controlling your hunger and appetite.”

When you have diabetes, a diet with fewer carbs (like bread, pasta, rice, desserts, sugary beverages, juice) is also important because you’ll need less insulin. And that can help prevent hunger, fat storage and weight gain.

Replace processed carbs like white bread, bagels, muffins or donuts for breakfast with high-protein foods like eggs, or Greek yogurt mixed with chia seeds and berries. You’ll find that you stay fuller, longer.

Tip 2: Don’t eat a carbohydrate unless it has fiber attached to it.

“This method forces you to forgo the bad carbs (candy, white bread, soda) and stick only with high-quality carbs,” says Kristin Kirkpatrick, MS, RD, LD. “The more fiber in your diet, the better!”

Fiber helps improve blood sugar control, helps lower cholesterol, and reduces your risk of chronic diseases like diabetes, colorectal cancer and heart disease.

Foods rich in fiber include legumes (dried beans, lentils), veggies (Brussels sprouts, broccoli, spinach squash, sweet potatoes) and fruit (apples, berries, oranges, pears).

Tip 3: Focus on healthy behaviors, not the number on the scale.

It’s easy to get discouraged when you look only at your weight. “Focus instead on making good food choices, watching portions and exercising regularly,” says Anna Taylor, MS, RD, LD.

Read More

Also Read: Unleash the Power of Honey for Skin and Health

Unleash the Power of Honey for Skin and Health

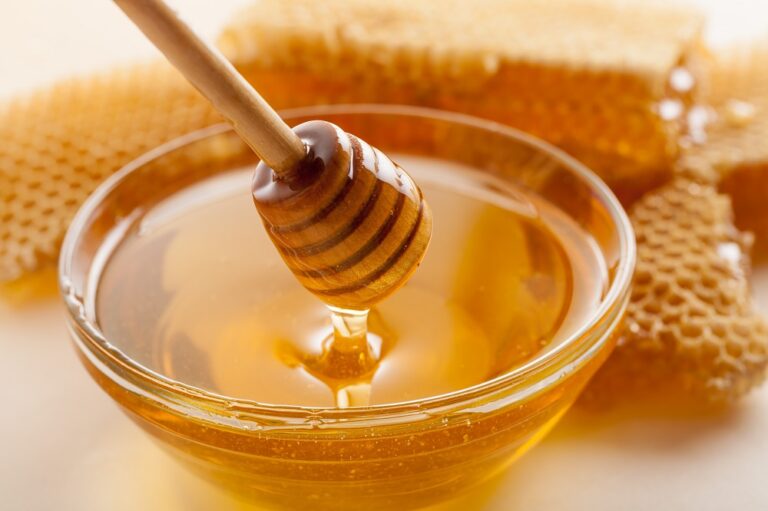
Unleash the Power of  Honey has rightly been called nature’s sweet nectar. Not only is it one of the most versatile ingredients to cook with, but is also known to be rich in minerals such as iron, calcium, and magnesium.

Here’s everything you need to know about honey and why you should include it in your daily beauty regimen.

For Fabulous Skin

There’s no need to splash out on expensive spa facials when you have some honey lying in your cupboard. Give your skin the benefit of honey’s powerful antioxidant, anti-inflammatory and ultra-moisturizing properties and use it as a face mask.

For a naturally exfoliating facial, just add some sugar to create a moisturizing scrub. Honey is a fantastic moisturizer and works wonders on patches of dry skin.

Use it to soften up those knees and elbows, and it will even work wonders on chapped lips. Just rub on some honey, leave it to work on your skin for up to 30 minutes, and then wash off.

Honey is also great for relaxing your body. Give your body an added treat by pouring in a few drops of raw honey in your bath water. It helps to soothe tired muscles and moisturize your skin. Try adding other essential oils like lavender oil. Skin Tip: Mix two table spoon honey with two teaspoons of milk, apply on your face and let the skin soak up its natural goodness for about 10 minutes and rinse off.

For Silky Smooth Hair

Honey has properties that act as a natural agent for moisturizing hair and cleansing scalp. It leaves you with silky smooth hair without stripping them of natural oils. Hair Tip: Add a teaspoonful to your usual shampoo to soften your hair, or combine with olive oil for a deep conditioning treatment – leave to work on damaged locks for 20 minutes before shampooing out. 

A Natural Energy Booster

Forget your coffee fix and ditch the energy drinks. It’s time to say goodbye to the sugar high that more often than not leads to a rapid energy crash and burn. Tip: For a natural energy boost, use honey in place of sugars and sweeteners in your tea, baking and cooking. You’ll soon notice the difference in your energy levels.  Read More……………..

Also Read: DIY Acne Pads

DIY Acne Pads

0

Acne and oily skin can be a pain in the butt to deal with, but this DIY acne pads can take care of that in a pinch! Made with all natural ingredients, these DIY acne pads control excess oil, fight off bacteria, and get rid of breakouts!

Store bought acne pads can contain some pretty harsh ingredients and chemicals that can actually make your skin worse, and that’s why we love this all natural version! Not only are these natural acne pads better for your skin, but they’ll also cost you almost nothing to make…and that’s something to brag about!

DIY Acne Pads Recipe

homemade acne pads

You’ll Need:

  • 1 cup alcohol free witch hazel
  • 20-30 drops essential oil of your choice such as tea tree or lavender
  • cotton rounds
  • clean, airtight jar or container

Directions:

  1. Clean the jar and fill with cotton rounds.
  2. Pour enough of the witch hazel liquid to cover the cotton rounds.
  3. Add your favorite essential oils and close the jar. Shake gently to mix.
  4. Use as you would any other acne pads, by taking a cotton round out and swiping onto the face or body. Be sure to remove any traces of makeup before hand.

Essential Oils:

acne pads

Tea tree oil is the best essential oil to use for acne prone and oily skin, but should not be used on sensitive skin.

Lavender oil is best to use for those with sensitive, dry, or combination skin.

Read more 

Also read  How Rice Water Is Beneficial for Your Skin, Hair and Health

How Rice Water Is Beneficial for Your Skin, Hair and Health

0

There are numerous beauty and health secrets hidden in our kitchen, and rice is one of them. Not many of us may be aware that the water we usually throw away after soaking or cooking rice is actually loaded with many health and beauty benefits. For centuries, Asian women have been using this magic portion to treat a number of skin, hair and health issues. Well, if you wish to avail the benefits of rice water too, it will be a good idea to browse through this article as it discusses rice water benefits in detail.

What is Rice Water and Its Nutritional Value?

Rice water is nothing but the leftover water that remains after you cook rice. However, sometimes the water that is used for soaking the rice is also used for beauty and health purposes. Rice water is high in starch and also contains carbohydrates, plant inositol, other organic substances, etc. Some of the prominent or vital nutrients present in rice water are as follows:

Nutrient Value 
Protein16 per cent
Lipids10 per cent
Triglycerides10 per cent
Starch9 per cent

The values mentioned above are approximate nutritional content present in a handful of white rice that is boiled in 2 cups of water.

How to Make Rice Water?

The best thing about rice water is that you can easily make it at home easily. There are three ways of making rice water. The first method is called boiled rice water and includes the following steps:

Take rice as required and wash it nicely with cold water a couple of times.

  1. Ensure that the water you discard after washing the rice is dirt free.
  2. Add double the amount of water, boil rice in it.
  3. Once the rice becomes tender, drain the water in a vessel and keep aside.
  4. Make sure there are no rice grains in water, if there are, you can strain the water.
  5. Let the water cool down before you store it in a glass jar, use as desired.

However, if you do not have that much time on your hands, you can try a quick fix with no-boil rice water method. To make rice water for face, hair or other health benefits, all you need to do is wash the rice thoroughly and let it sit in water for 15-20 minutes. Strain this water and use it as desired.

On the other hand, if you have time and are wondering how to make fermented rice water, well, it is very simple and the best way of making rice water because it has high pH levels. All you have to do it wash and soak the rice and let it sit in water for two days. Strain and use the water as desired. You can store this water in the refrigerator too.

Read more 

Also read  The Dermatologist-Approved Guide to Summer Skin Care

11 Home Remedies for Cystic Acne

0

If you’ve ever suffered from cystic acne, you KNOW how painful and embarrassing it can be. Cystic acne is basically the same as regular acne but times 1000. It can linger on for months, even years. It’s extremely painful, a lot bigger, a lot redder, and just overall very unpleasant. If you’ve tried over the counter medicines to treat cystic acne and that hasn’t worked, there ARE other ways you can try as well. These home remedies for cystic acne come highly recommended from people who have had cystic acne, including myself.

How Does Cystic Acne Form?

In short, acne causing bacteria gets under the skin and forms large, often painful bumps. These under the skin lesions cause skin inflammation, which can last for months or years if not treated. A cystic pimple is something to take seriously, as this type of acne is unlike regular breakouts. Below we’ve compiled 11 of the best home remedies for cystic acne. Before trying any of these home remedies, we do suggest you consult your dermatologist

Cystic Acne Home Remedy Recipes

#1. Ice

Ice works great when trying to reduce the size of your cystic acne, or any pimple for that matter! Although this wasn’t completely eliminate it, it WILL reduce the size. The best thing to do is apply ice immediately to the acne when you see it. Drop a couple of ice cubes in a sealable bag, and hold it against the affected area for 10-15 minutes. You should notice a big difference in the swelling.

#2. Apple Cider Vinegar

ACV is great for ALL skin ailments, but especially for acne-prone skin. ACV works as a natural astringent and toner that balances your skin’s pH levels. Basically, if used on a regular basis, it will restore your skin’s natural pH balance, which is one of the things that causes cystic acne in the first place. Mix equal parts AVC with equal parts water and apply all over face with a cotton ball. Leave it on overnight, and repeat the process every night before bed. Make sure you wash your face first!

#3. Egg Whites

Egg whites have been used for thousands of years in the treatment of cystic acne. They basically have the ability to pull out grease and oil from your pores…which is what you need. Simply separate the egg white from an egg, whisk it a bit, and apply directly to your face. Leave on for 10-15 minutes until it tightens, and rinse off with warm water. Repeat 2-3 times a week. The egg white will not only remove dirt, impurities, grease, and oil, but will also tighten and shrink pores, and smooth out imperfections.

#4. Lemons

Lemons have a very high acidic content and as such are an integral part of treating cystic acne. Lemon juice will reduce the size, eliminate redness, and erase scars due to its bleaching properties. Mix 1 part pure, organic lemon juice with 1 part water and apply to affected area daily using a cotton ball. Bonus: lemon juice also helps to reduce the appearance of acne scars!

#5. Honey

Honey has amazing anti-bacterial properties and is very often used in treating cystic acne breakouts. Make a honey paste by combining 1 part lemon juice with 1 part honey and apply it to the affected area. Leave on for 10-15 minutes and rinse off. You can apply this quick mask to your cystic acne every other day. If you have sensitive or dry skin, leave out the lemon juice, and only use honey.

#6. Aspirin

An at-home aspirin mask can reduce inflammation, remove dead skin cells, and calm pain. Aspirin is a close cousin to salicylic acid and so it works really well in a pinch! To make an aspirin spot treatment, crush up an aspirin really well and mix it with a little bit of water to form a paste. Apply directly to the cyst and leave on until dry. Remove with warm water and pat dry. Use once a day until the bump subsides. Check out other ways to use aspirin in your beauty regimen! Read more 

Also read: The Dermatologist-Approved Guide to Summer Skin Care