

Home Blog Page 342

Anti Aging Creams: Your Guide To Youthful Skin

Anti Aging creams are developed to slow down the aging process by promoting the synthesis of collagen, protecting free radicals damages, rejuvenates epidermis ( Outer layer of skin)  and regenerates dermis (Inner layer of skin). There is no doubt, and anti aging beauty products like anti aging serums and night creams are definitely in fashion. People buy these eye creams and anti-aging creams or lotions in the hope that these would work magically.

What Is Aging Skin?

Skin aging is a complicated biological phenomenon marked by various changes due to exposure to extrinsic and intrinsic factors.

Extrinsic factors involve the environment around us, especially the harmful ultraviolet (UV) radiations of the sun. Other than this, pollution and poor nutrition also exert a significant impact on skin aging. These extrinsic factors lead to loss of elasticity, coarse wrinkles, laxity, rough and dull skin texture.

Another is the intrinsic factors, i.e. metabolic or genetic, that leads to chronologically physiological modifications. According to scientific researches, during intrinsic aging, the major part which gets affected is the basal cell layer of the skin. Apart from this, the proliferation ability of keratinocytes, melanocytes and fibroblasts also decreases. In result, the components of skin structure i.e. fibrillin, collagen, elastin, and oligosaccharides, all degenerate.

Are Anti Aging Creams Efficient Against Aging Symptoms?

Ingrained with effective and adequate ingredients, anti-aging creams work in a progressive way to fade the impact of aging. Latest skincare and anti-aging formulations are formulated with advanced preparation concepts and active ingredients to fight skin aging. These ingredients can be integrated deeply into the skin and act upon the alterations to repair the damaged skin structure and function.

Retinol For Skin

An acid derived from Vitamin A is essential for healthy skin development. It helps to prevent ageing changes to the skin by increasing cell turnover and promoting collagen.

Retinol is a gold standard anti aging ingredient recommended for use in anti-aging and anti-wrinkle products, even skin tone care, age spot treatment, skin resculpting and smoothing products.

Hydrolyzed Collagen & Elastin 

The proteins – fundamental structures of all living organisms – have been the subject of studies and technological improvement since the beginnings of humanity. Proteins form the skin and hair. The collagen is a protein of fundamental importance in the constitution of the extracellular matrix of the connective tissue, being responsible for the big part of its physical properties.
….Read More…..

Read Also: REJUVENATE YOUR SKIN WITH AN ALOE VERA FACE MASK

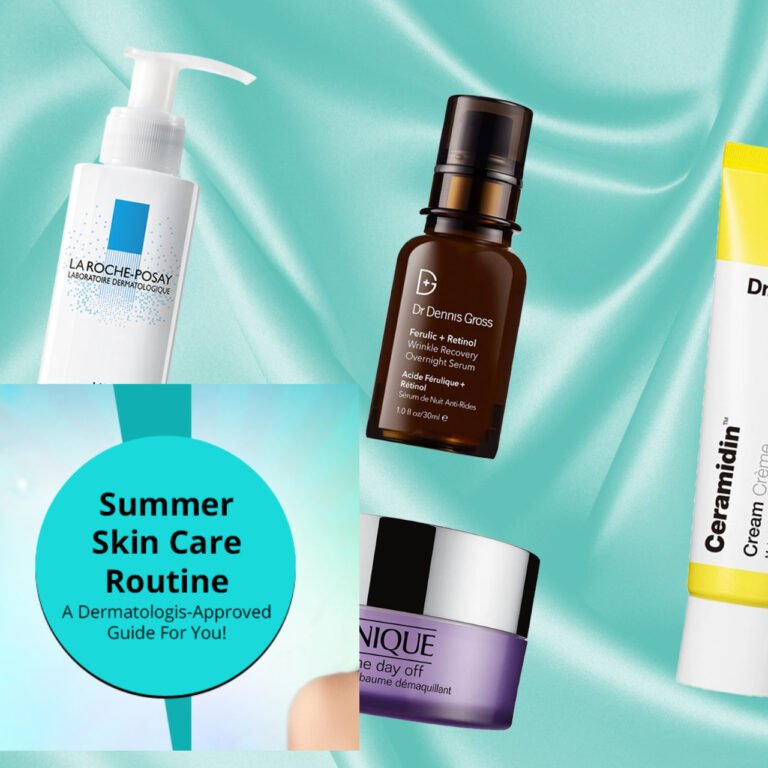
The Dermatologist-Approved Guide to Summer Skin Care

0

Dermatologists spend summers underneath the same sun as the rest of us, but somehow their skin manages to stay clear and glowing all season long. Sure, it’s part of the job description, but even the professionals have to work a bit harder to prevent breakouts and minimize sun damage during the summer months. Warm weather brings a whole slew of skin-care challenges and questions like, “Do I really have to moisturize even if it’s 100 degrees out and my face feels oily?” (Spoiler alert: Yes.) Luckily, the experts know exactly how to face summer — pun intended — head on. summers

REJUVENATE YOUR SKIN WITH AN ALOE VERA FACE MASK

0

REJUVENATE YOUR SKIN WITH AN ALOE VERA FACE MASK

To the ancient Egyptians, the aloe plant held the secret to eternal youth and beauty. There is also evidence they used it to treat burns, heal scars, and even aid in the embalming process. Cleopatra was said to have used aloe vera face masks on a regular basis. While the ancient Chinese were said to also use it to achieve a smooth, pleasing complexion. So aloe vera as part of a beauty routine is nothing new, and the benefits are just as real and as easy to enjoy today as they were thousands of years ago.

TOP 7 ALOE VERA FACE MASKS TO TRY

Like all the best face masks aloe vera face masks are incredibly simple to make and use. Below, we’ll go over our 7 favorite DIY aloe vera masks.

1) The aloe vera and lemon mask

This one is great for reducing blemishes, minimizing acne scars and evening out the sometimes blotchy appearance of tanned skin. All you need to make it is some aloe vera gel and lemon juice.

  • Combine 2 tbsp of aloe vera gel and the juice of half a lemon in a bowl.
  • Mix it thoroughly until the lemon juice is completely blended into the gel.
  • Apply it to your face evenly and leave it on for 10 minutes.
  • Rinse off with lukewarm water and pat dry.

2) The aloe vera and cucumber mask

This mask is especially good for treating pigmentation marks, blemishes left by pimples as well as scratches. All you’ll need to make it is some aloe vera gel, some cucumber slices and a few drops or rose water (optional).

  • Mash several slices of cucumber.
  • Combine in a bowl with 2 tbsp of aloe vera gel and the rose water.
  • Mix thoroughly until you have as smooth a paste as possible.
  • Apply to your face and leave on for 30 minutes.
  • Rinse off with lukewarm water and pat dry.

3) The honey and aloe face mask

This aloe face mask is great for treating oily and acne-prone skin. It restores a natural luster and doesn’t leave a greasy feeling in its wake. All you’ll need is an aloe leaf and some honey.

  • Boil the aloe leaf in water and then mash it into a paste.
  • Add a tbsp of honey and mix thoroughly.
  • Apply to your face when cool and leave for 20 minutes.
  • Rinse thoroughly with cold water.

….Read More….

Read Also: How To Remove Blackheads Naturally

How To Remove Blackheads Naturally

0

How To Remove Blackheads Naturally

In the hustle of life, your skin goes through all kinds of grime like dirt, pollution, sun rays, etc. These things accumulate on your skin on a daily basis. Thus, the skin pores and hair follicles get clogged by this dirt, sebum, oil, and dead skin cells, resulting in Blackheads.

DIY To Get Rid Of Blackhead

The first and foremost thing that you should do before trying anything is to moisturize your skin with a soft cream or moisturizer. Drinking adequate amount of water can also keep your skin hydrated.

1. Exfoliate your Skin – If exfoliation is not included in your skincare regimen, then it’s time that you start exfoliating your skin. You can use a cosmetic scrub (suitable for your skin texture) to pull out the dirt, oil, and dead skin cells from the skin pores. Gently rub on the blackhead’s affected area while exfoliating. Do this at least once a week.

2. Facials – Facials can really help in curbing blackheads to an extent. DIY facials can be a refreshing way to clean the dirt and debris clogged in the skin pores. It also restores the glow of your skin, thus making your skin smooth and shiny.

3. Invest in the Right Products – If you have blackheads or acne-prone skin, then you must think of reconsidering your skincare products. Try to buy comedogenic products that are specially formulated to not clog the skin pores, thus preventing your skin from acne or blackheads.

Natural Remedy For Blackheads Removal

Here are some of the natural ways to get rid of blackheads. These natural home remedies can help you in eliminating the blackheads to a great extent. The natural ingredients in these remedies will have several other benefits for your skin also. So without any further delay, let’s take a look on these remedies:

1. Baking Soda – It is one of the natural things that exfoliate the skin. Make a paste of baking Soda by adding water to it. Apply the paste onto the blackhead affected area. Gently rub the skin using your fingertips. After a few minutes of rubbing, wash it off with water. Do this twice a week.

2. Clay – The dirt and oil-absorbing properties of Clay make it ideal for removing blackheads from the pores of your skin. Clay masks made of fuller’s earth and Kaolin Clay can help clear the pores. You can also apply clay on your face, covering all the areas except eyes and mouth. Leave it on for a few minutes. Then, wash it off with water to get rid of blackhead.

3. Steaming – Exposing your skin to steam is a great way to remove blackheads. Steam makes the skin soft and sweating, thus ideal for cleaning the accumulated dirt and oil in the skin pores. It also clears the skin, making it smoother and glowing.

4. Lemon and Honey – Make a paste of honey, lemon, and a little bit of salt. The lemon helps in cleaning the oil and greasy dirt, while the fine granules of salt will act as a non-abrasive scrub for the skin. The honey will moisturize your skin, thus making it soft and easy to work on. Apply the paste on the blackhead affected area. Gently scrub the paste for a few minutes. Wash with warm water. Try these 2-3 times a week.

…..Read More….

Read Also: Home Remedies for Itchy Feet

Yogurt for Hair – 10 Easy Home Remedies for Your Daily Woes

0

Getting strong, flowing and shiny hair may seem like a dream for many, but it really isn’t. Yes, shampoos, fancy conditioners, and those serums you find being marketed may work, but they address the symptoms, not the problem itself. The truth of the matter is that your hair needs nourishment, and although you can hide away that dandruff using that conditioner, it’s not going to fix itself until you address it.

How do you get that nourishment? The answer is yogurt. Rich in fatty acids and various vitamins, yogurt gives your hair the pick-me-up it needs and gets it growing.

Benefits of Curd for Hair

The curd is not only good for your body and general health but for your hair too. Here are some of the benefits of curd for hair growth listed below.

1. Boosts Immunity

The vitamins and nutrients in yogurt are good for boosting immunity. Poor immunity equates to frequent or rapid hair loss, but with a cup of yogurt, you won’t have to worry about that.

2. Rich in Protein

Your hair follicles require protein to be strong and healthy. Just by adding in some curd or applying some on your scalp, you’ll be going a long way towards nourishing them. Protein also boosts metabolism and that influences your hair growth directly too.

3. Hydrates Your Scalp

Yogurt is known to hydrate your scalp very well. It rejuvenates your hair follicles and gets rid of that dreaded dryness and dullness, especially during the winter months.

4. Fixes Frizzy Hair

Frizzy hair is a huge problem faced by many. Yogurt softens your hair follicles and works as a soothing agent. It keeps your style in place.

fixes frizzy hair

5. Eliminates Dandruff

Those white flaky particles are detestable to look at but you don’t have to worry anymore now. Just apply some yogurt and leave it on for 40 minutes. Rinse and voila – your dandruff is gone!

6. Improves the Shine Factor

Yes, curd adds shine to your hair and makes it lustrous.  Making a curd mask and applying it to your hair for half an hour will work magic on those hair follicles. Your hair locks will simply look gorgeous and you can rinse it with shampoo afterwards.

7. Makes Your Hair Strong

Are your hair follicles too weak and come apart too easily? If yes, then you should consider mixing curd with olive oil, curry and basil leaf paste and applying that to your hair. It’s shown to strengthen it by delivering the right blend of nutrients to your hair follicles.

8. Conditions Your Hair

Yes, curd also works as a natural hair conditioner. It eliminates itchiness and irritation on your scalp and works even better when applied by mixing it with two teaspoons of honey. Your hair will become softer and silkier with this blend and it even moisturise your scalp in the process, eliminating dryness naturally.

Best Ways to Use Yogurt for Long and Shiny Hair

Looking for some of the best homemade remedies which use curd for long and shiny hair? Try these out these below.

Read more 

Also read  11 Homemade Night Creams for Healthy Skin

7 Tips for Curly Hair You Should Follow

0

Girls with curls may seem to have the best hair, but unfortunately, curly hair can be very hard to care for. Anyone that has straight hair always wants curly hair, and anyone that has curly hair wants straight hair. The grass is always greener, right? But for those with curly hair, it can be a constant and daily struggle to control and tame unruly hair. Curly hair can be hard to brush, hard to style, and can become very frizzy if given the chance.

Below, we’ll share our top 15 tips for curly hair and what you can do to make sure that your bouncy tresses are looking fabulous all day long. When it comes to tips for curly hair, one of the most important ones is to use the right products. Using the right combination of products and taking care of your curly hair is KEY to healthy, shiny, and bouncy curls that you can actually be proud of!

#1. Get Regular Trims

This one may be pretty obvious, and it applies to ALL hair types, not just curly . Getting a trim every six to eight weeks to crucial to keeping hair healthy and shiny. Getting rid of those split ends will make your hair not only look great, but will also encourage healthier growth. Don’t feel like paying for a trim? Check out this tutorial on how to cut your own hair.

#2. Comb Your Hair Properly

Believe it or not, most people comb their hair the wrong way. This can cause a lot of damage and breakage over time, so it’s important to know how to properly comb your hair. Curly hair is especially fragile, so it’s imperative that you always comb from the bottom up. Additionally, you should always use a wide tooth comb when brushing curly hair, and never a brush. This is because a brush can break hair, while a comb is much gentler.

#3. Use a Conditioning Treatment

Curly haired gals should use a conditioning treatment on a regular basis, especially when the hair is looking dull or dry. Use your fingertips to apply a small, dime sized amount of conditioning treatment to the ends. Which conditioning treatment you use, is dependent entirely on the type of hair you have. Those with thicker curls should use a cream based leave-in conditioner or oil. For thinner curls, use a conditioning spray which can be used all over the hair. For the most part, you can use conditioning treatments on wet or dry hair – see which method works best with your curls!

#4. Use the Right Products

Using the right mix of products is crucial to healthy, bouncy curls. Most people use a mixture of hair products to achieve a specific look, and the same goes for. The best combination is a serum plus a mousse, OR, coconut oil and a styling gel. Both of these combinations tame frizz, add shine, hydrate, and leave hair beautiful and bouncy. If you’d rather not combine products, simply use a serum on wet hair and distribute it evenly throughout the hair. Serums are lightweight but are great for thick, curly hair to tame frizz and add shine.

#5. Use a Diffuser

Using a diffuser on curly hair is super important as it evenly spaces out the heat that goes onto the hair, prevents frizz, and adds great volume. If you’re not already using a diffuser, you definitely should – it will make a world of difference for your curls! To begin, simply towel dry hair gently and apply your serum and a heat protectant. You should be using a heat protectant every time before you use any heating tools. Grab a chunk of hair and place it in the diffuser for a few seconds. Go around your whole head until hair is almost dry. No need to dry hair 100%, letting your curls air dry can prevent frizz. Read more

Also read: DIY Uplifting Eye Cream Recipe

11 Homemade Night Creams for Healthy Skin

0

There are numerous skin care brands out there with products claiming to be able to make your skin softer, younger and blemish free, but how many of them really work? What is more, with the price tags attached to many of them, many of us often wonder if it is even worth it. The truth is that our skin does need a bit of help when it comes to staying clear and youthful looking, something that becomes increasingly difficult with age. Luckily, most of the ingredients used in even the most expensive skin care products are really things you can find in your very own kitchen, so rather than burning a hole in your pocket, just step into your kitchen and whip up your own batch of DIY night creams.

Homemade Night Creams for Skin Care

No matter what type of skin you have, we have a recipe for you:

1. Almond Oil Night Cream

This is a great homemade night cream for dry skin, with Vitamin E in almond oil, cocoa butter and honey.

Almond Oil Night Cream

Ingredients: 

  •  Almond oil – 1 tablespoon
  • Cocoa butter -2 tablespoons
  • Honey – 1 tablespoon
  • Rosewater – 2 teaspoons

How To Prepare:

  • Melt the cocoa butter with the almond oil.
  • Remove the mix from heat and then add the honey and rosewater to it.
  • Mix well and leave to cool.
  • Store it in the fridge and use at bedtime.

 2. Avocado and Yoghurt Night Cream

 Rich in vitamins and minerals, avocado is an amazing ingredient to use for skin care. This recipe is a great homemade night cream for anti-ageing.

Avocado and Yogurt Night Cream

Ingredients:

  • Avocado – 1
  • Yoghurt – 1/2 cup

How To Prepare:

  • Mash the avocado well in a bowl until it reaches a paste-like consistency.
  • Blend the yoghurt and avocado well and store in an airtight container at a cool and dry place.
  • Use twice a week.

3. Apple Night Cream

With apple as an active ingredient, this recipe makes an amazing night cream for glowing skin.

Apple Night Cream

Ingredients:

  • Rosewater – 5 tablespoons
  • Apples – 2
  • Olive oil – 1 teaspoon

How To Prepare:

  • Peel the apples and cut them after removing the seeds.
  • Put the pieces in a blender and blend with olive oil.
  • Once the mix is smooth, pour it into a boiler.
  • Heat on a low flame until hot.
  • Remove from heat. Once it is cool, mix with rosewater.
  • Store in an airtight container in the fridge.
  • Use within six days.

4. Aloe Vera Night Cream

This is an amazing night cream for acne-prone skin as it contains aloe vera, known for its magical healing properties.

Aloe Vera Night Cream

Ingredients:

  • Aloe vera extracts – 2 tablespoons
  • Lavender oil – 1 teaspoon
  • Primrose oil – 1 teaspoon

How To Prepare:

  • Mix the lavender oil and primrose oil with the aloe vera extracts until it becomes a smooth paste..
  • Store in an airtight container and use every night before bed.

5. Green Tea and Aloe Night Cream

Get rid of the damage that environmental pollution does to your skin with this detoxing night cream for face.

Green Tea and Aloe Cream

Ingredients:

  • Green tea extract – 1 teaspoon
  • Almond oil – 1 tablespoon
  • Rosewater – 1 tablespoon
  • Essential oil – 1 teaspoon
  • Aloe vera juice – 1 tablespoon
  • Beeswax – 1 tablespoon

How To Prepare:

  • Use a double boiler or a makeshift one.
  • Pour the almond oil with the beeswax into it and melt them together.
  • Remove from heat and then mix the aloe vera.
  • Add the rest of the ingredients and mix well.
  • Store in an airtight container. Use before going to sleep.

Read more 

Also read  DIY Grape Skin Care Recipes

Home Remedies for Itchy Feet

Itchy skin, medically known as pruritus, may develop on a single area of the body or the entire body.

Itchiness causes a sensation on the skin that makes you almost desperate to scratch it and can be highly irritating.

While itchy skin can occur in any part of the body, the feet are more prone to this problem because they are more frequently sweaty as compared to other body parts.

Here are the top 10 home remedies for itchy feet.

1. Cold Compress

To get instant relief from itchy feet, nothing works better than a cold compress.

The sensations of both cold and itching travel along the same nerve fibers in the body, so applying a cold compress can bring immediate relief from itchiness. The cold temperature also helps numb the area, which in turn helps reduce the itching sensation.

  • Wrap a few ice cubes in a clean cloth. Put this ice pack on the itchy area of your feet for a few minutes. Take a break for 30 seconds and reapply it. Repeat until the itching stops. Use this remedy as needed.
  • You can also run cool tap water over the affected feet for as long as necessary.

Caution: Never put ice directly on the skin, as it can lead to frostbite.

2. Apple Cider Vinegar

Apple cider vinegar has been used as a natural remedy for centuries to ease itchiness of any type. Being acidic in nature, it helps kill fungi and bacteria that can be responsible for itchiness on your feet. It also helps restore the natural pH balance of your skin.

  • For topical use: Mix 1 part raw, unfiltered apple cider vinegar with 3 parts warm water in a small tub or a bucket. Soak your feet in this solution for 15 minutes, then thoroughly pat them dry. Do this twice every day for 1 week or so.
  • For consumption: Add 2 teaspoons of raw, unfiltered apple cider vinegar to a glass of warm water. Optionally, add 1 teaspoon of raw honey. Drink it twice daily.

3. Colloidal Oatmeal

Colloidal oatmeal (oats ground into an extremely fine powder) helps soothe and comfort itchy skin, even if the problem is just on your feet. It contains anti-irritating, anti-inflammatory and soothing properties that provide instant relief from itching.

For topical use:

  • Add ½ cup of colloidal oatmeal to a small tub filled with lukewarm water. Soak your feet in this water for at least 15 to 20 minutes. Use this remedy up to 3 times a day, depending on the severity of your condition.
  • Alternatively, add a little water to 1 cup of colloidal oatmeal and leave it until it thickens into a paste-like consistency. Apply this mixture on your itchy feet, cover it with a cloth and leave it on for 30 minutes. Use this remedy once daily.

4. Aloe Vera

If you have itchy feet due to extremely dry skin or scabies, aloe vera can come to your rescue.

Aloe vera contains excellent anti-inflammatory, antibacterial and antifungal properties. Plus, it contains vitamin E that helps keep the skin moisturized and in turn reduces itching.

…..Read More…..

Read Also: DIY Grape Skin Care Recipes

DIY Uplifting Eye Cream Recipe

0

Why spend an exorbitant amount of money on an eye cream, when a homemade one can do the same job..if not better?! This Diy uplifting eye cream recipe erases dark circles, de-puffs, and makes the skin look years younger! No longer do you have to look like you haven’t slept in 10 years because this DIY uplifting eye cream recipe will turn back the hands of time!

Made entirely of natural ingredients, this uplifting eye cream penetrates deep into the skin to erase fine lines, correct dark circles, and make you look more awake and rejuvenated! We promise it really works! Uplifting Eye Cream

Uplifting Eye Cream Recipe Recipe

You’ll Need:

  • 4 tsp avocado oil
  • 2 tsp calendula oil
  • 2 tsp rosehip oil
  • 2 tsp melted beeswax (10 grams/0.3 oz)
  • 1 vitamin E capsule
  • 1/2 tsp cornstarch or white cornflour
  • 3 drops lemon essential oil

Directions:

  1. To a double boiler (wait until the water underneath comes to a boil), add all of the ingredients except the vitamin E and essential oil.
  2. Stir gently with a whisk until all ingredients are completely melted.
  3. Remove from heat and stir in vitamin E oil and lemon essential oil.
  4. Pour mixture into a clean, sterilized container.
  5. Let cool and set for a couple of hours.
  6. Your uplifting eye cream is now ready to use!
  7. Use every night before bed. Simply use your (clean) index finger to apply a small amount underneath the eyes, on the eyelids, and around the eyes. Read more 

Also read: 11 Ways to Use Argan Oil for Shinier Hair and Healthier Skin