Home Blog Page 340

5 expert-approved DIY hair masks for an itchy, dandruff-prone scalp

Nothing is more annoying than a scalp that’s irritated and sensitive, often resulting in flaky shedding or dandruff. While dietary deficiencies, stress and other hormonal conditions are some possible causes that require medical intervention, often, dandruff can be weather-induced and a result of scalp oil imbalances. We spoke to haircare expert approved a leading dermatologist and an ace hairstylist—to list out tried-and-tested scalp purifying hair remedies you can whip up at home to reduce dandruff and soothe an irritated scalp.

DIY hair masks for an irritated, dandruff-prone scalp

Lemon + curd

Lemon is an effective natural remedy against dandruff. Mix about two tablespoons of yoghurt with a tablespoon of lemon juice, and apply onto the scalp gently. Let it sit for 30 minutes, before rinsing it off with a mild shampoo. “Thanks to the antimicrobial properties of the citric acid present in lemons, this DIY hair pack is used commonly in India. Applying lemon directly onto the scalp can sometimes cause irritation. Yoghurt is full of proteins and makes for a nourishing natural conditioner. You can add rice water to this mix as well, as it contains selenium, which reduces malassezia, the yeast responsible for dandruff.

Fenugreek seeds + yoghurt + patchouli essential oil

Samantha Kochhar, chief hairstylist, Earth to Bottle Salon, swears by the power of essential oils to fight an itchy scalp. Patchouli essential oil is a great antidote for dandruff due to its antiseptic properties. Additionally, it strengthens hair follicles and prevents hair loss. The lactic acid in yoghurt is great for cleansing the scalp and clearing away dead skin. “Soak the fenugreek seeds in water and leave it overnight. Next morning, strain and blend them with two tablespoons of yoghurt. Add three drops of patchouli essential oil, mix well and apply on your hair. Keep the mixture on for 20 minutes and rinse off with lukewarm water.”

Neem + coconut oil

This neem pack shows miraculous results when applied regularly, especially in summer months. Ayurveda holds neem leaves in high esteem for their magical ability to purify both skin and hair. Neem works as an anti-fungal, antiseptic and anti-inflammatory agent, helping to control many skin and scalp ailments, including a dry, flaky scalp. Dr Gupta shares her foolproof anti-dandruff home remedy: “Grind 10-20 neem leaves with coconut oil till it forms a thick paste. Apply this on your scalp. Leave it on for 15-20 minutes before washing off with water. Along with lauric acid (which boosts moisture), coconut oil also has linoleic acid, which helps sooth the scalp due to it anti-inflammatory nature.” Read More……….

Also Read: Ice Cube On Face: 15 Beauty Benefits

Ice Cube On Face: 15 Beauty Benefits

15 Beauty Benefits: Summer can be terrible for your skin. Especially when you see all that healthy glow melting away with the sweat, and no beauty hack seems to work out. Ladies, do you know that you’ve got the ultimate weapon for all your beauty woes lying right in your freezer? Whether you are trying to fight a pimple or make your makeup stick to your skin for longer on a hot summer day, an ice cube is the ultimate answer to all your worries!

Rubbing Ice Cube On Face: Is It Good?

Rubbing ice on your face after a hectic day is exceptionally refreshing. If everyday stress is taking a toll on your face and skin, ice can help. It boosts blood circulation to your face and makes it radiant.

If you haven’t heard about the ‘Ice Facial’ yet, let me tell you that it is a prevalent Korean beauty trend. This has inspired beauty conscious people across the world to rub ice all over their face to keep it glowing and make it appear smoother.

Benefits Of Rubbing Ice Cube On Face

A fresh-out-of-the freezer ice cube can be the all-year-round savior for your skin. Here’s how:

1. Key To Glowing Skin

Everyone wants radiant and glowing skin, and an ice massage on the face can give you just that. It improves blood circulation to your skin and makes it bright. Applying ice to your face constricts the blood vessels, which initially lowers the blood flow to your skin. To balance that, your body starts circulating more blood to your face, which makes it lively and radiant.

2. Enhances Product Absorption

This is an age-old trick that ensures the skin absorbs all the products you apply to it. If you have applied night cream or any serum on your skin, rub an ice cube over it. This constricts the capillaries on your face and creates a pulling effect on your skin which, in turn, helps in better absorption of the products.

Read More..

Also Read: How to use cinnamon for flawless skin

The Benefits of Beauty Sleep

Faster-Healing Skin

“Beauty sleep” is real. Your skin uses sleep hours to heal itself from the day’s damage. When you drift off, your skin gets the chance to improve. That’s why you may wake up looking fresh and rosy.

Fewer Breakouts

More sleep, clearer skin. Lack of sleep can lead to stress, which causes pimples and blackheads, even in adults. In one study, experts found that college students had more breakouts when they were stressed out, such as during exam time.

Brighter Eyes

Want eyes that sparkle? Don’t let dark circles steal their spotlight. Dark circles often run in families, but they can look even darker if you aren’t getting enough shut-eye. To disguise them, apply a light layer of eye cream as a primer. Then dab on and blend in a dot of concealer one to two shades lighter than your skin tone.

Outsmart Puffiness

You wake up with puffy eyes because fluid collects around them when your head lies flat on the bed. Solution: Prop your head above your heart at night with a couple of pillows. Still packing bags under your eyes? Apply a cold cloth to the area for a minute or two in the morning.

Skip the Salt

If you’re a night owl looking for a snack, reach for a piece of fruit. Salty snacks can give you a swollen face in the morning. That’s because foods that are high in salt can cause you to retain fluid, resulting in puffiness.

Make Water Your Nightcap

A glass of wine might seem relaxing, but you’re more apt to see dried-out skin and large, visible pores in the mirror the next day. Cut back on nightly drinking and have lots of water instead. In the morning, use a toner that contains zinc sulfate or aluminum, which make pores look smaller. Read more

Read also: DIY Self Tanner Recipes For Face and Body


DIY Self Tanner Recipes For Face and Body

0

If you love having a year-round tan, you’re going to LOVE these DIY self-tanner recipes! Unlike store-bought self-tanners, these DIY self-tanner recipes are much healthier for your skin as they contain 100% natural ingredients and won’t leave your skin orange. Many commercial tanning products also contain alcohol which can dry out the skin as well as irritate sensitive skin.

Using a DIY tanning lotion also reduces your risk of skin cancer as you’re not spending as much time in the sun (or at least we hope you wouldn’t be!). For sun-kissed skin, we always advise sunless tanning over actual tanning! A fake tan can be JUST as great as a real tan, especially if you use any of these DIY self-tanner recipes!

DIY Self Tanner Recipes

Benefits:

  • No orange spots or weird streaks.
  • You can customize the color just by changing the recipe up a little!
  • Super cheap to make and will save you hundreds of dollars a year.
  • No harsh chemicals or alcohols.

#1. Cocoa Powder Sunless Tanning Lotion

You’ll Need:

  • Unscented white lotion
  • 100% pure cocoa powder

Directions:

  • Start out by mixing 1/2 cup of the unscented white lotion with about 1/3 cup of pure cocoa powder.
  • Mix well with a fork until all lumps are gone.
  • Keep in mind that the lotion will appear darker in the bowl than on your skin.
  • If you’d like a darker color, add a little bit more cocoa powder.
  • For a lighter color, add a little bit more lotion.
  • Store in a clean jar or container.

Using the DIY Self Tanner:

  • Exfoliate face and body 2-3 times a week for the best results. Removing the dead skin cells that chill on the top layer of your skin will ensure a more even tan.
  • Rub the self-tanner on dry skin, making sure to cover all areas. You will be able to see the tanner as you’re applying it.
  • Wait 3-5 minutes for it to dry.
  • Apply as often as needed.

The self-tanner will leave your skin silky smooth and 2-3 shades darker than before. Be careful though! Since this does not contain any alcohol or preservatives, it won’t last as long as store-bought self-tanners, so you may need to reapply more often depending on how often you shower!

#2. DIY Carrot Sunless Tanning Oil

This carrot tanning oil is easy to make, but the best part of it is that it’ll leave less streaks because it’s an oil. This recipe makes about one gallon of carrot tanning oil.

You’ll Need:

Directions:

  1. Bring the water to a boil.
  2. Rinse the carrots really well and then cut them into thin slices.
  3. To the water, add the sliced carrots, brown sugar and coconut oil.
  4. Reduce heat, and simmer on low for about 3 hours.
  5. Remove from heat, and let the oil cool.
  6. Pour the oil through a strainer to remove any clumps.
  7. Pour the oil into a spray bottle.
  8. Spray onto freshly cleansed skin once a week.
  9. For best results, apply a little pressure to the carrots when straying to get the most oil out. Read more

Also read: 4 DIY Pore Strips Recipes: Homemade Nose Strips

How to use cinnamon for flawless skin

Apart from spicing up your lattes and imparting fragrance to pulao, cinnamon is a great skincare ingredient. The flavourful spice has been known for its medicinal properties since ages and has been used as an anti-inflammatory and anti-ageing ingredient. We tell you how you can incorporate the wonderful  in your beauty regimen to get flawless skin.

Cinnamon and honey for acne removal
The anti-inflammatory property of cinnamon combined with anti-microbial property of honey makes this combination great for acne removal. Mix 1 tablespoon of cinnamon powder with 2-3 teaspoon of honey to form a paste. Apply this mix on the face covering acne and pimples. Wash it off with lukewarm water after 10 minutes.

Cinnamon and banana mask for nourished skin
A face mask made of cinnamon and banana can nourish the skin adding a glow to it. Mash up 1 ripe banana and add 1 teaspoon of powder to it. Mix to a pulp. You can also add 2-3 drops of honey to it. Apply this mixture as face mask and let it dry for 10 minutes. Wash off to reveal soft skin.

Cinnamon and olive oil for anti-ageing
The combination helps reduce fine lines and is especially good if you have dry skin. In 2 tablespoon of extra virgin olive oil add half a teaspoon of  powder. Mix well and apply all over the face and neck. After 7-8 minutes, massage your face gently allowing the oil to penetrate the skin. Wipe off with a clean, damp cloth.

Read More..

Also Read: A 14-day Lemon water challenge to lose weight

4 DIY Pore Strips Recipes: Homemade Nose Strips

0

Pore strips can cost a pretty penny, but making your own definitely WON’T break the bank! With just a few simple ingredients found at home (which you probably already have), you can make your own DIY pore strips in a pinch! Made with simple ingredients such as milk and unflavored gelatin, these DIY nose strips recipes will leave your nose, chin, and whatever else part of your face you want, blackhead and whitehead free, and super smooth! Let’s get to it!

Make your own homemade pore strips by following this simple tutorial and never have to buy pore strips again! Great for problem areas and also dirt, debris, and blackhead removal, these homemade pore strips will quickly become a favorite beauty staple you won’t be able to live without!

Today we’ll be showing you 4 different ways to make homemade pore strips! The first involves milk and gelatin, the second method involves using egg whites, the third uses sugar and honey, and the last a combination of baking soda. These are all great DIY blackhead removal methods that are perfect for clogged pores and whiteheads as well.

4 DIY Pore Strips

#1. Gelatin Pore Strips:

As with any homemade beauty recipe, please test it out on your arm before trying, just to make sure that your skin won’t have an adverse reaction!

Ingredients:

  • 1 tbsp unflavored gelatin powder (such as Knoxx)
  • 1 tbsp milk

Directions:

  1. In a small, microwavable bowl, dissolve the gelatin within the milk. Do this in 5 second increments only to make sure that the solution isn’t too hot! Stir in between.
  2. Once the gelatin has dissolved, wait a few seconds for the mixture to cool down.
  3. Once cool enough to apply to the face (test it out on the back of your hand first!), use a flat makeup brush to apply to solution to your nose (or anywhere else you may want to purge blackheads!).
  4. Leave on for 10 to 15 minutes or until the solution has hardened.
  5. Gently and slowly peel off.
  6. Rinse off any residue and pat dry.
  7. Use once or twice a week to get rid of blackheads, whiteheads, and excess oil.

#2. Egg White Pore Strips

This recipe for egg white pore strips is easy to replicate, doesn’t require complicated ingredients, and really works!

Ingredients:

  • 1 egg white
  • 1 toilet paper square

Directions:

  1. In a small bowl, whip the egg white until nice a frothy.
  2. Make sure you remove all traces of makeup before applying a thin layer of egg white to the nose or wherever else you’d like to extract blackheads from.
  3. Now press a small piece of single-ply toilet paper on top of the egg white.
  4. Go ahead and apply a second layer of egg white on top of the tissue, and top that off with another single ply tissue.
  5. Allow to harden for about 30 minutes and gently and slowly peel off.
  6. Wash your face and rinse off any leftover residue and pat dry. Read more

Also read: 6 DIY Lip Plumper Recipes You Can Make Right Now!

A 14-day Lemon water challenge to lose weight

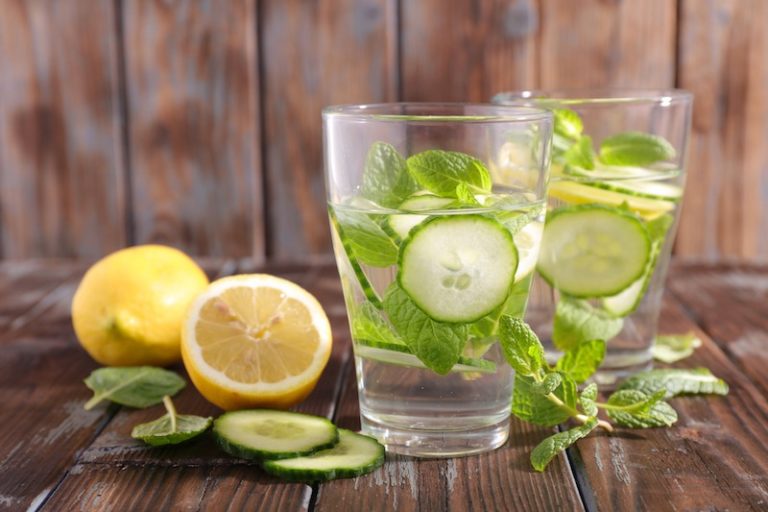
Lemon water challenge : Once you’ve established a routine, then I would go the route of what health advisors recommend. A simple 8×8 rule –> drinking eight 8 oz. glasses of water per day. Which is equivalent to 2 liters of water or a half gallon!

What Are the Benefits of Lemon Detox Water?

  1. It helps promote hydration. We should be drinking eight 8 oz. glasses of water per day, adding lemon to your water helps it taste better and in theory will help you drink more water.
  2. Water and Lemon support weight loss. Drinking more water will actually make you feel full. That combined with the health benefits of lemon, specifically the polyphenol antioxidants, helps reduces weight gain.
  3. It’s a good source of Vitamin C. Citrus fruits in general are a great source of Vitamin C, adding lemon to your water gives you an extra boost. (add in orange or grapefruit for even more Vitamin C power)
  4. Helps with Digestion. Some people drink lemon water to help prevent constipation. Drinking warm or hot lemon water when you wake up in the morning may help get your digestive system start moving.

How to Make Lemon Detox Water

 Always use fresh lemons not the artificial lemon juice. You will need more than one wedge or slice to have an affect, 3-4 slices of fresh lemon added to your water is a good place to start. Drinking this lemon water consistently throughout the day, you will notice a significant difference. To make the drink as healthy as possible used filtered water and organic lemons.

Read More..

Also Read: Seasonal Fruit Masks to Hydrate Your Skin

6 DIY Lip Plumper Recipes You Can Make Right Now!

0

Pink, plump lips aren’t hard to achieve at all, especially if you’ve got a few key ingredients laying around! These DIY lip plumper recipes use all-natural ingredients that are found around the house.  Most commercial lip plumpers contain cinnamon oil extract, as well as ginger oil, wintergreen oil, and even capsicum which is found in hot peppers to make the blood rush to the surface, therefore, plumping up the lips. All of the ingredients below are great at increasing blood flow!

We’re keeping it easy peasy with these natural ingredient DIY lip plumper recipes so you can have plumper lips in a pinch! Why spend all your hard-earned cash on Kylie Jenner products?!

DIY Lip Plumper Recipes

#1. Cinnamon Lip Plumper

This DIY lip plumper recipe is one of our favorites and it’s super easy to make! All you need are two ingredients: your favorite lipgloss and cinnamon essential oil. Lips appear fuller and healthier immediately!

You’ll Need:

Directions:

  1. It’s as easy as adding 6-8 drops of cinnamon essential oil to your lipgloss. Shake well to combine and apply!
  2. It’s important not to add too much cinnamon essential oil as it can be very overpowering and it may dry out the lips.
  3. If you have ginger essential oil or even wintergreen essential oil, you can always do 2 drops of each: 2 drops cinnamon, 2 drops ginger, and 2 drops wintergreen essential oils. Add those to your fave lip gloss, lipstick or lip balm and apply to lips.
  4. You’ll feel a tingly sensation within seconds and that means it’s working!

#2. Cayenne Powder Lip Plumper

Cayenne powder contains capsicum which is the active ingredient that gives the spice, and also helps lips plump up by helping blood rush through!

You’ll Need:

  • 1 tbsp olive oil, coconut oil, almond oil, or any other carrier oil
  • 1/2 tsp ground cinnamon or 1/4 tsp of cinnamon oil
  • 1/2 tsp ground cloves or 1/4 tsp clove oil
  • 1/4 tsp ground cayenne powder

Directions:

In a small bowl, mix all ingredients together using a small whisk. Apply to your lips by slowly massage into the lips with your finger. Leave on for 5-10 minutes and rinse off with cold water. Do not apply if you have any cuts or open sores! Read more 

Also read: Wine Color Nails: A Must Have Nail Color!

Homemade Face Scrubs That You Need To Try Right Now

Even after washing and cleansing your face every day, there are dead skin cells that even the best homemade face scrubs or cleansers miss out on. While they may help get rid of any superficial build up on the face, these face washers are not that effective at digging out the grime that’s deeper in your skin. Enter exfoliation, a process that not only helps remove dead skin, blackheads and whiteheads but also smoothens your skin texture. To scrub your way to a beautiful, glowing new you, you must make this process an essential part of your skincare regimen. Here’s how:

DIY Face Scrub Ideas

Before you reach out for those commercial exfoliators and scrubs, here are some DIY facial scrub ideas that you can try at home. Freshly prepared using natural ingredients, these exfoliators are gentle on the skin and are also safe and economical.

Face Scrub For A Radiant Glow

To fix tired skin immediately, use theseeasy-to-make face scrubs that revive, rejuvenate and add freshness to your face. The Esthetic Clinics believes that coffee is indeed perfect for the skin. “The benefits of coffee are not just limited to it as a drink; coffee is also an important ingredient of skincare in many ways. It reduces acne, combats the signs of ageing by boosting collagen levels, protects the skin from free radical damage, reduces sun damage to the skin, reduces cellulite, reduces dark circles under the eyes, reduces inflammation, improves blood flow for brighter and tighter skin, improves the hair strength.”

Here’s How You Can Make A DIY Coffee Scrub

The caffeine in coffee improves blood circulation and stimulates the skin to add radiance and youthfulness. What’s more, it also contains antioxidants, protects against UV damage and prevents against moisture loss.

1. Mix three teaspoonsfreshly ground coffee along with half a cup of yoghurt.
2. If you have dry skin, replace the yoghurt with full-fat milk.
3. Blend in a mixer and leave aside for five minutes.
4. Once the mixture thickens, add one teaspoon honey and mix well.
5. Apply this mixture on the face and scrub in upward circular movements for about 8 to 10 minutes.
6. Wash off with cold water. Use this scrub twice a week for best results. Read More……………

Also Read: Seasonal Fruit Masks to Hydrate Your Skin

8 Amazing Blueberry Face Masks For Radiant Skin

0

Blueberry Face Masks are a rare fruit in India. They are mainly found in USA and Europe and hence they are mostly side lined in our country.  We are missing out a lot on these tiny berries! Not just because they are delicious but also because they are a miraculous for our skin.

Blueberry Face Masks For Radiant Skin

Following are some of the best blueberry face mask recipes for radiant skin.

Blueberry is of course the common ingredient for all these recipes!

1. Nourishing Blueberry Mask:

How To Prepare And Apply?

¼ cup of blueberries mixed with one tablespoon of olive oil and honey.
  1. Blend them together till smooth.
  2. Apply for 20 minutes and wash off with warm water.

2. Blueberry and Yogurt Face Mask:

How To Prepare And Apply?

  1. Blend blueberries till smooth.
  2. Add the puree into Greek Yogurt – This yogurt is strained through cheese cloth or filter which removes whey and gives you a consistency of that between yogurt and cheese. It has distinctive sour’s taste. This mask will slough off damaged layer of epidermis.
  3. Spread onto face for 20 minutes.
  4. Wash off with cold water.

Read More..

Also Read: Seasonal Fruit Masks to Hydrate Your Skin