Home Blog Page 377

15 Amazing Homemade Scrubs for Oily Skin

If you have Scrub for oily skin, your skin may require extra care than the usual cleansing, toning and moisturizing routine. Scrubbing is a great way of getting rid of dead cells from the skin as it unclogs pores and helps the skin to breathe. If your skin is oily, you must exfoliate and scrub your face at least two to three times a week to prevent any oil build-up, which can clog the pores. You can pick up any scrub from the market that is suitable for your oily skin. However, you can also make amazing scrubs at home that will help your skin shine and glow and reduce oil build up on your face. Read this article and find out some easy to make scrubs for oily skin.

15 DIY Scrubs for Oily Skin

Homemade scrubs are a great way of taking care of your oily skin. Here are some homemade face scrubs for oily skin:

1. Kiwi Scrub

Kiwi fruit is loaded with antioxidant properties, and it helps in improving skin texture too.

What You Will Need

  • 1 whole kiwi fruit
  • 2 teaspoons sugar
  • Few drops of olive oil

How to Make and Apply

  • Squish the kiwi fruit nicely into pulp.
  • Add sugar and olive oil in it.
  • Apply it all over the face, massage in small circular movements.
  • Wash your face with tepid water.
  • It will take 10 minutes to make and apply the scrub.
  • Use this scrub once a week for best results.

Precautionary Tips

In case of very sensitive skin, you can skip the sugar.

2. Oatmeal Scrub

In this scrub, oatmeal renders anti-inflammatory properties, honey helps in hydrating and moisturising the skin, yogurt controls the sebum production.

What You Will Need

  • 1 tablespoon oatmeal
  • one tablespoon organic honey
  • 1 tablespoon thick yogurt

How to Make and Apply

  • Take all the ingredients and mix well.
  • Apply on your face and massage for a few minutes, in circular motions.
  • Wash with cold water.
  • The entire process will require 10 to 12 minutes.
  • Apply this scrub one to two times a week.

Precautionary Tips

If you have very sensitive skin, use rose water instead of yogurt. Read More………..

Also Read: This Coconut And Turmeric Anti-Ageing Drink Is A Recipe For Healthy Skin

This Coconut And Turmeric Anti-Ageing Drink Is A Recipe For Healthy Skin
Just like the rest of our body parts, the skin also requires certain essential nutrients to maintain it in good health. This biggest of our body organs is tough but is still susceptible to the excesses of the outside environment, as well as the changes that occur inside our bodies. But since we can only control our external environments to a certain extent, it is important to ensure that our internal environment is healthy and happy.

 Nutrients For Healthy Skin

Some nutrients that have been known to promote skin health include antioxidants, omega-3 and -6 fatty acids and, vitamins E and C. Antioxidants are found in a number of plant-based foods like fruits and vegetables, as well as spices and herbs. These usually also contain the essential vitamins important for maintaining a healthy skin. Meanwhile, fatty acids are found in seeds and nuts, as well as fatty fish.

Anti-Ageing Coconut And Turmeric Drink Recipe

This recipe contains banana, pineapple, flaxseeds, coconut milk, coconut oil, ginger, cinnamon and turmeric. This drink can be a powerful addition to your diet if you are looking to improve the health of your skin. The coconut oil and milk are sources of healthy fats and important vitamins.

Here’s how to make this drink:

1. Chop the banana and pineapple.

2. Place them in a bowl and add flaxseeds, grated ginger, coconut oil, cinnamon powder, turmeric powder and flaxseeds to the fruits.

3. Add coconut milk and use a hand-held blender to blend all the ingredients together.

Read More

Also Read: Milk Bath, the Centuries-Old Beauty Ritual for Gorgeous Skin

Drink This Nutrient-Rich Apple And Aloe Vera Juice To Boost Digestion

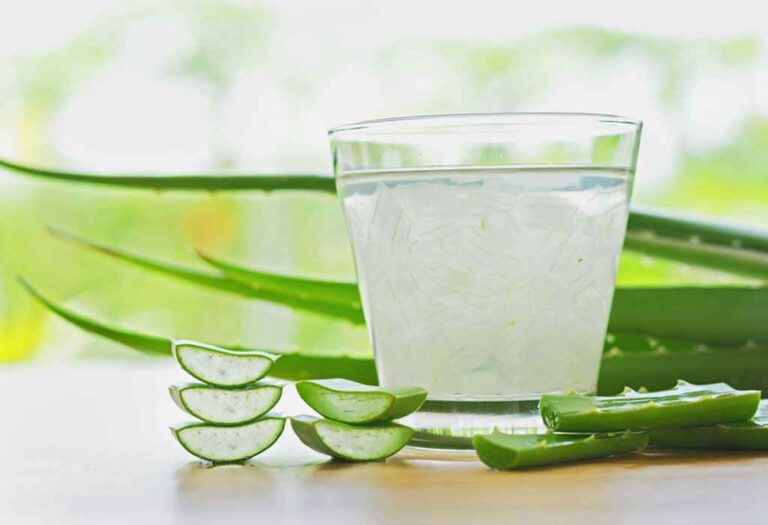
Aloe Vera Juice : Lifestyle habits like skipping meals, overeating, bingeing on junk and greasy foods often lead to various health conditions that can turn severe if they’re not taken care of. Such habits can also lead to an impaired digestive system that can further have negative impacts on the overall health. If you have been over-indulging in oily foods lately, then you may be at a greater risk of developing digestive woes.

Foods For Digestion: Here’s How You Can Make Apple And Aloe Vera Juice At Home:

Ingredients Required:

Apple – 1
Aloe Vera – 1 large leaf
Turmeric Root – 1 cm
Ginger Root – 1 cm

How To Make:

To begin with, peel the ginger and turmeric root and wash them thoroughly. Chop them into two halves. Cut the apple into two halves as well.
Now with the help of a sharp knife, discard the yellow part from the aloe vera leaf and scrape off the gel after slicing the leaf lengthwise.
Add all the ingredients in a juice and blend well. Once a juice-like consistency is attained, pour it in a glass and drink.

“Aloe vera has a cooling, anti-inflammatory effect on the gut; it helps relieve constipation and can help clear intestinal parasites. Turmeric has a similarly soothing effect on the gut, relieving pain and tension, and also helps improve circulation.

Read More

Also Read: Milk Bath, the Centuries-Old Beauty Ritual for Gorgeous Skin

6 Amazing Benefits of Aloe Vera for Hair, Skin and Weight-Loss

Aloe vera is extensively used in beauty products and for good reason. It’s got antiviral and antibacterial properties, and the ability to help treat everything from constipation to diabetes. The green-cactus looking plant that sits out in your garden isn’t just a plant with its roots in folklore, it’s the crux of a million dollar industry that extends from beauty creams to healthy juices and diet supplements. Over time, aloe vera has seamlessly integrated itself into everything we use.

1. Aloe vera for dry skin – Take some aloe vera, a pinch of turmeric, a teaspoon of honey, a teaspoon of milk and a few drops of rose water. Blend this mix till you get a paste. Apply it and leave in for about 20 minutes or so.

2. Aloe vera scrub – Grab half a cup of fresh aloe vera gel, a cup of sugar and two tablespoons of lemon juice. The sugar will help exfoliate and scrub off dead skin, the aloe vera will deep clean the skin and the lemon will help fade out scars and tan. Stir the three ingredients together and use it to scrub both face and body.

3. Aloe vera for acne – Take some aloe vera gel, blended walnuts with a flour like consistency and honey. Aloe vera’s healing properties coupled with the anti-oxidants from honey will leave you with smooth and clear skin.

4. Aloe vera for sensitive skin – Grab some aloe vera gel, cucumber juice, yogurt and rose oil and blend them to a paste. Apply and leave for around 20 minutes, then rinse it off.

Aloe Vera For Weight Loss

It’s not just the beauty industry that’s obsessing over the benefits of aloe vera, the health industry can’t stop raving about it either. Known as ghritkumari in Hindi, the plant has millions of takers around the world and is used in the form of gels, cream and juices, due to the aloe vera’s wondrous health benefits.

Read More

Also Read: 8 Ways to Use Baking Soda For The Most Common Skin Problems


Milk Bath, the Centuries-Old Beauty Ritual for Gorgeous Skin

We have all heard that the Egyptian queen Cleopatra was known for her beauty across various kingdoms. Her beauty rituals were said to have been an elaborate affair with exotic scrubs, face packs, hair masks and what not, and one of the most famous rituals from the lot being the milk bath. Having a milk bath can be one of the most wonderful, invigorating, sensuous and rejuvenating experiences of your life. Not only does it make you feel good with all the pampering, but nourish and detan your skin, leaving you feeling feather soft and silky all over.

What You Need to Equip Yourself With

5 litres full cream milk
100 gm rose petals or mogra flowers
10ml essential oil of rose/sandalwood/lavender
A good quality sea salt scrub
Almond oil
Some bubble bath, preferably a herbal one
A back brush or loofah
2 large bath towels
Some aromatic candles
Soothing music
Maybe a glass of wine or champagne

How to Go About

1. First things first; switch off your phone and keep it far away. Trust me, you don’t want any distraction.

2. Now run your hot water in a tub and add warm milk to it. Then add the bubble bath, essential oil of your choice and the flower petals.

3. Clean your face with almond oil and massage your face gently. Once you are in your steamy tub, this will soak into the skin and give it a natural shine.

Read More

Also Read: 8 Ways to Use Baking Soda For The Most Common Skin Problems

How To Remove Black Patches From Bleaching

Stay tuned to find some tried and tested methods to reduce the effects of bleaching and remove black patches that might be caused by the reactor.

1. Turmeric and Yoghurt Paste:

When mixed with a sour medium like yoghurt, turmeric acts as a skin whitening agent and helps in removing and lightening dark spot, dark patch or burn mark effectively. Turmeric, when used alone without any fat-based medium, can leave unsightly yellow stains on your skin which can be hard to get rid of and can be a bit harsh for sensitively skinned beauties. Therefore remember to always use it with yoghurt or even milk and never on its own.

2. Aloe Vera:

The white gel extracted from aloe vera leaves can be exceptionally useful in treating dark patches caused by bleaching. It has a number of qualities that make it useful to heal skin tissue and it has been used to beautify skin and solve a number of skin problems since time immemorial.

3. Cold Milk:

Cold milk has soothing properties and a lot of lactic acid that helps in exfoliating your skin in the most gentle way in order to get rid of old dead cells and make way for new skin cells. Therefore, it is highly beneficial to get rid of dark and ugly black patches and make way for beautiful skin. Also, apart from removing black patches caused by bleaching, milk also helps to subside any possible burn marks which may be caused by bleaching agents.

4. Potato Peel:

Potato peels have anti-inflammatory properties and natural skin whitening agents that get rid of dark spots and patches on skin effectively with regular usage. Apart from that, vitamins and minerals present in potato help in keeping your skin healthy and nourished. To get most out of potatoes in your skincare regime, peel some potatoes and use these to massage your face lightly. Alternatively, you can also mash a potato and make yourself a quick potato mask. Read More………

Also Read: Four Usefull Tips On How To Exfoliate Dry and Dull Skin

8 Ways to Use Baking Soda For The Most Common Skin Problems

It is one ingredient that you will always find in your kitchen cabinet but have your ever thought of including it in your beauty regime? It might sound absurd but the fact is that baking soda carries immense benefits for your skin. Since it is alkaline in nature, it balances the pH levels of your skin to make it glow with radiance. It also helps in exfoliating the dead skin cells to reveal new freshness. Here are eight ways to use this humble ingredient in dealing with your day to day beauty problems.

1. Removes acne scars

When your skin becomes clogged with dead skin, oil or bacteria, tiny pimples appear on the surface called acne. If acne is not properly dealt with, it can leave some marks and scars behind. To remove these scars from your face, use a paste of baking soda and water. Make it thick enough so that it can be easily applied to your skin. Baking soda will exfoliate the scarred skin and reveal a fresh layer. You can apply the paste two or three times in a day for 3-4 minutes and then wash off.

2. Soothes skin rashes

Baking soda has anti-inflammatory and antibacterial properties. Since it can dry out your skin due to its alkaline properties, you can get relief from itching and swelling that comes with skin rashes. Add coconut oil to baking soda and apply this paste for 4-5 minutes. You can apply this twice a day for a soothing effect.

Read More

Also Read :10 Easy Home Remedies for Rashes

7 Natural Face Packs Our Grandmothers Used for Beautiful Skin

Face Packs: You may have always wondered the magic behind your grandmother’s healthy and glowing skin. Well, as they say, old is gold, especially when it comes to taking care of your skin and hair, purane nuskhe  from our grandmothers were the best and the most effective. Whether it is to cure suntan, acne, dry skin or oily skin, she had the perfect solutions to all your beauty problems using natural homemade face packs.

A face pack of coriander leaves and turmeric powder makes a great solution for excessive blackheads on your face especially on the nose. The pack helps in shrinking large pores. Coriander acts as a caustic to clean dirt, blocking the pores of your skin. Turmeric helps in pulling out excess oil in your skin pores.

How to make?

Blend coriander leaves with two teaspoons of turmeric powder to make a fine paste. Apply this paste on your face and keep it overnight. Wash it off the next morning with cold water. Follow this routine at least twice a week to get rid of blackheads easily.

2. Curd and gram flour face pack for dry skin

The curd and besan face pack makes for an amazing way to nourish dry skin and remove dead cells. Besan acts as a cleansing agent for the skin and curd has a moisturizing effect.

How to make?

All you need to do is to mix two tablespoons of besan, one tablespoon of curd, one teaspoon of honey and a dash of turmeric to make a smooth paste. Apply evenly on you face and leave it for about five minutes and wash it off with cold water.

Read More
Also Read: 10 Easy Home Remedies for Rashes

Four Usefull Tips On How To Exfoliate Dry and Dull Skin

0

Are you aging or having a dry and dull skin and wonder what you can do to remedy this situation and have  a younger and healthy skin? We are constantly exposed to different factors such as sunlight and harsh dry climates which affect our skin causing it to age faster and  looks dry and dull added to the fact that our skin cells die and can’t be completely gotten rid of by just washing or brushing these dead skin cells which hold on to the skin obstructing your skin pores.

Most people have the problem of dry skin and dull skin which is also aging fast. The solution to this, is regularly exfoliating the dead skin . This article is going to provide you with some useful tips on  how to  exfoliate dry skin and also avoid dry, dull, and aging skin.

1. How To Exfoliate Dry Skin With the Use of citrus acid from fruits

Fruits which contain citrus acid such as lemon are good exfoliating agents, these fruits produce citrus acid which is a natural acid from fruits and this acidic property makes it a treatment to dermis problems. Dry, dull and aging skin being some of these problems among others.

This natural acid does this by removing dead skin cells. This remedy works even better if the acid from these juice is mix with honey before applying on damp skin for about 30 minutes then washing with warm water. Some enzymes too are good exfoliating agents.

2.  Enzymes from yellow or orange colored fruits

Fruits and vegetables such as pineapples, oranges and pumpkin contain these enzymes. This is done by blending these fruits or vegetables and mixing  with brown sugar for added effect.

This is applied to the skin and these enzymes work by breaking the binding components holding dead skin cells and skin pores making skin look fresh and soft within a very period of time. Another way to take care of dry, dull and aging skin is to use milk.

 3. How To Exfoliate Dry Skin Using Milk

I know you will be wondering, but yeah milk can help you with dry and dull skin problem. Milk can actually remove these dead skin cells from the surface of your skin. And this is quite simple, you just apply milk to your skin and wash after an hour, this facilitates the peeling of dead cells thereby exposing new and healthier skin cells, making you look fresh. It is worth noting that one need to dampen the skin before using these exfoliating agents. Read More………..

Also Read: 10 Easy Home Remedies for Rashes

10 Easy Home Remedies for Rashes

Rashes can be maddeningly itchy, no matter what the cause.

Doctors are likely to prescribe creams, lotions, or antihistamines for relief. They may also suggest cold compresses or other home remedies.

We all know not to scratch. That only makes it worse and may cause infection. Here are some relief measures to try, along with information about why they might work.

Cold compress

One of the fastest and easiest ways to stop the pain and itch of a rash is to apply cold. Whether you choose a cold compress, cool showers, or damp cloth, cold water can bring immediate relief and can help stop swelling, ease itching, and slow the progression of a rash.

Consider making or purchasing fabric bags stuffed with ice. They freeze well, and they can be heated for other uses.

How to use it

  • Fill an ice bag or plastic bag with ice or dampen a cloth with cold water.
  • Place a cloth over your skin (never place ice directly on your skin).
  • Hold on your skin until itching or pain subsides.
  • Repeat as needed.

How it works

Cold limits blood flow to an inflamed area. When you apply ice or cold water to a rash, it can help reduce swelling and inflammation and can stop itching almost immediately. For rashes that cover more of the body or that affect an area that is difficult to cover with an ice pack, a cool bath or shower may provide relief.

Oatmeal bath

Oats (avena sativa) have been used for centuries to treat many skin conditions, from eczema to burns. The U.S. Food and Drug Administration (FDA) approved the use of oatmeal in suspension (colloidal oatmeal) as a skin protectant in 2003. Today there are many over-the-counter skin products containing oatmeal.

Colloidal oatmeal dissolved in a bath can relieve itchiness. Commercial brands of oatmeal bath, like Aveeno, come in ready-to-use packets, measured for a single bath. Or you can very finely grind regular oatmeal in a food processor or blender and add 1 cup to bathwater.

How to use it

  • Fill your bathtub with warm water.
  • Mix one cup (or one packet) of colloidal oatmeal into the water.
  • Immerse yourself in the water and soak for 30 minutes.
  • Rinse off with a lukewarm shower. Read More…………..

Also Read: What Is Microneedling? Benefits, Costs, Side Effects, and More