Home Blog Page 376

Get Glowing Skin With These Detox Drinks; Know Methods To Prepare

There are several ways to achieve glowing skin. You need to follow a proper skincare routine, diet and precautions to prevent skin issues. Detoxification can help you achieve glowing skin. It helps you get rid of toxins and impurities which results in flawless skin. You can simply add a few detox drinks to your diet which will help in complete detoxification as well as give you a healthy skin. Adding certain nutrients to your diet can provide several benefits to your skin. Many kitchen ingredients can work wonders for your skin. You can combine few simple ingredients to prepare healthy detox drinks which can help you give flawless skin.

Skincare: Detox drinks for glowing skin

1. Vitamin C detox drink

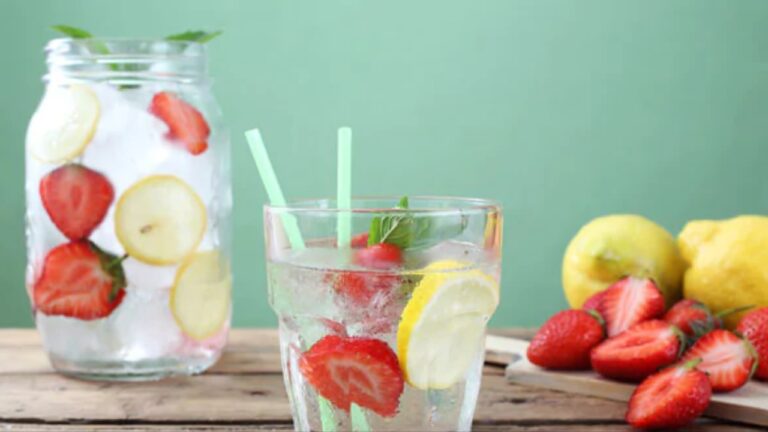
Vitamin C is one of the best vitamins for skin health. It helps in purification and prevents several skin issues. You might have noticed many skincare products are loaded with vitamin C food sources like lemon or orange. You can prepare a detox drink that is loaded with vitamin C. Take water in a jar and squeeze a lemon to it. Add a few slices of oranges, pineapple, kiwi and other food sources of vitamin C. Allow this water to cool and drink it throughout the day. You can refill until the fruits are fresh.

2. Turmeric detox

Turmeric is loaded with properties that can work well for your skin. It contains anti-inflammatory and anti-bacterial properties which can help you fight acne. It has medicinal properties which are beneficial for your overall health. You can add turmeric to your diet as well as use it for tropical use. You can prepare a turmeric detox drink for clear skin. You can take around 2-3 cups of water and add a few fresh turmeric slices to it. Boil this properly for few minutes. Once done, add juice of half lemon and some honey to this. Your detox drink is ready. This drink will offer you several health benefits and medicinal properties.

3. Apple cider vinegar detox drink

Apple cider vinegar is commonly used for weight loss. It can also help in detoxification which can result in better skin health. To prepare this drink, take 1 to 2 tablespoons of apple cider vinegar and add it to about 2 liters of water. You can add some amount of honey to this mixture. Drink this through the day. Do not drink more than 2 tablespoons of apple cider vinegar in a day.

These detox drinks will help you achieve glowing skin and fight several skin issues naturally. You should also consume a healthy diet loaded with nutrients. Protect your skin from sun damage, dirt and pollution.

…..Read More….

Read Also: 3 Hassle free and natural ways to get the pinkest lips EVER

REVEALED! THE DIFFERENCE BETWEEN BIKINI, FRENCH AND BRAZILIAN WAX

0

With the crazy salon lingo, deciding on a hair removal technique for down there can seem like you’re trying to solve a jigsaw puzzle. Bikini, French and Brazilian wax may seem like different names for essentially the same thing — waxing the pubic area—but guess what, they’re all different.

Bikini wax

The most common form of waxing, a bikini wax is ideal for beginners. It is also perfect for someone who wants to wear hot shorts or a bikini (summer vacay feels, ya know?). This form of waxing consists of waxing the bikini area and includes the sides of your legs/thighs, your panty line and below the naval. A bikini wax forms a neat inverted triangle of hair that perfectly complements the panty line of your bikini.

Note: A bikini wax is mainly for beginners and won’t take off much hair. This kind of waxing is only meant to be the first step towards more painful waxes. It is ideal for quick clean ups and does not require you to remove your panties. So for those who aren’t comfortable being naked around a stranger, a bikini wax is the one for you!

French wax

Just like bikini wax, French wax also does not remove all the hair; it leaves a tiny bit behind. While most of your hair is removed, a little bit from the front and back is left behind. This sort of waxing will make your pubic area feel extremely clean.

Read More

Also Read :WHAT IS A SNAIL FACIAL AND WHY IT IS SO POPULAR IN THE BEAUTY WORLD

3 Hassle free and natural ways to get the pinkest lips EVER
3 Hassle free and natural ways to get the pinkest lips EVER
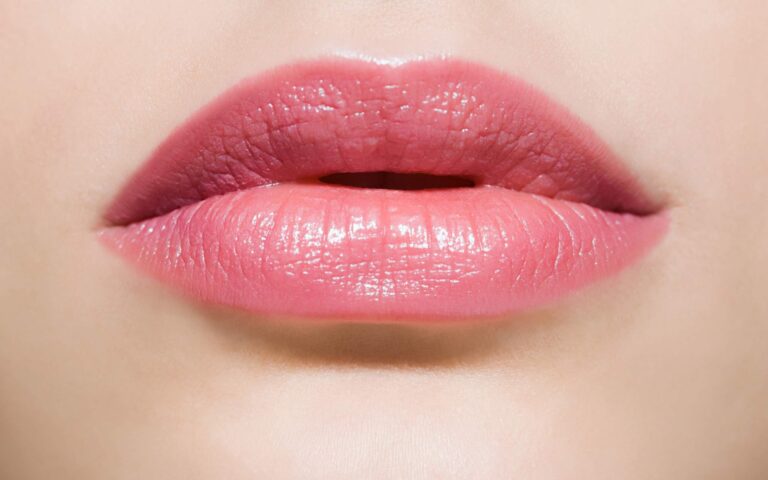
Soft and pinkest lips are something everybody desires as they not only improve the appearance but are also a sign of good health. They can be achieved in 3 simple ways.
Dark and chapped lips are usually a health concern to most people. Chapped lips that are bleeding also look extremely unattractive.
Pink, plump and healthy lips are something everybody desires and an appealing feature as well. They enhance one’s look, making them look more attractive.
Applying lip balm and lip oils and continuously caring for the lips might not deliver the desired results as they all contain chemicals. It is, therefore, best to opt for all natural products to achieve the same.
While for many, pink and healthy lips might seem like a distant desire, it is relatively easy to achieve, with the following methods.

WHAT IS A SNAIL FACIAL AND WHY IT IS SO POPULAR IN THE BEAUTY WORLD

0

The world of beauty is brimming with weird and exciting treatments and procedures that can make you go “huh?”! From vampire facials to using expensive caviar as a detox mask, there is no limit to the creativity of innovators who are in pursuit of beauty. One of these mind-bending procedures is a snail facial, that either gets people intrigued or absolutely grossed out.

What is a snail facial?

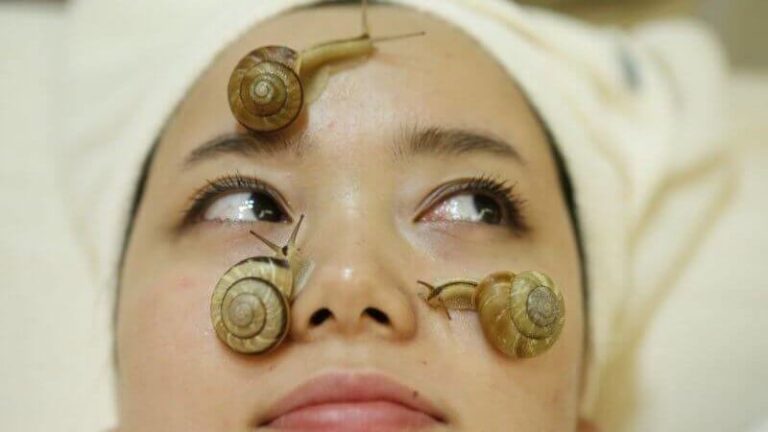
As the name suggests, snail facials are a procedure where live snails are left to slither around on your face. This is done by first cleansing the face, followed by a toner and a quick massage with snail mucin products. Traditional snail facials use garden snails during the facial and let them slither on your face for a couple of minutes.

Fascinating facts about snail mucin

  • It is packed with nutrients – Snail mucin is packed with essential nutrients that can do wonders for your skin – hyaluronic acid, glycoprotein, proteoglycans, and microbial and copper peptides. These essential nutrients are quite difficult to find in nature elsewhere and fetch big bucks when added in skincare staples.

  • It is 91-98% water – Snail mucin, when used in cosmetics, is filtered multiple times to increase its purity. As such, it has a very high water content, which in turn makes it an excellent hydrating agent for the skin. Regular use of the ingredient can give you soft, supple and glowing skin!

  • It has anti-ageing properties – Snail mucin is known for its many anti-ageing benefits – boosting collagen and elastin production, minimising free radical damage, repairing damaged tissues and maintaining hydration levels. The age-defying benefits of this ingredient is what makes it popular among beauty enthusiasts.
  • Read More

Also Read: 5 Tips for Soft Skin

Balanced Diet: A Key To Healthy Living

A balanced diet includes food from the five food groups, that is vegetables, fruits, grains, protein and dairy and fulfills the needs of the individual. It helps in maintaining good health and prevents any disease.

Nowadays, we all are so busy in our work that we barely have time to have a properly balanced meal and that is the reason why we remain unfit most of the time. So, it is necessary to have a balanced and nutritious meal to stay fit and healthy.

What Is A Balanced Diet?

A balanced diet is the one which gives you all the nutrients required for the proper functioning of your body. To keep your body fit and healthy you should have a meal which consists of green vegetables, fresh fruits, whole grains, nuts, legumes and proteins.

By eating a balanced diet a person can get the desired amount of nutrients and calories that are required for the proper functioning.

Balanced Diet Food

The best way to eat for health is to choose the right amount of food from the five food groups. Vegetables, legumes, fruits, grains, cereals, meat, poultry, nuts, seeds, milk, cheese and fish are the constituents of the five groups that keep us fit and healthy.

These are the sources of proteins, vitamins and minerals which are essential for our body. The amount of food you require depends on your lifestyle and it changes accordingly, like, how active you are or whether you are growing or not etc.

What Is The Importance Of A Balanced Diet?

A balanced diet is important because our cells, tissues and organs require proper nutrition to work efficiently. Without proper nutrition your body’s immune system becomes weak and your body is not able to fight with diseases and infections.

Children consuming poor diets can often have growth and developmental problems. There is a higher risk of obesity and diabetes in individuals who constantly consume junk food or food which lacks the desired nutrients.

The Balanced Diet Food Pyramid

According to a balanced diet pyramid, it is recommended that a person should consume grains the most. After grains, fruits and vegetables should be your second priority. Meat, fish dairy products should be consumed in lesser amounts and fats and oils must be prevented in our diet. One should drink an adequate amount of water or any other fluid every day.

A Balanced Diet For Healthy Hair

Eating a balanced diet with the right nutrients can be quite beneficial for hair growth, especially if you are suffering from hair loss due to lack of proper nutrition. So your meal should contain eggs, fatty fish, spinach, sweet potatoes, nuts, seeds, beans and soybeans.

A meal containing these food items promotes hair growth because they are rich in vitamins and proteins required for

A meal containing these food items promotes hair growth because they are rich in vitamins and proteins required for strengthening the hair, promoting its growth and protects hair follicles from the damaging free radicals.

…..Read More….

Read Also: 5 Tips for Soft Skin….

5 Tips for Soft Skin

0

One of the most important things you can do to get soft skin is to exfoliate. Exfoliation is the act of using a sugar scrub or a salt scrub and massaging it into wet skin. This removes the dead skin cells that can sometimes build up onto the skin, and reveals softer, smoother, younger looking skin. When exfoliating, scrub your skin in slow, circular motions, and be sure to focus on rougher areas such as elbows, knees, and shoulders. Rinse the scrub off and follow up with a thick, moisturizing body butter.

#2. Moisturize

This one may seem like a no brainer, but too often we forget to nourish our skin with a good moisturizer. You should be applying a moisturizer or a body lotion all over your body every time after you shower and every night before bed. Doing this on a regular basis will ensure that your skin is hydrated, and therefore softer. This will also plump up the skin, giving it a more youthful appearance.

#3. Hydrate

The secret to glowing, youthful looking skin is hydration, hydration, hydration. Consume at least 8 glasses of water a day to ensure healthy skin, nails, and hair. Water is THE secret to glowing skin and being dehydrated is the number one culprit for dry, rough skin.

#4. Dry Brushing

Dry brushing is simply brushing your skin using a natural bristle brush in order to stimulate blood circulation which in turn results in smoother skin, minimized cellulite, and a slew of other incredible benefits. Doing this will also eliminate toxins in the skin, reduce the amount of clogged pores, and leave you with supple, glowing skin! You can dry brush every night before bed!

#5. Weekly Bath

Once a week, set a side an hour or two to take a nice relaxing bath. To that bath, you can add relaxing bath bombs, bath salts, bath milk, or just a handful of Epsom salts with a few drops of lavender essential oil. Taking the time out to unwind and relax your muscles in a bath is super important to your overall health, plus it will leave your skin bright and soft!

Read more 

Also read  DIY Hair Mask for Dry Hair

DIY Hair Mask for Dry Hair

0

Thankfully, there are simple and all natural ways to avoid not only dry, damaged strands, but also an oily scalp. The solution lies in natural ingredients that can be found in our kitchen cupboards. You all know we love our natural ingredients here, and this DIY hair mask for dry hair is NO exception!

When it comes to putting things on our skin and hair, we only want the best, because let’s face it – commercial products are LADEN with harsh chemicals that can actually cause a slew of problems.

The Ingredients

A good, effective DIY hair mask always starts with good, healthy, and organic ingredients. For this particular recipe, we’ll be using honey, eggs, and ACV (apple cider vinegar), and here’s why!

Honey:

Honey is as natural as they come! But even so, you have to be careful which kind of honey you purchase. Believe it or not, honey is a multi-billion dollar industry and a lot of it is actually NOT honey, but syrup with added sugar. Finding real honey isn’t hard though – just look to your local markets. After all, buying local ensures that you get good, quality ingredients, and also helps out your local economy. Real honey should be thick and should also SMELL like honey!

But why is honey good for your hair you ask? Aside from being a natural moisturizer and hydrating agent, honey also fights bacteria and promotes healthy hair growth. Honey also helps to strengthen the hair follicles, which in turn helps growth and prevents thinning. Because it fights bacteria, honey can help with flakes, eczema, dry and itchy scalp issues, and also cleanse the hair follicles.

Eggs:

Eggs are packed full of protein, as you may already know, so it’s no wonder that eggs can do A LOT for your hair as well! Dry, frizzy hair is a sign of damage, and so eggs can actually strengthen the hair follicle by giving it much needed protein. But the best thing about eggs for hair? They hydrate the scalp and hair, and therefore help prevent itchiness and flakes.

Basically, eggs are to your hair like spinach is for Popeye’s muscles! They strengthen, hydrate, add shine, and also condition dry, brittle hair. If possible and for best results, try always using organic grade A eggs!

Read more 

Also read How to Lighten Your Hair at Home (Without Bleach)

How to Lighten Your Hair at Home (Without Bleach)

0

Ready to go blonde or try a lighter look on budget? You don’t have to go to the salon, but you should beware of bleach. To get some expert tips on how to lighten your locks at home, we spoke with Jordan Davis, a hair stylist at Roots Salon & Hair Studio in Denver, Colorado, about how to lighten your hair at home without bleach.

“As a stylist, I see too many women and teens come in with at-home disasters from bleaching their own hair,” says Davis. “Unfortunately, people make the assumption that the higher the volume of developer the faster it is going to lift; this is not the case. Our hair goes through different levels of lifting: red, red/orange, orange, yellow/orange, yellow to pale yellow. Many people stop lifting at red/orange or yellow/orange while bleaching their own hair which is usually where I see people coming to me for my help.”

4 Ways to Lighten Your Hair at Home

If you’d like to get lighter hair without a trip to the salon, step away from the bleach. At best, you’ll wind up with some uneven tones or a shade that wasn’t what you had in mind. At worst, you could burn your scalp or cause your hair to break and/or fall out. And then you’ll likely have to spend more money and time going to the salon—or even the doctor—for damage control.

So, “Unless you are a certified professional with experience, I would not recommend bleaching your own hair at home,” warns Davis. Fortunately, there are four much safer ways to lighten your hair at home without the risks of bleach mishaps.

1. Sunshine 

Your hair will lighten on its own when exposed to UV and UVA rays. To quicken this process, spritz equal parts lemon juice and water onto your hair and soak up the sun. “The safest way to do some lightening at home is lemon juice diluted with water,” says Davis.

“Sitting out in the sunshine helps the process.” However, Davis only advises this method for those who have naturally blonde hair, as “use on brunette hair can cause a reddish/orange hue to come out of the hair.”

2. Lemon Juice

“My favorite way to lighten hair is lemon juice and sunshine! Being from California, this method still continues to be the safest and most popular way to lighten your hair. Also a little bit better on the budget!”

Remember swimming in the ocean and realizing your hair was lighter for it? You can add sea salt to your mixture for additional lightening.

3. Chamomile

Yep, just like the tea. Brew a strong cup, let it cool and apply to individual strands for highlights or pour all over to enhance naturally blonde and golden tones.

Read more 

Also read  Homemade Eye Makeup Remover

DIY Shampoo Recipe for All Hair Types

This DIY shampoo recipe has been tried and tested for all kinds of different hair types, and we’re excited to share it with you! If you’ve ever gone the “no-poo” route (where you don’t use commercial shampoos to wash your hair), you know it can be difficult. But, a DIY shampoo is not that – it’s a natural alternative to commercial shampoos, which is obviously much better for your hair.

Benefits of DIY Shampoo

So if we know all of that, why not make our own shampoo? Homemade shampoos are actually pretty easy to make, and over time, will hydrate the hair and bring it back to health. The ingredients are usually all natural and you can almost always customize your DIY shampoo to your preferences.

  • No parabens and sulfates
  • No hurtful chemicals
  • Contains only natural ingredients
  • Does not irritate skin, eyes, or scalp
  • Moisturizes and hydrates
  • Prevents dandruff
  • Inexpensive to make
  • Safe for kids

DIY Shampoo Recipe With Coconut Milk

This DIY shampoo with coconut oil is tried, tested, and true. The reason we love this recipe is because it contains coconut milk. Just using Castile soap, for example, is simply not enough, and can actually leave hair tangled and greasy. This recipe works for ALL hair types including natural hair, dry hair, oily hair, curly hair, and kids hair. Feel free to customize this recipe to your preferences. Play around with different essential oils, or just use what you have on hand.

You’ll Need:

  • 1/4 cup Castile soap
  • 1/4 cup coconut milk
  • 20 drops essential oil of your choice (lavender, tea tree oil, grapefruit oil, orange oil, peppermint oil, rosemary oil, etc…)
  • 1/2 tsp olive oil or another carrier oil of your choice such as coconut oil, sweet almond oil, avocado oil, etc… – Optional, for dry hair

Directions:

  1. To a clean shampoo bottle, add all of the ingredients and shake well.
  2. Add the olive oil only if you have dry hair.
  3. If you’re using a pump bottle or dispenser, add about 1/4 cup of distilled water.
  4. Shake well before each use, and use about a teaspoon or two for every hair wash.
  5. Can be kept in the shower for up to 1 month.
  6. Rinse hair with a mixture of apple cider vinegar and distilled water – a 50/50 mix is usually best.
  7. Follow up with a homemade leave-in conditioner. Read More…….

Homemade Eye Makeup Remover

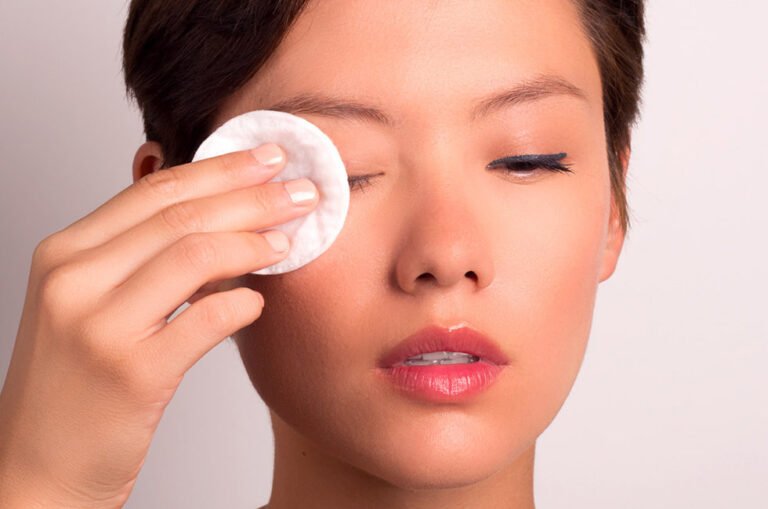
Commercial eye makeup remover can be quite expensive, and quite honestly, they don’t even work that well! So what’s a girl to do? Make her own of course! This homemade eye makeup remover is so simple to make and will not only remove even the toughest of mascaras and eyeliners, but will also encourage lash growth and hydrate the skin!

So if you’re looking for the perfect, all natural homemade makeup remover, look no further because this is the only one you’ll ever use!

Homemade Eye Makeup Remover Recipe

Ingredients:

  • 2 tbsp witch hazel
  • Two tbsp oil of your choice (jojoba, almond, etc…)
  • 2 tbsp filtered water
  • 1 tsp castor oil
  • 1 tsp almond oil
  • one tsp liquid coconut oil
  • 1-2 capsules vitamin E OR 1/2 tsp liquid vitamin E

Directions:

  1. To a clean bottle or container of your choice, add all the ingredients.
  2. Shake well to combined all ingredients together.
  3. Apply a small amount to a cotton pad or ball and swipe over eyes, mouth, and/or face. Rub in slow, circular motions to remove all makeup and you’re all set!
  4. Store in a cool, dark place and it will last for months!

1.  Extra Virgin Coconut oil Eye Makeup Remover Recipe

To start off, we have an olive oil eye makeup remover. Olive oil is a pretty common ingredient in these homemade eye makeup remover recipes because it quickly breaks down the makeup on your face.

The other ingredients in this recipe help break down the makeup further and also relax and nourish your skin.

You will need: 

  • ½ cup of extra virgin coconut oil
  • vitamin E capsules (or oil)
  • lavender essential oil
  • small containers for mixing and storage

Directions:

  1. Start by melting the coconut oil in the microwave. (It should only take 15 seconds.)
  2. Pour the liquid into your container(s).
  3. Use a small pin to poke holes in 6 vitamin E capsules. Add the contents of the capsules into a mason jar with the coconut oil.
  4. Add 6-7 drops of lavender essential oil.

When the mixture has returned to room temperature, it creates an oil that can be lightly massaged onto your eyelids and wiped clean. You can also leave on a small amount overnight to moisturize the delicate skin around your eyes.

Why This Homemade Eye Makeup Remover Is SO Good:

  • Hydrates dry skin
  • Encourages lash and eyebrow growth
  • Cleanses the skin
  • Prevents fine lines and crows feet
  • Anti-aging
  • Acts as a serum Read More……………

Also Read: 15 Amazing Homemade Scrubs for Oily Skin