
Home Blog Page 383

Get Rid of Frizzy Hair With These Easy Natural Remedies

0

12 Simple & Effective Home Remedies to Get Rid of Frizzy Hair

These home remedies for frizzy hair after a shower and before are great to control that frizz.

1. The Almond Oil-Egg Remedy

Almond and eggs are classics for your hair.

Why It Works

The egg supplies your hair follicles with protein, while almond oil nourishes your scalp and repairs any damage caused with its omega-3 fatty acids and Vitamin E content.

What You Will Need

  • One raw egg
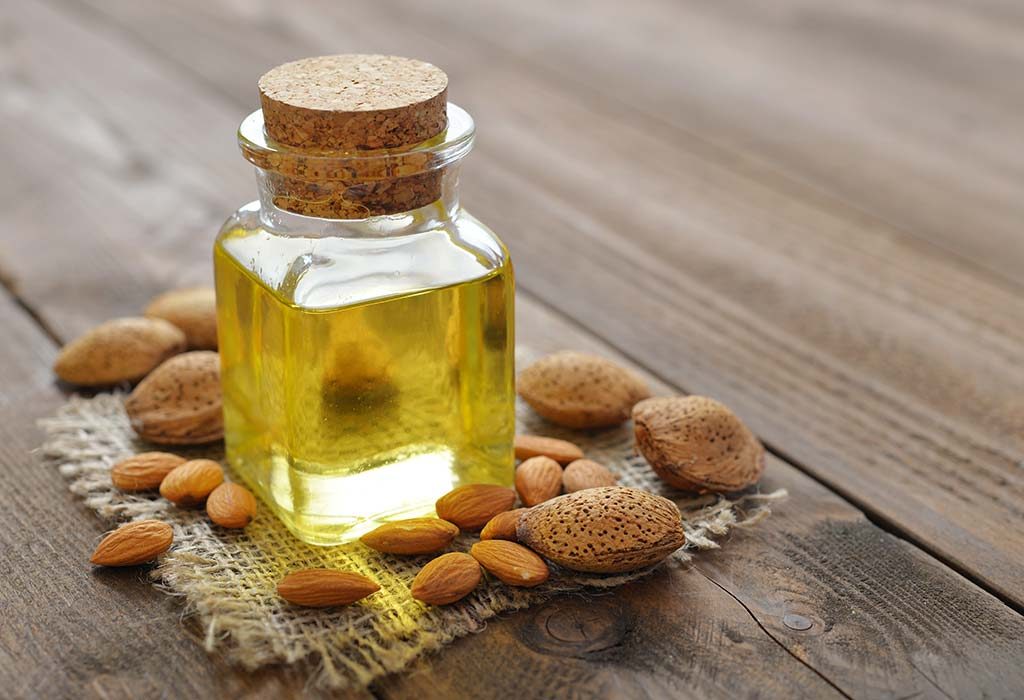
  • A quarter cup of almond oil

What You Have To Do

Take a bowl and whisk the egg yolk and almond oil well.

  • Apply the mixture to your hair, section by section, making sure to work down the entire length.
  • Leave it on for about 40 minutes and rinse well.
  • Afterwards, use a shampoo or hair conditioner that doesn’t have any sulphates to wash your hair.

How Often Should You Do This

You will need to apply this remedy at least once every week.
almond oil and egg mixture

2. Avocado and Yogurt Hair Mask

Craving avocados? Spruce up your hair with a mask using it along with some yogurt today.

Why It Works

The yogurt acts as a deep conditioning agent, while the avocado supplies your hair with optimal nourishment with its blend of Vitamins B and E.

What You Will Need

  • One raw avocado
  • A cup of fresh yogurt

What You Have To Do

  • Scoop out the inner contents of the avocado after removing the pit. Mash it well and blend it nicely with fresh yogurt to get a creamy paste.
  • Apply on the hair and wait for about 40 to 45 minutes.
  • Rinse well using shampoo, and apply a good hair conditioner afterwards.

How Often Should You Do This

Repeat at least twice a week for optimal results.

3. The Coconut-E Remedy

We like to call this a Coconut-E remedy because it contains coconut and Vitamin E!

Why It Works

Vitamin E nourishes your hair, while coconut supplies your hair with much-needed protein.

Read More

Also Read: 8 Clever Nail Hacks

8 Clever Nail Hacks

Looking to step up your nail game? These 8 clever nail hacks are complete game changers and once you use them, you’ll never go back!

8 Clever Nail Hacks You Need In Your Life

#1. Line Your Nails With Petroleum Jelly or White Craft Glue

Lining your nails with petroleum jelly or white craft clue before painting your nails. Use a cotton swab to apply the jelly or the glue around the nail base. This will create a barrier between the nail polish and will create less of a mess.

#2. Prevent Chips

Prevent chips by applying two base-coat layers: one layer just on the tip of your nails, and another layer on the entire nail. Just wait until the first coat has dried before applying the second coat.

#3. Use White Nail Polish to Make Colors Pop

Before applying bright, neon nail polish, use a white nail polish. Apply white nail polish to your nails and let them dry. Then, apply a bright polish on top. The bright polish will look much brighter and more colorful.

#4. Clean Up Messes With a Q-Tip

Use a q-tip dipped in acetone to remove any nail polishes messes. The Q-tip is small enough to remove any nail polish that may have went on the skin, without removing the polish from the nails.

#5. Easy French Manicure

Create a super easy French manicure by looping a rubber band around the nail. Take a rubber band and tie it in the middle Loop one end over your thumb (to create tension) and align the other end over the top of your nail, just below the edge, to create a a French tip shape.

#6. Make Your Own Nail Polish

Got some loose eye shadow or pigment? Mix it with a little bit of clear nail polish until you get the consistency of a nail polish. Apply as you would any other polish!

#7. Fast Drying Nails With Ice Water

Dry your nails super fast by soaking them in ice water. Grab a bowl and fill it with water and some ice cubes. After painting your nails, soak them for a few minutes and voila!

#8. Non-Stick Cooking Spray To Dry Nails

Another way to get your nails to dry super quickly is to spray cooking spray directly onto the nails after painting them. Wait a few minutes, and wash the oil off – your nail polish should be nice and dry!

….Read More…

Read Also: Is your skin constantly drying out? This DIY face mist is the only thing you need to hydrate those pores

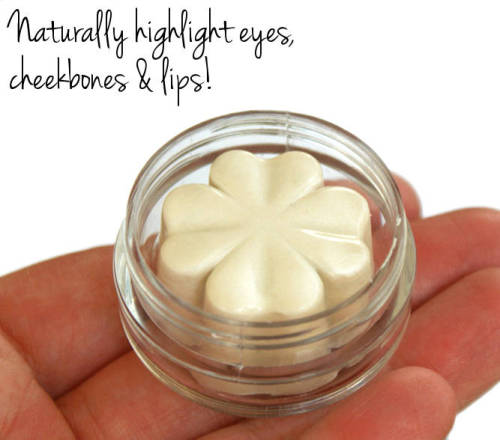
DIY Highlighter and Luminizer

0

Face highlighters and luminizers give you a beautiful glow that usually lasts all day, but paying $20 or even more for a tiny tube of the stuff isn’t exactly my idea of a fun time. So with a little research, I found that the best way to save money AND get that beautiful glow, is to make your own! With just a few simple ingredients, this DIY highlighter and luminizer will be in your hands in minutes!

DIY Highlighter and Luminizer Recipe

You’ll Need:

  • 2 tbsp grated beeswax
  • 1 tbsp coconut oil
  • 1 tbsp castor oil
  • 4-5 drops vitamin E oil
  • 1 drop rosemary oil (optional)
  • 2 tbsp mica powder in gold or silver
  • clean container (I like to use old eyeshadow pots, but you can pretty much use anything you like! This recipe will fit about 4 eyeshadow container pots)

The Drill:

  1. In a microwave safe bowl, heat your beeswax 15-20 seconds at a time until it is melted. Keep a close eye on it so it doesn’t begin smoking.
  2. Then, add your coconut oil, castor oil, vitamin E oil, and rosemary oil. Mix well until all ingredients are combined and your coconut oil has melted.
  3. Add your mica powder and stir very well until everything is mixed thoroughly.
  4. If your mixture has begun to harden before you finished stirring, pop in the microwave for a few more seconds.
  5. Pour into clean containers and let set for about 20 minutes.

And that’s it! Now you have your own highlighter/luminizer in just a few minutes for pennies! You can slo mix and match the gold and silver mica powders ( 1 tbsp each) to make a sparkly champagne color! Read more

Also read: Cooling Cucumber Bath With Epsom Salts

Is your skin constantly drying out? This DIY face mist is the only thing you need to hydrate those pores

0
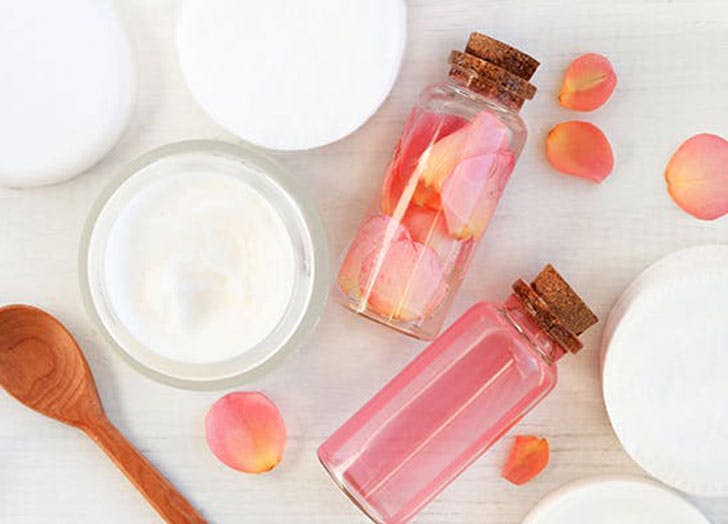
Is your skin constantly drying out? This DIY face mist is the only thing you need to hydrate those pores.
If you’re dealing with a hot and humid weather just like us, this face mist is going to come into your lives as an absolute saviour.
If you think summer is the worse season for your skin, you’ve definitely not dealt with the hot and humid climate. Even if you are not living in hot area, humidity and heat is something we all deal with at least once a year. While this is the case, just like the body, even the skin needs to stay hydrated. So, we’re here with an easy home remedy to keep your skin fresh and hydrated throughout the day.
DIY face mist are the easiest and effective ways to keep the skin hydrated (and in some cases, moisturised) throughout the day. Whenever you feel like the weather is taking a toll on your skin, make sure to keep a bottle around and spritz whenever needed!

All you need: 

Rose and Hibiscus petals

Water

Essential oils of your choice

How to: 

  1. Boil water in a pan and add the petals to it. Let it sit for a few hours and strain the petals out.
  2. Once you have the rose and hibiscus infused water, add a few drops of your favourite essential oils.
  3. Fill it in a spray bottle and make sure to spritz your face throughout the day.

Benefits:

The flower petals ensure that you have glowing, younger-looking skin while the essential oils keep it moisturised and deal with any issues you’re facing. You can even switch the essential oils and squeeze out the oil from one Vitamin E capsule to pamper your skin furthermore.

….Read More….

Read Also: How To Make A Brightening Turmeric Face Mask + 3 Ways To Spice It Up

Cooling Cucumber Bath With Epsom Salts

0

A warm bath and a glass of wine may be one of the most relaxing things to do during cold winter days but have you ever thought of a cool bath during summer? This cooling cucumber bath with Epsom salts will give your muscles the relaxation they need, all while cooling the body down, making this the perfect summertime bath! As the Epsom salts soothe and exfoliate, the cucumber hydrates and coats the skin with vitamins. The cool water allows for the skin to tighten, shrinking pores, and also increase the metabolism.

Cooling Cucumber Bath

What you will need:

  • A bath tub 3/4 full of cool water
  • 1 cucumber cut in slices
  • 2 cups of Epsom salts
  • A handful of chopped peppermint leaves
  • 3 or 4 drops of Ylang Ylang essential oil or lavender oil.

In this soak, the peppermint leaves refresh the skin and treat any sort of discomfort caused by poison ivy, poison oak and even calms a blasting headache. The cucumber help to reduce inflammation and bring vitamins and minerals to the skin. The cold water is a therapy for your body as it refreshes the epidermis outside and organs inside the body, especially in the middle of a hot, stressful summer afternoon.

Directions:

  1. Fill up the bathtub with relatively cool water.
  2. While the tub is filling up, add the Epsom salts.
  3. Lastly, dd the fresh peppermint, essential oil and cucumber slices.
  4. Sit, soak and simply relax.

While in the zone, listen to some calming music, read or simply breathe and enjoy. Take this bath and use it as a time to focus on pampering yourself and releasing all the toxins in your body. After this cooling cucumber bath, you will be ready to face anything that comes your way. Read more

Also read: Natural Lash Lift Treatments

Make Ginger-Tulsi Herbal Tea For Healthy Immunity This Monsoon

Healthy Immunity: Monsoon showers have finally begun across the country, offering a major respite from the soaring temperatures. With the rainy season, however, come major communicable infections and other health concerns too. The best way to ensure that we do not contract any diseases such as common cold or seasonal flu is to maintain good immunity. Building immunity is a vital task, especially, in times like these when there is heightened risk of a number of illnesses, Healthy Immunity.

Here Is The Full Recipe For Ginger-Tulsi Immunity Drink For Monsoon by Shilpa Arora:

Ingredients:

  • 1 pinch Ginger
  • 3 Peppercorns
  • 2-3 leaves Tulsi
  • 1 tsp Oregano (dry)
  • 1/4 tsp Fennel Seeds
  • 1/4 tsp Jeera
  • 1/4 tsp Cinnamon powder

Method:

  1. Bring all the ingredients together in a pan with 2 cups of water.
  2. Keep the tea to boil for 10 minutes and simmer. Sip warm

Development immunity is a crucial activity, particularly, in occasions like those when there may be heightened chance of quite a lot of sicknesses. It’s stated that the immune gadget regenerates itself each different week which is why what we devour and drink has a big have an effect on on our total well being and wellbeing.

Read More

Also Read: Natural Lash Lift Treatments

Natural Lash Lift Treatments

Heard about lash lift and have no idea what it is? Well, you have come to the right place because today we will be talking all about lash lifts, what it is, its benefits, and share a few natural lash lift treatments you can do at home!

A lash lift is an alternative to lash extensions – it’s like a perm for your lashes that makes them look curly, lifted and defined for 6 to 8 weeks. A lash lift can be done in a salon by a specialist but you know how pricey that can be? Yup, hella pricey not to mention that some of them don’t use the right and safe ingredients for you and in the end all the products used are chemicals.

There are also kits you can buy that can be cheaper solutions, but can be just as dangerous because those kits come with chemical glues and if you are not a professional, you can seriously damage your lashes and sight. That’s why we’re bringing you the natural solution to a lash lift that will safely give you that amazing look and will cost you almost nothing. Let’s take a look at some of the benefits of getting natural lash lift treatments!

Natural Lash Lift Benefits:

  • Safe and natural products: unlike a lash lift you get at the salon, making your own will ensure the protection your eyes need since you will know what exactly is being applied.
  • Longer lashes: With this treatment, your lashes will look longer and fuller than ever, not to mention the ingredients work to actually help your lashes grown while looking amazing.
  • No need of curling your lashes everyday: Use the right treatment for you and enjoy your lifted lashes for weeks.

Natural Lash Lift Treatments

#1. Oils for Natural Lash Lift

Mother nature always has us covered and for lash lifts, one of the best natural methods is using natural oils that will help us achieve that long and thicker eyelash look!

Castor Oil

Castor oil has amazing extreme hair growth properties making it one of the best oils you can use to lengthen your lashes.

Instructions:

  1. Grab a Q-tip and dip it in Castor oil.
  2. Gently run the Q-tip along the base of your lashes.
  3. Apply the treatment every day during a month and start seeing the difference after 2 weeks!

Lavender Essential Oil

Lavender essential oil is an excellent oil that helps to encourage hair growth making your lashes fuller and thicker all in a natural way. The soothing lavender scent will help you sleep nice and tight!

Instructions:

  1. Using a Q-tip, apply the lavender oil at the base of your lashes.
  2. Do this every night for at least 30 days.

Rosemary Essential Oil

This essential oil is one of the best when it comes to hair growth which will help to get longer and thicker lashes!

Instructions:

  1. Use a Q-tip to apply the rosemary essential oil at the base of your lashes.
  2. Do this for 30 days.

Grapeseed oil

Grapeseed oil contains linoleic acid and omega 6 fatty acids that combat hair loss and promotes luscious and long lashes. This oil also contains vitamin E which moisturizes and strengthens.

Instructions:

  1. Grab a Q-tip and dip it in grapeseed oil.
  2. Gently run the Q-tip along the base of your lashes.
  3. Apply the treatment for 30 days. Read more 

Also read: How to Apply Your Eye Cream Properly

Immunity-Boosting Summer Foods You Must Include In Your Daily Diet

Summer Foods: The whole world woke up to the need of having a good immunity, which may not have crossed our minds earlier, but in the wake of Coronavirus scare, it did. A good immunity helps stay us in good shape, which may prove beneficial in preventing and managing various infections, flus and diseases. The seasonal produce of summer abounds with many foods that may play a significant role in building or strengthening our immune system.

Orange And Lemons

These vitamin C-rich foods are essential to consume right now. Apart from their high vitamin C content, which is a good immunity booster, they are also refreshing, hydrating and cooling. Eat raw orange or juice it. Drink lemon water every day or sprinkle lemon juice on your salad and other meals.

Watermelon And Cucumber

Both watermelon and cucumber are filled of mostly water. Not only they are extremely hydrating and light on stomach, their nutrient composition also helps enhance our immunity level. Bonus: Both watermelon and cucumber are low-cal, weight-loss-friendly foods!

Curd

Every time we finish a bowl of cool curd, we feel a wave of freshness rushing through our system. Right? Curd is a cooling food, which is perfect for summer; and its probiotic content helps keep digestive issues at bay. You may already know all of this but what you may not know is that curd is fortified with vitamin D, which also helps keep our immunity system running smoothly.

Read More

Also Read: Turmeric Powder for Beauty: How to Use it for Your Face and Skin

How To Make A Brightening Turmeric Face Mask + 3 Ways To Spice It Up

Looking to give your skin some extra love? Perhaps peek into your kitchen. Yes, 100% natural ingredients can be just as nourishing as market masks and treatments, not to mention a fun way to spend the evening. If you’re new to the venture that is DIY beauty, there’s no shortage of players you can source at home (honey, cucumber, avocado, aloe vera—the skin-friendly grocery list goes on and on).

Let’s add one more to the DIY docket: a turmeric face mask.

How to make a turmeric face mask.

Turmeric, while rather buzzy in the last couple of years, is by no means a new addition to DIY; in fact, the spice has been used in ayurvedic medicine for thousands of years. And as modern science is also fully on board, there’s plenty of research touting the spice as quite the impressive anti-inflammatory. Additionally, turmeric (and its active ingredient, curcumin) has antioxidant properties that can help protect the skin from free-radical damage.

Needless to say, it makes a lovely face mask for those looking to brighten skin and refine texture and tone. (Plus, it only takes a few ingredients to get started.) Here’s exactly what you need:

Yogurt: “Mixing turmeric with yogurt as a base gives a nice texture to spread on your face as a mask,” says Marisa Plescia, research scientist at clean beauty e-tailer NakedPoppy. “Plus, yogurt is full of probiotics that could help balance the skin’s microbiome.” And it’s jam-packed with lactic acid, which can gently buff the skin smooth.

Turmeric: Of course, we can’t have a turmeric face mask without the star ingredient. Just keep in mind that you don’t need a ton of spice for it to be effective—a little goes a long way! Plescia recommends ⅛ to ½ teaspoon of turmeric to avoid overpowering the mask and staining the skin (more on that later).

To make a basic mask, simply combine ½ cup of plain yogurt with ¼ teaspoon of turmeric. Apply an even layer to the skin, leave on for 10 to 20 minutes, then remove with warm water. Always remember to seal in the moisture with a cream or oil, so you don’t dry your skin out further.

3 turmeric face mask for glowing skin.

So you have your basic mask recipe—why not spice it up (pun intended) with a few add-ins? Below, three helpful ways to give your turmeric face mask just a little more oomph:

1. Add aloe, for skin-soothing.

Aloe’s an incredible skin-soother, particularly perfect for relieving the skin after a scorching beach day. Simply mix a 1:1 ratio of fresh aloe and yogurt (plus a teaspoon or so of turmeric) in a bowl until you get a spreadable consistency. Apply the mask to your face and let sit for five to 10 minutes. (Don’t let it sit for longer than 20 minutes, as aloe can lose its moisturizing effect and potentially cause irritation when sitting on the skin for too long!) Then rinse your face thoroughly and pat dry.

 2. Add honey, for extra hydration.

Ah, honey: One of the most sought-after DIY ingredients out there. There’s a pretty good reason honey remains a beauty fan favorite: It’s an all-natural way to hydrate your skin and ease inflammation. “Adding a bit of honey to your DIY turmeric face mask will increase the mask’s ability to hydrate the skin, and it’s great for acne and blemishes, as both turmeric and honey are known to provide antibacterial and anti-inflammatory benefits,” explains Plescia.

Either add a dollop of the golden goop to your yogurt-turmeric concoction, or create a whole new base entirely: Mix 1 tbsp. of raw or Manuka honey, 1 tsp. ground turmeric, and ½ tsp. lemon juice until it forms a paste. Slather on and leave for 10 minutes or until the mask starts to harden, then wash with lukewarm water.

3. Add apple cider vinegar, for gentle exfoliation.

“If you have uneven skin tone and texture, add a little bit of apple cider vinegar to your turmeric treatment for some extra skin brightening,” says Plescia. ACV is naturally chock-full of alpha-hydroxy acids (AHAs), which can gently dissolve dead skin cells and leave your skin looking smooth and renewed.

Just be careful if you have chronically dry or sensitive skin: Applying ACV directly on the skin can be irritating for some. That’s why Plescia says just a few drops to your turmeric face mask will do the trick; if you feel any irritation start to occur, rinse off the mixture immediately.

……Read More……

Read Also: 7 Questions About Obagi’s Vitamin C Serums, Answered!

7 Questions About Obagi’s Vitamin C Serums, Answered!

0

So you’ve finally decided you need a vitamin C serum—congratulations, you are one step closer to achieving a brighter, more youthful complexion. You’ve read all about the little-known benefits of this powerful antioxidant and even found out that Obagi Medical, one of the most renowned professional skin care lines, offers some of the best vitamin C serums out there. Still, you find yourself confused. What is L-ascorbic acid and what do those percentages mean?

Lucky for you, we’re here to demystify the science behind vitamin C and Obagi’s Professional-C Serum line. Here, we chatted with the experts at Obagi to answer seven of the most frequently asked questions about this line.

Question#1: What result can I expect from a vitamin C serum?

Answer: Vitamin C is essential for a healthy body, and therefore essential for healthy skin and hair. It’s a potent antioxidant that can neutralize free radicals, such as those found in environmental pollutants and after exposure to ultraviolet radiation. A vitamin C serum can do various wonders for your skin. Among the most noticeable benefits are the following:

  • Even skin tone; diminished dark spots
  • Reduced appearance of fine lines and wrinkles
  • Brighter skin overall

Question#2: Why does Obagi prefer L-ascorbic acid over other forms?

Answer: Not all forms of vitamin C are created equal, and there are many derivatives on the market. Obagi uses L-ascorbic acid because it is known to be the most bioavailable (most absorbed by your skin) and thus most efficacious form.

Question#3: Why do Obagi Vitamin C serums come in different concentrations (10%, 15% and 20%)? What’s the difference and who should use which?

Answer: There are three percentages of L-ascorbic acid available in the Obagi Professional-C product line. A higher concentration isn’t necessarily better than a lower concentration; the difference is in intended use.

Read more 

Also read  How to Apply Your Eye Cream Properly