Home Blog Page 359

5 Homemade Face Packs for Glowing Skin

0

5 Homemade Face Packs for Glowing Skin

Get ready to say hello to glowing and smooth skin! Forget expensive cosmetics that burn a hole in your pocket. Discover the wonders of natural products that are gentle on your skin and on your wallet too. These homemade face packs will get you looking gorgeous.

Tired of switching expensive face packs and other cosmetic products to spruce up dull skin? Don’t worry – you’re not alone. With so many products available today, you can’t be blamed for being overwhelmed. While you can choose any store-bought item, why not give homemade face packs for glowing skin a try? They’re virtually free, easy to prepare and are quite safe. Take a look at some of these natural, effective face packs that will get your skin radiant again.

Quick Homemade Face Packs

1. Curd and Oatmeal Pack

Curd and Oatmeal Pack

This is a simple pack with ingredients right out of the kitchen. All you need to do is soak a bowlful of oats for a night and grind it into a not-so-thick paste in the morning. Mix with curd and apply it on your face. Leave it on for 10 to 15 minutes and rinse off with lukewarm water. Repeat after every two days and see results in no time.

2. Potato Pulp

Potato Pulp for face

Potatoes are said to have mild bleaching properties and they make wonderful homemade face packs for glowing skin. Mash a boiled potato and mix in a teaspoon of almond oil. Apply it evenly all over and wash it after 15 minutes. You can also use a teaspoon of milk if you don’t have almond oil.

3. Mint Paste

Mint Paste

Mint is easy to grow and has uses well outside cooking. It can make for the best face pack for fair and glowing skin. Take a bunch of these fresh green wonders and reduce them to a thick paste. Next, add one or two teaspoonfuls of yoghurt and apply the pack to your face. Let it dry, rinse and follow with a good moisturiser.

4. Sandalwood Powder Pack

Sandalwood Powder Pack

This natural and fragrant ingredient has been used in face packs for fair skin for ages. It’s wonderful for controlling excess oil buildup. Mix chandan or sandalwood powder with rose water and apply it evenly on your face. Leave it until it gets dry and begins to crack. Wash it off with running water and moisturise with face cream.

Read more

Also read  Dos and Don’ts for Daily Hair Care
9 Easy Ways to Strengthen Your Nails

We all want strong, thick, beautiful nails. But simply going about our lives can become a minefield of potentially nail-damaging situations.

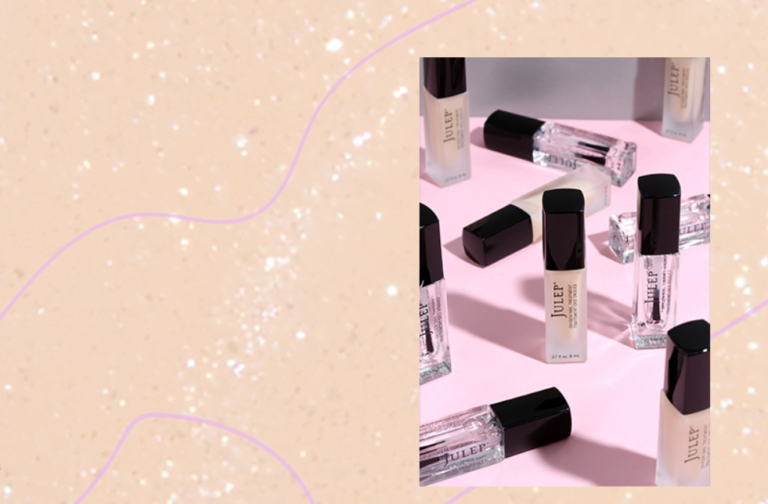
Here at Julep we’ve put a lot of thought, love, and science into helping you strengthen your nails with products like Take a Breather Oxygen Nail Treatment, Mighty Nail & Cuticle Serum, and our Color That Treats Nail Polish. All these products let your nails breathe while infusing them with natural nail-strengthening ingredients.

But even with the help of powerful nail treatments, growing your healthiest nails ever starts with fine-tuning your everyday habits. Here are our top tips for strengthening nail and preventing nail damage—so you can better enjoy all your gorgeous manicures.

Limit water exposure.

Wear gloves when you wash dishes, and don’t soak nail in the bath or pool for too long. Keep your nail outside the water for most of your soak.

But drink lots (and lots) of water.

Hydration is key for beautiful skin, hair, and nail. Drink lots of water throughout the day, and you’ll feel and look better—all the way down to your hydrated cuticles and nail. A balanced diet that includes plenty of protein will also help improve nail health. Strengthen

Keep your nails on the shorter side.

If you’re having trouble with weak nails, consider cutting down the length while you build up their strength. Shorter nails are less prone to breaking because there are fewer exposed edges to tear and less surface area where water and chemicals can be absorbed. Just make sure to file down your nail in one direction. Don’t saw them back and forth as this can cause your nail to split and peel.

Read More

Also Read: Dos and Don’ts for Daily Hair Care

Make cuticle oil or crème a part of your routine.If you don’t keep your nails and cuticles moisturized, common nail problems like hang nail and dry skin can snowball into bigger problems, like chronic cuticle picking and nail peeling. Instead of cutting your cuticles

Dos and Don’ts for Daily Hair Care

Everyday hair care requires attention, a good shampoo and conditioner and a basic general know-how about what’s good and what’s not. Major missteps on your part can lead to dull and lifeless locks. Therefore, adopting good hair habits will help in keeping your tresses sparkly fresh and good looking.

Mothers have a lot on their plate. From taking care of their kids to doing the housework, life can get hectic. So when it comes to daily hair care, many moms don’t even have the time to adopt healthy methods to ensure luscious locks. However, it is imperative that moms take time-out to care for their tresses, lest they regret later. Here are some dos and don’ts, as well as everyday hair care solutions, which all women should follow.

Daily Hair Care Tips for Mothers

Hair Care Do’s

  • Use a dry shampoo instead of washing your hair everyday. A dry shampoo helps soak excess oil without dehydrating the hair.
  • Use oil-based shampoos. Your hair will retain moisture, which gets lost when you wash them regularly.
  • At night, sleep on a silk pillow. It helps keeps your hair tangle-free. This simple tip will keep your hair from getting damaged.
  • For damaged hair, aloe vera oil is a great remedy. While the results might take some time to show, it will eventually manifest after regular use.
  • To prevent hair from getting damaged, brush and untangle it properly when it’s wet. Using a wide-tooth comb will serve the purpose. The wide teeth of the comb will go through the hair smoothly and prevent it from getting tangled.
  • For shinier and softer hair, try out deep conditioning treatments.
  • Regular hair trimming can keep your hair from getting damaged. Cutting off the split ends will keep your hair satin shiny and healthy looking. If those pesky split ends are not tended to, they can damage the hair further.
  • Wearing a hat when you leave the house during summers will guard your tresses from the sharp rays of the sun.
  • To give your hair that extra shine, use the extract of half a lemon. Rinse after 15-20 minutes of application. While even vinegar and water gives you the same result, it is preferred to apply lemon juice.

Read more 

Also read  5 Shower Mistakes to Avoid for Healthy Hair and Skin

How to Get Amazingly Long Lashes

0

Today we’re going to show you how to get amazingly long lashes! If there is one thing I cannot live without it’s my mascara. The second you elongate those lashes, your eyes open up and your whole faces takes on a new look. Learn the tricks of the pros and see how you can achieve long, thick, beautifully enticing eyelashes that everyone will fall for!

How to Get Amazingly Long Lashes

Step 1

After applying your face lotion, wait for it to dry completely. Apply a light powder over your eye concealer to prevent leaks and smudges.

Step 2

Take an eyelash curler and start curling as close to the roots as possible. After doing so, move the curler up a little bit more and curl again. Repeat this process 2-3 times, until  curled up. TIP: if you find that your lashes don’t curl, use your blow dryer to heat up the curler for 2-5 seconds.

Step 3

Take your favorite thickening or lengthening mascara, I like Maybelline Lash Blast, and hold the wand at the base of your lashes. Wiggle the wand from side to side then brush straight up through the ends. Apply 2-3 coats on each lash, leaving about 2 minutes in between to dry.

Step 4

After each coat of mascara, use an eyelash comb to comb out the lashes as to not get any clumps. Avoid smudging by applying a coat of waterproof mascara on top.

Step 5

Finish off by swiping your lower lashes with mascara. If you wish, you can also add a few fake lashes on the outer corner of your eyes to make them look even fuller. Read more

Also read: Easy as Apple Pie Body Scrub Recipe

8 Best DIY Natural Face Scrubs for Glowing Skin

0

8 Best DIY Natural Face Scrubs for Glowing Skin

Looking to get glowing skin and have a little fun in the kitchen? We’ve got you covered. Whether your skin is dry, acne-prone, oily, aging, or just in need of a boost, there is a homemade natural face scrub for your needs. All you’ll need is a mixing bowl, measuring cups and spoons, a liquid or cream base, and the ingredients you want to add in.

How to make the best DIY face scrub for your skin

There are many ways to exfoliate skin naturally. Coffee grounds, sugar, finely ground sea salt, cinnamon, and oats are some of the best ingredients to use in a homemade exfoliating scrub, Roff says. She is a big fan of sugar face scrubs, as they can brighten dull skin and fight signs of aging.

They remove dead skin cells and surface build-up to reveal new, healthier skin and speed up the skin renewal process. Just make sure that the sugar granules are finely ground and small enough so that they don’t irritate the face, she advises.

1. Acne-Fighting Strawberry Face Scrub:

Prevent (and treat) pimples with this fruity acne-fighting yet soothing face scrub. If you’re bothered by persistent breakouts, or dull, oily skin, this scrub will help brighten, clear and reduce surface bacteria, Vargas says.

Recipe:
1 cup plain yogurt
½ cup mashed strawberries
½ cup almond meal
A splash of raw apple cider vinegar

Mix all ingredients and lightly buff the blend onto on skin. Leave on for 15 minutes, then rinse with warm water.

2. Hydrating Honey Cherry Face Scrub:

The sweet stuff is great for hydrating skin, Vargas says. Use this honey face scrub whenever your complexion needs a boost of nourishment and exfoliation at the same time.

Recipe:
5 cherries
1 tbsp almond powder
1/4 cup honey
1 tbsp brown sugar
3 tbsp yogurt

Mix together and gently scrub onto skin for 30 seconds, then rinse with warm water.

3.Blackhead-Busting Lemon Face Scrub:

Bye, bye blackheads! Try a scrub with lemon juice to get rid of them for good. Lemon juice has antiseptic properties that aid in killing off bacteria, Balensi explains. It’s also great for reducing sebum and inflammation. Just be mindful with the amount of lemon juice you use—it’s acidic, so too much can irritate skin. And it can make your skin extra sensitive to the sun, so always apply sunscreen afterward to protect against UV damage.

Recipe:
½ tsp lemon
1 tbsp salt
1 tsp purified/distilled water

Mix the ingredients well and rub the paste onto skin in a circular motion. Gently scrub for two to three minutes, being careful not to rub too hard. Rinse off with warm water and follow with the rest of your skincare routine.

4. Anti-Aging Rose Face Scrub:

Talk about an anti-aging all-star. Vargas’ light, oil-based scrub hydrates skin, tightens pores and reduces inflammation, making your skin noticeably brighter. The ground almonds exfoliate and smooth out wrinkles to help turn back the clock, too.

Recipe:
2 tablespoons grape seed oil
5 teaspoons ground almonds
1 teaspoon warmed honey
2 drops rose oil

Blend all ingredients together in a small bowl, then buff onto face and decolletage. Rinse with warm water.

5 Shower Mistakes to Avoid for Healthy Hair and Skin

0
Sometimes, no amount of tools in your makeup case seem to give you healthy looking hair or skin. Guess what, a shower can do this naturally! Gear up to learn some shower tips for healthy skin and hair and make looking good just a bath away – literally.

Over the years, in your journey from marriage to motherhood to getting all your work done, you have mastered the art of quick showers. But while showering is definitely an exercise in hygiene, there are secrets that can also keep your skin and hair rejuvenated! Try out these shower techniques and say hello to gorgeous hair and glowing skin right under that spout.

5 Shower Mistakes to Avoid for Healthy Hair and Skin

1. Opting for the bar

We have been taught that there’s no such thing as bath without soap. But dermatologists say that soapsuds can actually make your skin feel drier by stripping away essential oils from the skin. One of the shower tips for healthy skin would definitely be to go soap-free. Pick up a water-based body wash to get you feeling squeaky clean in no time!

2. Keeping it Hot

After a long, tiring day nothing seems to be more inviting than a tub full of hot water. Everyone loves the way it relaxes your body and washes away all the stress. Post your bath, you always scurry to apply a heavy dose of moisturiser on your body, right? Well, hot water indeed dries out the skin by stripping it off it’s natural oils. So the next time you’re tempted to turn up the heat in the shower, make sure lukewarm water is the highest you go if you want your skin to be happy!

3. Missing the right spots

You shampoo your hair at the right frequency and use good products but your hair ends still feel dry and brittle. If you can relate to this, maybe you’ve been shampooing incorrectly all along. While shampooing, focus more on the nape of your neck, hair roots, and scalp. Lather these areas up to remove all the accumulated dirt. Avoid building excess shampoo at the hair ends; you’d be doing them a huge favour this way!

4. Going Lavishly Long

The best way to shower to get perfect skin and hair is to keep your showers short. Unless you want dry and itchy skin, save the luxurious long baths for special occasions only! Dermatologists suggest sticking to a 5-10 minute limit to save your skin and your time.

5. Shave It First

If you’ve been using up your shower time to multitask, keep shaving for the end. The secret to getting a really close shave is to wait at least a few minutes after the bath. The open pores after the shower will ensure that hair is softened and easier to remove. Make sure you stay away from hot water as it swells up the hair follicles and makes hair break easily. This will leave you with ingrown hair and a rough stubble no matter how close a shave!

Read more 

Also read  DIY self care products

BOOSTING YOUR IMMUNE SYSTEM AGAINST CORONAVIRUS: HOW TO MINIMIZE THE RISK OF INFECTION?

IMMUNE SYSTEM: Coronavirus was declared as a global pandemic by the World Health Organization. And while the countries are grappling with imminent dangers that this virus poses to humanity, there are few key measures that individuals can take to fight this pandemic.

While it is crucial to mention hygiene standards like washing your hands frequently, especially if you have travelled by public transport. Using an alcohol sanitizer, in case you are travelling to disinfect your hands, wearing a mask (cover your nose and mouth) and avoiding touching your hand or mouth. There are also certain methods to improve your immunity which is paramount at this juncture.

Improve Your Diet

The food you eat plays a key aspect in determining your overall health and immunity. Eat low carb diets, as this will help control high blood sugar and pressure.  A low carb diet will help slow down diabetes and focus on a protein-rich diet to keep you in good shape. And regularly consume vegetables and fruits rich in Beta carotene, Ascorbic acid & other essential vitamins.

Don’t Compromise on Sleep

Good snooze time for 7-8 hours is the best way to help your body build immunity; lesser sleep will leave you tired and impair your brain activity. The lack of sleep will prevent the body from resting and this will impair other bodily functions that will have a direct impact on your immunity. Lack of sleep adversely affects the action of the flu vaccine.

Stay Hydrated

Drink up to 8-10 glasses of water every day, to stay hydrated. Hydration will help flush out the toxins from the body and lower the chances of flu. Other alternatives include juices made of citrus fruits and coconut water, to beat the heat.

Read More..

Also Read: DIY self care products

Easy as Apple Pie Body Scrub Recipe

0

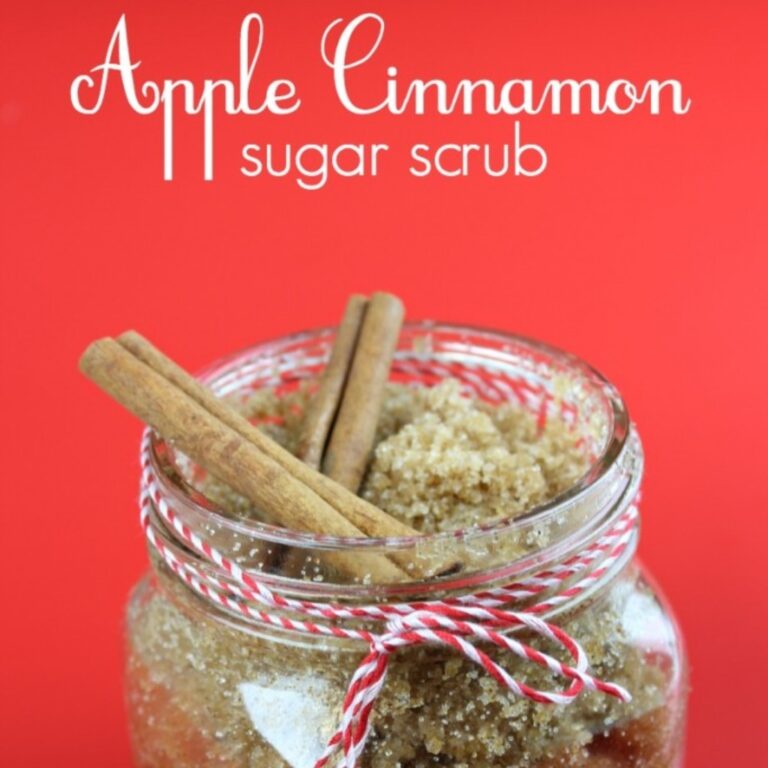
Have you ever walked into a kitchen or bakery while an apple pie was baking in the oven with the sweet smells of baked apple and cinnamon wafting through the air and thought, “I just want to be all up in that apple pie right now?!” Well, here is a simple DIY for an apple pie body scrub recipe to make those dreams come true. It’s like taking a drive to grandma’s farm on a cool, crisp fall day, but with added benefits for your skin!

First and foremost, applesauce isn’t just for babies and adults with broken jaws. It is full of vitamin C which nourishes skin cells and may help reverse UV damage. Apples are also loaded with malic acid which works as an immunity booster and detoxifier, all while promoting skin elasticity.

When it comes to sugar, select what best suits your skin and/or desired effect. Brown sugar, for example, is softer and ideal for sensitive skin and the face. Raw sugar and white sugar are both coarser and work well to exfoliate the body.

Coconut oil is a great moisturizing agent as well as being antimicrobial and antibacterial so can further aid in detoxifying while leaving skin healthy and happy.

Apple Pie Body Scrub Recipe

What You Need:

Directions:

If the coconut is solid, first heat it to an oil form. Next, combine coconut oil and remaining ingredients in a mixing bowl and stir until all of the clumps are smoothed out and it is a consistent paste-like texture. Transfer to the 4-ounce jar and close the lid tight. Keep in the refrigerator before using it to let cool.  Read more

Also, read: Maple Syrup Face and Hair Mask

Maple Syrup Face and Hair Mask

0

From sticky to smooth, this homemade maple syrup face and hair mask does SO much for both your skin and your tresses!

In 2012 it was discovered that roughly 3,000 tons of maple syrup had been stolen from a storage facility in Quebec, Canada resulting in what came to be known as the Great Canadian Maple Syrup Heist. And while the robbers behind this historical heist were probably well aware of the needs and benefits of consuming maple syrup, I would venture to say that they did not know about all of the amazing ways maple syrup can benefit the hair and skin! It sure is liquid gold!

Packed with antioxidants and vitamins such as vitamin A and vitamin E, maple syrup can go beyond a waffle topper and be applied directly to the skin as it will help to nourish and rejuvenate dry, tired skin, while calming inflammation, locking in moisture, and boosting skin’s elasticity. All good things for fighting wrinkles, reducing acne, and protecting against damage caused by free radicals, leaving skin healthy and youthful.

Maple Syrup Face and Hair Mask Recipes

Maple Syrup Face Masks:

For Acne: Simply apply maple syrup directly to acne spots on the face and allow to sit for 10 minutes. Then rinse with warm to cool water and pat dry.

Face Mask: Combine maple syrup with other face-friendly and nourishing ingredients for a yummy face mask you can use a few times a week or daily. Apply to the face and allow to sit for 10-15 minutes before rinsing with warm to cool water and patting dry.

  • 2 tbsp maple syrup
  • 1 tbsp jojoba oil or aloe vera juice

Facial and/or Body Scrub: Combine all ingredients and apply to the face and body. Let sit for 10-15 minutes and rinse with warm to cool water. Use this mixture once per week for the best results.

  • 2 tbsp maple syrup
  • 1 tbsp milk or yogurt
  • 3 tbsp dry oats

Maple Syrup Hair Mask

For hair, maple syrup is a natural hydrator and can help give dry, damaged hair a much-needed pick-me-up, leaving it healthy and vibrant.

Hair Mask: Apply 5 tablespoons of maple syrup to wet hair. Massage the scalp and use a comb to get the syrup thoroughly applied down to the ends. Add an oil such as coconut or almond, or aloe vera juice for extra moisture and nourishment.

Leave on for 10-15 minutes and rinse out. Use once or twice a week to lock in moisture, nourish damaged hair, and give shine to otherwise dull hair. Read more

Also read: Natural Homemade Eyeliner Recipe