Home Blog Page 374

How to Make a Cucumber Mint Scrub

0

This light, delicious, unbelievably fresh, and oh-so luxurious cucumber mint scrub is the only scrub you’ll ever need in your shower! Okay, so maybe come winter you’ll opt for a more “decadent” body scrub, such as the coffee and sugar body scrub. But for now – this cucumber mint scrub is all you need! Easy to make, super light on your wallet (in fact, you most likely already have all of these ingredients in your kitchen!), and very very hard working.

I’ll show you how to make a cucumber mint scrub in just a few minutes. Your shower will smells unbelievable, and, using this scrub just once a week, will yield amazing skin results. So let’s get to it!

Also read  DIY Serum for Oily Skin

Cucumber Mint Scrub Recipe

You’ll Need:

  • 1 Cucumber
  • 2 tbsp fresh mint leaves
  • 2 1/2 cups granulated sugar
  • 4 tablespoons extra virgin olive oil

Directions:

In a blender, puree the cucumber and mint leaves. In a bowl, add the sugar and olive oil. Pour the pureed cucumber and mint mixture into the bowl and mix well. If you like a more firm consistence, simply add more sugar. Store in an airtight jar or container and place in the fridge until ready to use!

How to Use the Cucumber Mint Scrub

Once you’re ready to use your scrub, remove it from the fridge. While in the shower, grab a small handful of the scrub and scrub entire body using gentle, circular motions. The scrub will not only smell fantastic and fresh (and so will your skin), but it will also remove dead skin cells, revealing smoother, softer, and younger looking skin. Rinse off the scrub, and pat dry. Follow up with a light, refreshing moisturizer such as this DIY peppermint lotion.

Read more 

Also read  7 Foundations with Natural, Clean and Good-for-Skin Ingredients

DIY Serum for Oily Skin

0

Serums are a part of your daily skincare routine that you shouldn’t skip and today we will tell you why along with some of the best DIY serum for oily skin recipes!

The Importance of Using Serums:

  • Serums are formulated to target specific skin problems like dark spots, acne, fine lines, pores, wrinkles, and hyper-pigmentation.
  • Serums act as an anti-aging prevention, as a brightening treatment and can also help with any type of skin.
  • Due to its active ingredients, serums can bring antioxidants to the skin and restore cell growth.
  • Serums are made of mostly of lighter ingredients, making it perfect for oily skin since they hydrate without making your skin feel and look oily.
  • Basically, serums give your skin nutrients that moisturizers don’t, that’s why it’s so important to use both in your skin care routine. Moisturizers hydrate the outer layer of your skin while serums allow needed nutrients to soak deep into the skin.
  • Serums are anti-inflammatory and can therefore reduce inflammation and redness in a pinch.

DIY Serum for Oily Skin- Top 5 Recipes

All of the serums recipes below contain specific natural ingredients to target oily skin to leave it less oily and radiant. These serums are great for anyone with oily and/or acne prone skin, but also work for those with sensitive skin.

1. Essentials Oil Serum for Oily Skin

The carrier oils in this DIY face serum recipe (jojoba and grapeseed oil), are super light, meaning they’re perfect for those with oily skin. The essential oils in this recipe work together to fight bacteria and reduce their spread all while rejuvenating the skin.

You’ll need:

  • 1 tsp jojoba oil
  • 1 tsp grapeseed oil
  • 10 drops cypress essential oil
  • 5 drops peppermint essential oil
  • 5 drops rosemary essential oil
  • A small glass dropper bottle

Instructions:

  1. Add all the ingredients in the glass dropper bottle and gently shake it to mix the carrier and essential oils.
  2. Apply a drop of the serum to your forehead, chin, and cheeks after your toner.
  3. Gently massage the serum into your skin, making sure your skin absorbs the oils.
  4. Continue with the next step in your skincare routine.
  5. Read more 

Also read  7 Foundations with Natural, Clean and Good-for-Skin Ingredients

10 Step Korean Skin Care Routine

0

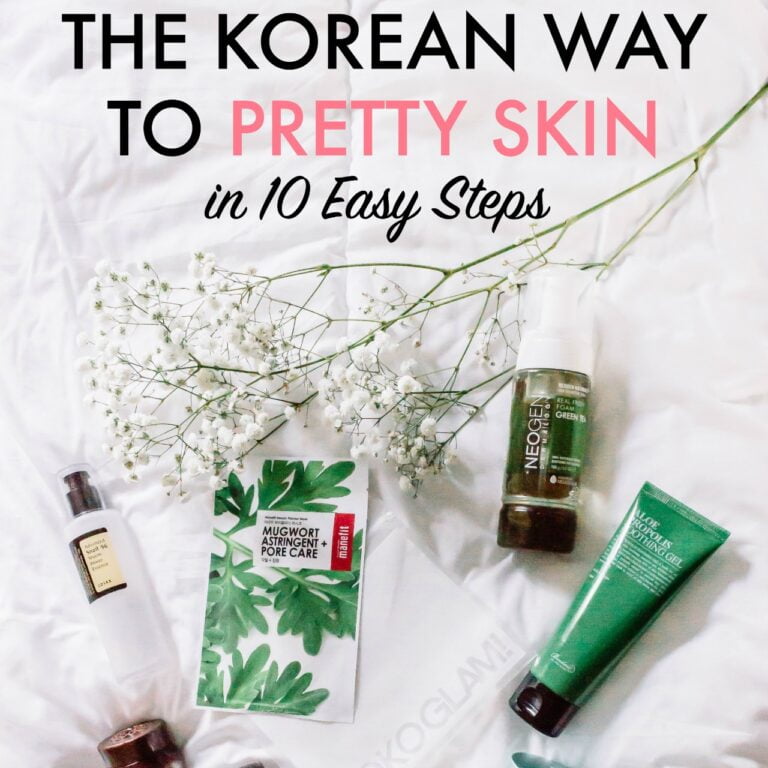
Ever heard of the 10 steps Korean skincare routine? If you’re a beauty fanatic like we are, then surely you’ve heard of the global phenom that has taken the beauty world by storm! As you may already know, Korea has adopted a reputation for beauty obsession, and with it, a 10 step skincare routine that will have your skin going from blah to wow! Korean Skin Care

But before you go ahead and dismiss the 10 steps Korean skincare routine because let’s face it, we’re all thinking the same thing – ain’t nobody got time for that – consider the benefits. This skincare routine is not about having a million products and spending a bunch of money expensive skincare products, but rather it’s about knowing what products to use for your skin type and how to use them.

Let’s take a closer look at the global phenomenon that is the 10 steps Korean skincare routine!

Does the Korean 10 Step Skin Care Routine Really Work?

Unsurprisingly, the answer is yes! Anytime you put time and effort into a project, job, or anything really, it WILL pay off! The same goes for this skincare routine which works to eliminate a bunch of different skin ailments such as breakouts, dry skin, oily skin, premature aging, and the list goes on and on.

These step by step instructions help the skin to re-balance itself, replenish moisture, get rid of excess oil, and leave skin soft, supple, and younger-looking. And the proof is in the pudding! Just take a look at any Korean woman’s skin – it’s absolutely flawless!

Step 1: Remove Makeup & Oil Cleanse

In a Korean skincare routine, there are two cleansing steps. This is called a double-cleanse. The first cleansing involves using oil. The oil gently removes any traces of makeup, dirt, and debris, all the while drawing out excess sebum (oil) out of the skin.

How to Oil Cleanse:

Simply massage the oil into the skin using slow, circular motions. Work your way upwards as if giving yourself a “mini-lift”. Add lukewarm water and massage into skin until all traces of makeup and dirt are gone. Do this morning and night.

Oils:

Step 2: Water Based Cleansing

The second step involves cleansing again, but this time with a water-based cleanser. According to dermatologists and skin experts alike, double cleansing is highly recommended in order to truly get rid of dirt and impurities that may cause breakouts. Look for a water-based cleanser on Amazon or your local beauty store. Micellar water-based cleansers work really well!

How to Water Cleanse:

Apply to wet skin and massage gently in slow, circular motions, working upwards. Do this morning and night and rinse off with lukewarm water. This step will help remove impurities such as sweat and dirt.

Water-Based Cleanser Ingredients:

  • Green Tea
  • Rice Extract
  • Pearl Extract

Step 3: Exfoliating

Exfoliating the skin on a regular basis helps it get rid of dead skin cells which can accumulate over time. Doing this will help your skincare products to absorbs more easily into the skin. Regular exfoliating also helps eliminate blackheads and whiteheads.

How to Exfoliate:

Focus on blackhead prone areas of the skin such as forehead, nose, and chin. Gently and in circular motions scrub onto wet skin, and rinse off with lukewarm water. Do this 1-2 times a week for bright, clear skin.

Exfoliator Ingredients To Look For:

  • Black Sugar (for all skin types)
  • Salicylic Acid (for acne treatments)
  • Lactic Acid (found in milk and other dairy products) Read more

Also read: Homemade Brightening Face Mask

7 Foundations with Natural, Clean and Good-for-Skin Ingredients

0

7 Foundations with Natural, Clean and Good-for-Skin Ingredients

If you’re someone who uses foundation to help your complexion look smoother and more even-toned, you probably care just as much about how your skin looks underneath. That’s why many of us are becoming increasingly ingredient-conscious when it comes to the makeup that sits on our skin all day.

When shopping for skin care, 50% of consumers look for products that are all-natural or free of synthetics, and many have begun to approach their makeup bags with the same preference—for good reason.

“I think in general, there has been more and more research showing less is more. When more preservatives are used, the chance for reactions (irritant or allergic) tends to increase,” explains NYC-based dermatologist Dhaval Bhanusali. “The issue is that ‘natural’ is somewhat poorly defined and doesn’t always guarantee the products are worth using.”

The best way to make the right choice for your skin is to familiarize yourself with what words like “clean,” “natural” and “non-toxic” really mean. The good news? The latest crop of foundations made with good-for-skin ingredients is designed to perform better—and leave skin more flawless—than ever before.

What Makes a Formula “Natural” or “Clean”?

When it comes to natural and clean cosmetics, there are currently no regulations set forth by the Food & Drug Administration (FDA). “Unfortunately, the FDA does not define or regulate those terms, so anyone can decide what it means to them and label their products as such,” explains clean beauty expert and One Love Organics founder Suzanne LeRoux. This means that each brand can choose to define these terms differently. For example, one brand might choose the term “natural” to mean no synthetic ingredients, while another might use some synthetic ingredients but avoid more controversial ones, such as parabens and phthalates.

When shopping for beauty products, there are also certain certifications you can look out for on a product—but these are somewhat murky, too. As cosmetic chemist Ginger King explains, “USDA Organic is really from the food industry. In cosmetics, there are Ecocert and COSMOS—both are European standards, not from our FDA. But even [products that comply with] Ecocert or COSMOS can still allow 5% synthetic materials.”

At Dermstore, our Natural label indicates that 50% or more of a product’s ingredients are derived from a natural source, excluding water. If you see a product categorized as Clean, this means its formula does not contain any of the ingredients on our Potentially Harmful Ingredient List.

Best Natural and Clean Foundations to Try Now

If you’re interested in trying out clean or natural makeup, foundation is the perfect category to start with. Here, we’re outlining our favorite foundations with clean and/or natural ingredients, plus highlighting what makes each formula so great.

Read more 

Also read  How to Keep Your Hair Color Looking Healthy


Homemade Brightening Face Mask

This homemade brightening face mask will work hard to slough off dead skin cells, hydrate, and leave skin bright and glowing! Say goodbye to dull, drab skin once and for all! Made entirely from natural ingredients, this homemade brightening face mask is easy to make, and will enhance your skin’s natural skin tone after just one use!

Especially if you suffer from dark spots, acne scars, and uneven skin tone, this face mask and scrub is the perfect remedy! This recipe uses some less commonly known ingredients such as brown rice flour and orris root powder (more on that later), but these ingredients deliver!

We’ve tried this mask and it has made a HUGE difference in our skin! Skin tone was brighter, spots were smaller, and overall skin health was improved!

Homemade Brightening Face Mask Recipe:

Let’s take a look at some of the ingredients we’ll be using in this brightening face mask and WHY they’re so effective:

Brown Rice Flour
Pretty self-explanatory, but brown rice flour is exactly what it sounds like: finely ground up brown rice kernels! It contains a high amount of vitamins C and B5, which are actually naturally brightening. Brown rice flour also helps absorb excess sebum in the skin (oil), and is therefore great for those with oily/acne-prone skin. If possible, try to use organic brown rice flour! You can find rice flour at your local grocery store!

Orris Root Powder
This plant-based powder is made from the orris root which is the root of the Iris flower! This finely ground powder has been used for centuries for its medicinal properties, and in this instance, can help with cleansing and detoxifying the skin. If possible, try to use organic orris root powder! You can find orris root powder online such as on Amazon, as well as your local health store!

Chamomile Flower Water
This floral water is made from chamomile flowers which is extremely beneficial for the skin. It will help to reduce redness, calm the skin, and also hydrate. Look for a hydrosol (flower water) that is 100%, meaning it should ONLY contain water and chamomile flowers.

Ingredients:

  • 1 tsp organic brown flour
  • 3 tsps chamomile flower water
  • 1 tsp orris root powder

Directions:

  1. To a small bowl, add all of the ingredients. Stir well until thick paste forms.
  2. If the mask is too thick, add a little more liquid. If it’s too liquidy, add more flour.
  3. Apply the mask to (cleansed) skin and leave on for 10 minutes. Be sure to remove right before it starts to dry out.
  4. Wet your fingers and scrub the mask into the skin for about a minute and rinse off completely.
  5. Pat dry and follow up with a DIY toner and your daily moisturizer. Read more

Also read: How to Keep Your Hair Color Looking Healthy

How to Keep Your Hair Color Looking Healthy

0

If you recently dyed your hair and want to maintain that beautiful color for a long time, this post is for you! Hair, We have collected a few tricks and tips on how to keep your hair color looking healthy!

After you color your hair, there are a few steps you have to follow in order to keep your hair looking healthy. Hair dyes penetrate the cuticle which is the hair’s protection barrier, in order to remove your natural color and set the new one. After all of this processing, your hair gets weak and if you dye it too often, it can result in breakage. Knowing how to keep your coloring looks healthy so you don’t have to color too often, is crucial!

10 Tricks and Tips To Keep Your Hair Color Looking Healthy

Whether you dye your hair at home or you go to a salon, the following tips are excellent when it comes to keeping your color looking healthy and shiny.

Tip #1: Change your Shampoo and Conditioner

Just like you use skincare products for your specific skin type, when you color your hair you will have to get hair products for newly dyed locks.

Lots of cheap shampoos and conditioners contain detergents, salts, and sulfates. These ingredients tend to strip hair color out which will help fade out your color even faster. Instead, look for products that are for dyed hair and alcohol and sulfate-free. These types of shampoos and conditioners will help your hair hold onto its color.

Tip #2. Wash Less

If you wash your hair daily, stop this. As you wash your hair, your color also washes out. Try to wash your hair 2-3 times a week. This will help you preserve natural oils that help nourish your hair and make and color last.

As an alternative, you can use dry shampoo during the week to keep your hair clean. Purchase a good dry shampoo according to your hair or make your own dry shampoo at home.

Tip #3. Rinse with Cold Water

Everyone loves a long hot shower, especially now during winter, but washing your hair with hot water is so bad for your newly colored hair. Hot water makes your dye hair fade out faster, stripping the color.

Tip #4. Stop Using Clarifying Shampoo

If you use clarifying shampoos, that’s another thing you need to stop. Clarifying shampoos contain a high level of detergent that strips your hair of its color. Avoid using this type of shampoo after you have dyed your hair.

Tip #5. Nourish your Hair with Natural Proteins

After coloring your hair, the proteins that help protect your hair, disappear. If your hair starts to snap off, gets brittle and dry, this means it’s lacking protein.

We are all about natural products here and when it comes to protein, eggs, and mayonnaise are the ultimate ingredients. Mayonnaise smooths hair out, while eggs are full of protein that nourish your hair. These two ingredients together will help repair protein damage, leaving your hair healthy. Check out the DIY hair mask recipe below and give your hair the boost of protein it needs.

Ingredients:

  • 2 tbsp mayonnaise
  • 1 egg

Directions:

  1. Mix the ingredients together in a small bowl until smooth.
  2. Gently start applying the mixture to your hair concentrating on the tips.
  3. After your whole hair is saturated, cover with a shower cap and leave on for 40 minutes.
  4. After 40 minutes, wash off with cold water and sulfate and alcohol-free shampoo.
  5. Use this DIY hair mask once a week. Read more

Also read: DIY Yogurt, Cucumber, & Honey Face Mask


How to Cope With Summer Hair Problems

Our crowning glory — and Samson’s source of strength — human hair has long been a fascination and an obsession. What a shame that summer can reduce this glorious body adornment to ruins. What’s the worst that can happen — and how can you “head off” or heal the damage?WebMD spoke to experts to get tips for coping with five summertime hair problems.

Problem No. 1: Sun Scorching

Without hesitation, Phillip Wilson, once voted the best hairstylist in 100 years and president of the Angles & Collections Salon and Day Spa, tells WebMD that the sun is the biggest enemy of hair during the summer.

Wilson, who often journeys to the Sundance and Cannes film festivals to tend to his movie star clients, says not only in Hollywood do 85% of women have color-treated hair. “That’s the figure nationwide,” he says. “Sun dries hair out. If it’s already processed, it’s already depleted and can become dry straw.”

To combat this, Wilson says, “the coolest thing on the market” is leave-in conditioners. “If not overly used,” he adds, “they start the styling for you, adding volume at the roots.”

David Bank, MD, director of the Center for Dermatology, Cosmetic, and Laser Surgery, in Mount Kisco, N.Y., also recommends a pretreatment with an SPF spray made for hair. “We see some skin cancers of the scalp and these not only protect hair, but guard against those,” he says, adding that SPF sprays are a light mist. What level of SPF? “Whatever you can get your hands on — 15, 30,” Bank says.

Hats can also protect hair from the sun, but there is a trade-off — hat head.

Problem No. 2: Green Hair

If a swimming pool is not properly balanced, metals such as copper in the water can leach onto hair. You know that nice green patina of a copper picture frame? It looks less fetching on the head.

Again, treated hair, especially the blond shades, tinges the most. “Chlorine is a nightmare!” exclaims Wilson. He recommends pretreating your hair with a pH balancer to try to get it to a pH of 3.5, which is acidic. “This almost creates a barrier [to greening substances in the water]. It’s like a mist.”

Bank is not sure that a spray might not wash out. “It might not solve the problem.”

He recommends rinsing hair thoroughly before going into either a chlorinated pool or the ocean. If the fresh water has saturated the hair, the salt or chemically treated water may not be able to get under the protective scales on the hair shaft as readily. Read more

Read also: Winter-Proof Your Skin


Winter-Proof Your Skin

When the seasons change, your skin may get flaky and itchy. It may even crack and bleed. What is it about winter and dry skin?”Winter brings cold temperatures and less humidity,” explains Deanne Robinson, MD, co-founder of Modern Dermatology of Connecticut. “These changes lead to water loss, resulting in dry and sometimes itchy skin. Indoor heat in the form of forced hot air or radiant heat produces very dry, hot air, which makes it worse.”

Robinson suggests some tips and tricks to soothe winter dry skin.

Is it true that hot showers make dry skin worse?

Yes. Hot and long showers, especially in winter, strip the skin of natural oils, which leads to dryness. You can help prevent winter dry skin by taking shorter (less than 10 minutes) and cooler (less than 105 degrees F) showers — and by moisturizing immediately after.

Which products are best for winter?

Try a heavier cream or ointment-based emollient, ideally one with ceramides. Ceramides are the skin’s natural fatty acids, which rebuild and protect the skin barrier. Also, skip the soap. Traditional bar soap dries skin out by stripping the natural oils. Instead, opt for a non-soap cleanser, which is much gentler.

Why are my hands extra dry?

Hand-washing and alcohol-based sanitizers can trigger hand eczema. To treat it, moisturize, moisturize, moisturize. Try a non-soap cleanser that’s fragrance- and color-free. After every hand wash, apply a moisturizer. Try one with dimethicone, which coats your skin to create a glove-like barrier that protects against further damage. At night, apply a thick emollient, and then put on cotton gloves, which can help a whole lot.

How does winter affect psoriasis?

Psoriasis is a skin condition that may get better from natural UV radiation, or sunlight. Winter may flare your psoriasis because you get less exposure to the sun. Controlled exposure to the sun in winter can improve it. Read more

Read also: Foods for Healthy, Supple Skin

Foods for Healthy, Supple Skin

How Water Benefits Your Skin

Drinking water is one of the best things you can do to keep your skin in shape. It keeps your skin moist — and that makes fine lines and wrinkles less noticeable. It also helps your cells take in nutrients and get rid of toxins. And it helps with blood flow, keeping your skin glowing. The common advice is to drink 8 glasses of water a day, but you may not need exactly that many. The water in fruits, veggies, juice, and milk counts toward your total.

How Water Benefits Your Skin

Drinking water is one of the best things you can do to keep your skin in shape. It keeps your skin moist — and that makes fine lines and wrinkles less noticeable. It also helps your cells take in nutrients and get rid of toxins. And it helps with blood flow, keeping your skin glowing. The common advice is to drink 8 glasses of water a day, but you may not need exactly that many. The water in fruits, veggies, juice, and milk counts toward your total.

Selenium for Your Skin

This mineral may help protect your skin from cells that gather free radicals. Free radicals cause signs of aging like wrinkles and dry skin, tissue damage, and probably some diseases. Selenium may also help prevent skin cancer. You can get it from Brazil nuts, button mushrooms, shrimp, lamb, and fish like snapper, cod, halibut, tuna, and salmon. Cooked beef, light turkey, oysters, sardines, crab, and whole-wheat pasta also have selenium.

Antioxidants for Healthy Cells

Antioxidants are important to slowing and preventing free-radical damage. You can find them in all kinds of foods, especially colorful fruits and vegetables like berries, tomatoes, apricots, beets, squash, spinach, sweet potatoes, tangerines, peppers, and beans.

Fight Free Radicals with CoQ10

Your body makes a key antioxidant called Coenzyme Q10. But as you get older, you make less of it. It’s involved in making energy and helping your cells work. You can find CoQ10 in fish like salmon and tuna, poultry, organ meats like liver, and whole grains.  If you use a skin product that has CoQ10, it may help soften wrinkles and other signs of aging. Read more

Read also:HOW TO TREAT DRY, CRACKED HEELS