

Home Blog Page 366

Hair Washing Hacks For Healthier Hair

0

There’s a lot of hype about hair care, hair treatments, and hacks for growing your hair…

Yet one simple task that often gets overlooked is how you wash hair.

The truth is, most people are washing their hair wrong.

We get into bad habits growing up, and by the time we’re adults, washing our hair is as automatic as driving a car.

You’d never stop one day to reassess if you’ve been driving correctly your whole life, right? Well, apart from parallel parking 😜

So why would you stop to consider if you’ve been washing your hair correctly?

According to hairstylist Brad Mondo, how you wash your hair can either help or disadvantage your hair care routine.

On his YouTube channel, Brad shares his best hair washing hacks and debunks the common hair washing myths among his clients.

How to correctly wash your hair

Below are some of the frequently asked hair washing questions. The answers may surprise you!

What water temperature is best for washing my hair?

Answer: Lukewarm.

There is some talk about washing your hair with cold water to make your hair look shinier…

It’s a myth.

Lukewarm water is the ideal temperature to wash your hair.

It opens up the hair follicles more than cold water, allowing the hair and scalp to release dirt and be fully cleansed.

Whereas at a cold temperature, water can’t break up the dirt and oils as effectively.

And at a super hot temperature, water will weaken the hair while you’re scrubbing and cause breakage.

It can also boil the hair and scalp making hair frizzy which results in less shine overall.

How strongly should I massage my hair with shampoo?

Are you guilty of going for a good, hard scrub when it’s time for shampoo?

Naturally, we tend to have the mentality that the harder you scrub your hair, the cleaner your scalp will be.

Read More

Also Read: Homemade Dry Shampoo Spray For Oily Hair
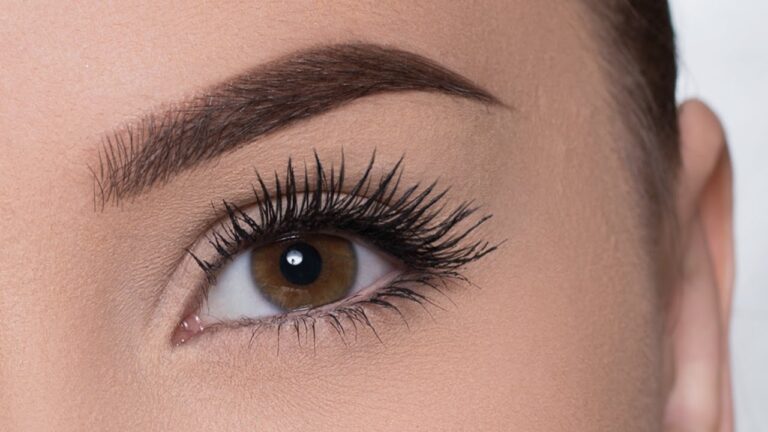
6 MASCARA MISTAKES YOU SHOULD TRY TO AVOID

6 MASCARA MISTAKES YOU SHOULD TRY TO AVOID

With so many different type’s of mascara available finding the one that best suits your lash needs has become pretty easy… getting your lashes to perform however is another story. Believe it or not, how you swipe the wand is just as important and by following all or just a few of the suggestions below, can be the game changer in your daily mascara routine.

1. TO CURL OR NOT TO CURL YOUR LASHES

Mascara will give you the lift you want but to get that super extension you see on so many celebrities you need to use a lash curler. If your lashes resist curling, a great tip is to heat the pads before curling which will give you an even more amazing lift. The key is to curl before applying your mascara. Curling after when the lashes are already hard can cause breakage, and sometimes even pull the lashes out. If the idea of using a lash curler scares you choose one without the bars on the side like Tweezerman Super Curl Eyelash Curler.

2. OVER DOING BY ADDING TOO MANY COATS

We all love thick lashes but the more coats of mascara you apply (we usually stop at two), the more your mascara will dry during the application. The end result? Lashes that look clumped and the unnatural spidery look that is not so pretty. If a single or double swipe of mascara isn’t giving you the volume you need, you should consider using a thicker formula.

3. THE FAMOUS PUMPING OF THE WAND

Pumping the wand in and out of the mascara tube to get more product may seem like a good idea while you’re doing it, but what’s actually happening is you’re adding air to the tube. What this does is dry out the mascara and causes it to clump when applying to your lashes and can even flake off. All of the things you don’t want. If you desire more mascara and go for a second coat, trying dipping the wand in just once. If you turn up empty it’s probably time for a new tube.

4. USING EXPIRED PRODUCTS

Most of us hate to part with a good mascara after just 3 months, but this is the point where bacteria begins to grow on the wand and inside the tube, and can lead to red, itchy eyes and and even worse, pinkeye. Now that is one eye makeup look that definitely falls under the category of “not good”.  Whenever you are using a makeup product so close to the eyes, you want to be extra careful. Even if you’ve only used your mascara a few times, the three-month rule should still apply.

…….Read More……

Read Also: Rose Water and Aloe Vera Face Mask

Homemade Dry Shampoo Spray For Oily Hair

If you have oily hair, it can be a pain finding the perfect dry spray because frankly, most of them don’t work for those of with super oily hair! The only thing I’ve ever found that worked was baby powder, but, if you have darker hair, baby powder can REALLY show! Thankfully, we found this homemade dry shampoo spray recipe which works SO well, we just had to share!

This homemade dry shampoo spray is made with ingredients that are safe for your hair, and will actually absorb all of the oil immediately! Trust us, you’ll love this dry shampoo!

Homemade Dry Shampoo Spray

Ingredients:

  • 3 tbsp high proof alcohol (at least 50%)
  • 1 tbsp distilled water
  • 1/2 tsp arrowroot starch
  • 5-10 drops lavender essential oil
  • 2 oz spritz bottle

Directions:

  1. Use a funnel to add all of the ingredients to a spritz bottle.
  2. Shake well to combine.
  3. Spray directly onto scalp by sectioning off hair.
  4. Use your fingers to tousle hair around, or a fine tooth comb.
  5. If you need to apply more, let dry before doing so.

Benefits of Using Homemade Dry Shampoo Spray:

  • Soaks up oil
  • Leaves hair feeling soft and silky
  • Keeps hair healthier (because it helps you skin washes!)
  • Prevents dandruff
  • Soothes scalp

Read more 

Also read  10 Baking Soda Uses For Better Skin, Hair, and Nails

Vitamin E Oil for Your Face – Benefits and Tips to Apply

0

An essential ingredient for nails, hair, and face is Vitamin E which is a potent antioxidant which exhibits a wonderful effect on the skin. In dermatology, Vitamin E is used for sun damage, inflammation, and ageing. It is also hailed as a perfect cure for all hair related problems. The skin-boosting properties have made Vitamin E a multi-purpose medicine used for improving the skin texture and enhancing the glow. When the nutrients of vitamin E oil penetrate into the skin tissue, the skin appears brighter and lighter.

Benefits of Vitamin E for Face

Vitamin E for face glow is not a new concept. For ages, it has worked like magic for the skin. It rejuvenates the skin because it is an antioxidant and nutrient.

1. Anti – Inflammatory Properties

Vitamin E helps in the protection of the skin from damages caused by the environment. It replaces the dead skin cells with healthy cells and thus paves the way for the regeneration of new skin. This eventually makes the skin glow and radiate. This happens due to the anti-inflammatory property of Vitamin E.

2. Skin Protected from UV Rays

The harmful effects of UV rays in the form of skin pigmentation can be avoided by using it in combination with Vitamin C. Shielding the skin from UV rays is becoming absolutely essential day after day.

3. Presence of Antioxidants

The free radicals harm the delicate skin of the face in many different ways. Applying Vitamin E oil on the face helps in better protection and skin tightening as well. It neutralizes free radicals.

4. Nourishes and Moisturizes

The skin remains hydrated and glowing because of the moisturizing property of vitamin E. The skin scars disappear on regularly using Vitamin E on the skin. The healing of the skin becomes possible then. It also reverses the signs of ageing by promoting healthy skin.

5. Removes Skin Acne

Face acne which is a very annoying thing among youth indicates a low level of vitamin E content in the skin. The acne related scars disappear by raising the level of vitamin E content by using vitamin E capsules for face massage.

Read more 

Also read  10 Baking Soda Uses For Better Skin, Hair, and Nails

Rose Water and Aloe Vera Face Mask

The Rose Water and Aloe Vera Face Mask has three main benefits:  It fights off skin infection. The mask improves and evens out your skin tone. It also removes marks and discoloration from the skin.

Skin infections include any acne, pimples blackheads whiteheads and various other unsightly imperfections. These are soothed and eliminated with long term use of this mask, plus this mask is very suitable for oily skin, as it contains all water based ingredients that hydrate without adding grease. Normal and dry skin can also benefit from this mask; however it is optimal for normal to oily skin.

The skin tone is evened out and made clearer and brighter as well more even. The areas of the face darker than others are lightened to match the rest of the skin, allowing skin to become uniform and healthy looking. The skin also gets brightens and dull spots become much reduced.

Any marks such as acne scarring, under eye dark circles or dark spots are cleared. This leaves the skin looking more even and healthy. This mask is not one that shows results immediately, however, you should be able to see a noticeable improvement after a month of twice weekly applications.

The Ingredients

The Rose Water and Aloe Vera Face Mask is relatively simple and easy to make. It has three ingredients.

  • Rose Water
  • Aloe Vera Gel
  • Cucumber

Why Rose Water?

Rose Water acts as a base for this spray and is widely known as being wonderful for the skin:

  • Rosewater holds effects which maintain the skin’s pH balance and reduce the production of excess oil.
  • It is an Anti-inflammatory agent which also reduces redness, acne, dermatitis and eczema.
  • Rosewater is brilliant at cleansing and unclogging pores. It also removes dirt and oil deposited in them.
  • This ingredient moisturizes hydrates and revitalizes the skin.
  • It has antibacterial properties that help reduce acne scars and close small wounds.
  • Rosewater is an antioxidant that strengthens the skin cells and regenerates tissues.
  • Rosewater is used by aroma-therapists to reduce anxiety and can help relieve stress.
  • It also helps keep you looking younger by reducing fine lines and wrinkles.

Why Aloe Vera Gel?

The Gel is very beneficial for the skin:

  • Aloe Vera gel has two hormones: Auxin and Gibberellins. These have wound healing and anti-inflammatory properties that diminish skin inflammation.
  • The antibacterial properties of aloe vera gel are very effective in treating acne and reducing the redness caused by it.
  • The anti-fungal properties also fight any swollen pimples.
  • It fights ageing as it contains several antioxidants some of which are, vitamin C, beta carotene and Vitamin E that enhance the skin’s natural firmness.

……Read More……

Read Also: Homemade Moisturizer Without Coconut Oil for Face and Body

Homemade Moisturizer Without Coconut Oil for Face and Body

Making your own beauty products is not as hard as you might think! This homemade moisturizer without coconut oil for face and body is no exception. Made with all natural ingredients that you can easily find, this homemade moisturizer is perfect for the face and the body. One of the worst things you can do to your body is slather it with beauty products that are laden with chemicals.

Ingredients:

  • 1/2 cup (4 oz) shea butter
  • 2 tbsp nourishing oil of your choice – jojoba, avocado, grapeseed oil, sweet almond oil, olive oil, or apricot oil
  • 10 drops lavender essential oil – optional
  • 5 drops rosemary essential oil – optional
  • 3 drops tea tree oil – optional, but great for those with oily and/or acne prone skin
  • 3 drops carrot seed oil – optional

Directions:

  1. In a double boiler, melt the shea butter on low heat. Then, stir in the nourishing oil.
  2. To make a double boiler, simply fill a pot 1/4 of the way with water, and place a glass bowl over the pot. Place the shea butter in the bowl, and gently melt.
  3. Once melted, pour the shea butter and oil into a bowl and place in the freezer for 15-20 minutes, or until solidified but not hard.
  4. Once the mixture is slightly firm and opaque, take it out of the freezer and in the essential oils if using.
  5. Using a whisk attachment for a stand mixer, whip the mixture for a few seconds. If you don’t have a stand mixer, you can also do this by hand.
  6. Store in a clean, airtight jar or container and use on the face and body.

A Note About Essential Oils

Aside from giving your moisturizer a pleasant scent, essential oils also play an essential role in all of your homemade beauty products! Each essential oil serves a different purpose.
Lavender essential oil alleviates a slew of different ailments, especially when it applied to skin, it can heal cuts, bruises, burns, dermatitis, insect bites, scars, stretch marks, and even chicken pox. It also contains anti-inflammatory and soothing properties which is great for those with problem skin.
Rosemary essential oil can help protect the skin from the sun’s harmful UV rays and free radicals. It promotes healthy, moisturized skin, and also has natural antiseptic properties.
Tea tree oil has antibacterial and antimicrobial properties, which, as we mentioned above, is great for acne prone skin. It can calm redness and inflammation, and also heal scars.
Carrot seed oil contains bioflavonoids which makes it antifungal and antibacterial. Also contains sun protecting ingredients and helps heal dry, damaged skin. Read More…………..

Also Read: 10 PRO TIPS FOR A SEXY SMOKEY EYE

Go Green…With Your Eyeshadow

0

Go green…with your eyeshadow! It’s time to put away your neutrals, and start experimenting with bright, glittery colors! Summer always puts me in the mood to try bright, unexpected colors, and you’d be surprised at what a huge pick-me-up a little color can do for you!

Go Green…With Your Eyeshadow

Lately I’ve been obsessed with greens probably because of all the beautiful foliage around me, but also because green eyeshadows bring out the green specks in brown and hazel eyes (which I have), as well as green eyes which make them stand out even more.

This look is actually pretty easy to achieve and it’s perfect for day or night as it’s not too dramatic. Here’s how to get this look!

Step 1:

Prime your lids with a lid primer or a concealer, they both work just as well. This will ensure a clean canvas which will make it easier to work on. Also, the blank canvas helps your eye color stand out better.

Step 2:

Take an angled eyeliner brush and damp it. Run the brush over a green eyeshadow (your preference), but I like MAC eyeshadow in Shimmermoss which is a green with turquoise shade that looks breathtaking. Next, run the angled brush along your upper lash lines, extending just a little bit past your outer corners (see picture!).

Step 3:

Last but not least pick up a highly pigmented glittery green shade like Urban Decay’s Heavy Metal Glitter Eyeliner in Stagedive and apply it on top of the green line you’ve already made. To complete your green look, go with a nude lipstick and finish off with a swipe of lipgloss. Read more

Also read: How to Apply Foundation Like a Pro

Go green…with your eyeshadow! It’s time to put away your neutrals, and start experimenting with bright, glittery colors! Summer always puts me in the mood to try bright, unexpected colors

10 Baking Soda Uses For Better Skin, Hair, and Nails

Baking soda is one of those ingredients that just NEVER goes out of style because it’s just SO versatile! Everything from cooking, to cleaning, beauty, and anything else in between – baking soda can do it! These 10 baking soda uses will improve your skin, hair, and nails, without breaking the bank!

10 Baking Soda Uses:

baking soda paste

#1. Deodorant

Recent studies have shown that commercial deodorants are laden with cancer-causing chemicals that can seep into our pores and actually make us sick! So why keep using something so harmful when baking soda can do the job without the harm? Simply sprinkle baking soda onto freshly washed armpits. It will soak up any moisture as well as any smells (think about the way it works in your fridge, after all!).

#2. Body Scrub

Baking soda is one of the best ingredients you can use for a body scrub because of its small, exfoliating granules, not to mention it’s a natural cleanser and skin brightener! Try this DIY baking soda scrub for flawless skin:

  • 2 tbsp baking soda
  • 1 tbsp coconut oil
  • 7 drops tea tree oil
  • 5 drops lemon essential oil

Mix all ingredients to form a paste and rub onto wet skin while in the shower in slow, circular motions. Rinse off and repeat 2-3 times a week for softer, brighter skin!

#3. Clarifying Shampoo

Neutrogena’s clarifying shampoo IS good, but there really is NO need to spend money on that when baking soda can do the same job! Simply mix a quarter-sized amount of baking soda with your normal shampoo and massage into scalp as you normally would. Do this once or twice a week to remove product build up, deeply cleanse, and brighten hair color. You can also try this DIY oily scalp shampoo which uses baking soda, apple cider vinegar, and water – perfect for those with oily scalp and hair!

#4. Nail Whitener & Scrub

Because baking soda is a natural whitening agent, it can cleanse yellowing nails and restore them to their natural color! Simply dip a wet toothbrush into some baking soda and scrub over and underneath nails. Read more about how to remove yellow nails stains and how baking soda can help you do that!

#5. Bath Soak

After a long, hard day, there’s nothing more relaxing than soaking in a bath! Mix 1/2 cup of baking soda into your bath to neutralize acids on the skin and and help wash away oils and perspiration. When combined with warm water, baking soda can soften and soothe skin, especially if it’s irritated!

#6. Soften Calluses

To soften calluses, add 1 tbsp baking soda to a warm foot soak along with a few drops of your favorite essential oil. Soak your feet for 20-30 minutes, and then scrub the calluses away using 3 parts baking soda, 1 part water, and 1 part brown sugar. Rinse off, pat dry, and follow up with a homemade foot salve!

Read more 

Also read  How Rice Water Is Beneficial for Your Skin, Hair and Health

How to Apply Foundation Like a Pro

0

New to makeup? Not to worry because today we’ll show you how to apply foundation like a pro! Applying foundation shouldn’t be a chore…and it doesn’t have to be! Once you have these 5 steps down pat, you’ll be applying foundation like a pro in no time!

How to Apply Foundation Like a Pro

Step #1: Choose the Right Shade For You

can’t tell you how many times I’ve seen people with the wrong shade of foundation on – it’s a big no-no! Your foundation should match your skin tone. The best thing you can do is go to your local makeup counter and ask for help! Anyone of them will be more than happy to help you find the right shade. Also, be sure to let them know if you have dry, oily, or combination skin!

Step #2: Prep Your Skin

Your skin should be cleansed and toned properly. For your foundation to last and stick properly, make sure you moisturize well. Let your moisturizer dry for at least 5 minutes before applying your foundation.

Step #3: Apply Correctly

Depending on the kind of coverage you want, less is always more. If you want just a little coverage, use your fingertips to apply your foundation. For more coverage, use a makeup sponge, starting from the middle and working your way outwards. If you want to cover only a few spots, dab it on with your fingertips. Remember to blend well, especially around the jaw/neck area so your foundation isn’t visible.

Step #4: Apply Concealer

Always apply your concealer AFTER your foundation. Pick one that is ONE shade lighter than your foundation and gently dab onto problem areas such as scars, pimples, and under-eye areas. Use a brush concealer for under your eyes and dab gently onto the darkest parts. Pat with your fingertips to blend well.

Step #5: Finish With A Translucent Powder

Pull everything together by dusting on a translucent powder. It will make your foundation last longer and will give you that healthy glow you’re looking for. Dust it on in a W pattern, starting at your hairline on one side, swooping down to your cheekbone, up to the bridge of your nose, and back down the other cheek. Repeat on the other side. Read more

Also read: Chamomile Geranium Spray for Face and Body

10 PRO TIPS FOR A SEXY SMOKEY EYE

There may not be a more popular eye makeup look than the sexy smokey eye. Not only does it look gorgeous when done correctly, it also screams sultriness and is perfect for any of your nighttime outings. Although some might be apprehensive about creating a smoked out eye look, it’s a lot easier than it seems and with a few tips and tricks on how to do them under your belt, you’ll be rockin’ some gorgeous smokey eyes in no time.

1. DO YOUR EYES FIRST

This was hard for us to do at first too, but after years of fashion weeks and as many smokey eye looks behind us we can’t say it enough. Adding your foundation first before beginning your eyes seems like the natural thing to start with, but for a flawless finish and smokey eyes you can be proud of, save the foundation and concealer for last. As careful as you might be when applying your eye color, eyeshadows loose or pressed tend to have fallout and if you’ve already gone ahead and put on your foundation and concealer you can be sure you’ll be touching it up or cleaning it up at least a few times while doing your makeup. It’s a lot easier to fix any mistakes or fallout you might have when you don’t have a full face of makeup already done. Trust us on this one.

2. Add Primer To Your Lids

Not everyone primes, but if your lids tend to be shiny, priming your eyelids before adding color is an important step, especially when you’re taking the time to create a beautiful smokey eye look. Primer creates a good foundation for layering your shadows and building color that lasts. Since you’re going to be blending a lot while doing your smokey eyes, having a good base makes it that much easier. Another benefit to wearing a primer is no creasing, and who doesn’t love that?

3. FIND LOTS OF DIFFERENT SHADES

If you’re creating a gradient smokey eye look make sure to have several different colors on hand from the same color family to complete the look. For example, if you’re doing a purple smokey eye, you’re going to want at least three variations of purple (a dark, medium and light) to complete the look. You’ll also always want to have a highlighter or base shade on hand for highlighting under the brow bone and in the inner crease of eyes, also known as the “v”.

4. USE LINER

If you’re going for the total smokey eye glam look we recommend adding a khol liner to it. After creating the perfect gradient of colors on your lid, apply your kohl liner along the base of your lashline and smudge it. This creates definition to the lids and will give you that smoldering eye look seen in so many magazines. You can do the same underneath the eyes and set with a coordinating powder shadow so that any bleeding of the liner will rest on the powder shadow.

5. INVEST IN SOME BRUSHES

To take your eyeshadow looks up a notch, treat yourself to a few good makeup brushes. The basics like an eyeshadow brush, blender brush, highlighter/shader and eyeliner are all a good place to start. Since the look is all about blending, you’re going to want brushes that will perform well and give you professional results.

6. BLEND BABY BLEND

The most important pro tip for eyes, smokey especially, is to blend, and then blend again. If you don’t blend out your smokey eyes your colors will look harsh and unpolished. If you’re creating a gradient look and you want your colors to be seamless blending is key. To blend out the colors, create small circles with a fluffy brush until all harsh lines are gone. Either use a different fluffy brush for each color, or cleaning the brush after each color is applied to the eye to make sure you’re not blending a color with a shadow you don’t want it to be blended with. Read More……………….

Also Read: 10 Natural and Cheap Ways to Remove Acne Scars