Home Blog Page 365

Clogged Pores on Face: How It Happens, How to Clear Them & What Not to Use

0

Everyone knows the term clogged pores. But this commonplace facial condition alludes toward the ambiguous. What exactly are the pores clogged with? What does it mean? And how can one unclog them? The internet yields a number of remedies to unclog your pores ranging from the gentle to the extreme. We sat down with some experts in the field—dermatologist Yuri M. Kim, DO and esthetician Karoly Spring—to figure out the best ways to unclog your pores, with or without the presence of an acne breakout and also to look a bit further into the internet’s most viral unclogging trend.

What’s Clogging Your Pores?

According to Dr. Kim, “Clogged pores occur when oil, dirt or dead skin cells start to build up. This can be caused by makeup, not having a good skin care regimen, bacteria, sweat, excessive oil production and even hormones.” Clogged pores often catch a pointed finger as an acne-causing culprit, which is not unfounded. However, clogged pores are not the sole cause of acne.

This buildup of dirt, oil and dead skin blocks and clogs your pores thus making your skin prone to possible acne breakouts. The signs of clogged pores are pretty tell-tale. Dermatologists and estheticians alike confirm that the presence of blackheads and whiteheads means that your skin could benefit from a refreshing cleanse.

“Sometimes patients may start to develop whiteheads or blackheads under the skin. If there is more inflammation, then that is when the ‘pimples’ start to form. The face will look dull and not refreshed,” says Dr. Kim. Spring agrees and adds, “You can also feel your face with your fingers and notice a bumpy, rough surface.”

The Problem With the Viral Pore-Unclogging Videos

Social media is saturated with these addicting-to-watch videos. The videos situate a well-lit shot, framed shoulders-up of some wide-grinning millennials seemingly covering their faces with charcoal paint. Clever editing and a speedy time-lapse show the paint hardening into a face mask. And then: bam! The climax. The moment we all stalled on the video to see—the peel off. The satisfyingly slow pull and peel shows the viewer just how clogged pores can be, and by the same token, the necessity of the face mask to unclog and prevent acne.

This viral face regimen has stormed the internet in droves; however, because of the very nature of the digital sphere, cutting and editing omits some of the less glamorous sides the compelling face mask pull. Many of the popular products have harsh ingredients that do not bode well on sensitive skin. Also, the very act of the pull can be too aggressive, removing skin and doing more damage than it’s worth. “There should be little to no pain when unclogging your pores,” says Spring. “The right preparation and ingredients make a great difference.”

Read more 

Also read  15 Best Fruit and Vegetable Juices for Glowing Skin

ADOPT THESE HEALTHY EATING HABITS FOR CLEAR AND GLOWING SKIN

Glowing skin is always in! This quest for clear skin does not end with just strict skincare regimens, managing stress or exercising. There’s one more thing that most people ignore – healthy eating habits. Let’s just admit we love junk food so much that we find it difficult to replace it with healthier options. However, this one habit can lead to several skin problems such as acne, premature ageing and even excessively oily skin.

Diet checklist for glowing skin:

– Drink water on empty stomach in the morning

– Have a wholesome breakfast before leaving the house

– Include a good mix of proteins and veggies in every meal

– Consume fruit juice, nuts or coconut water during snack time

– Avoid eating dinner very late

– Stay away from dairy


1. Eat seasonal fruits and vegetables

“Consuming fruits and vegetables when they are not in season means that they are mixed with added preservatives or refrigerated to extend their shelf life. This diminishes its nutritional value drastically. Eating fruits or vegetables when they are in season.

2. Avoid artificial sweeteners

“The second healthy eating habit is to kick artificial sweeteners out of your diet. They induce blood sugar disturbance and increase the appetite which leads to weight gain, acne and pigmentation around the neck.It can also cause hormonal imbalance which affects the skin negatively. If you want clear and healthy skin which is free from pigmentation and acne, give up on sugary foods and aerated drinks as research links them to poor skin health.” 

Read More

Also Read: 7 MAKEUP HACKS THAT WILL CHANGE YOUR LIFE

Everything you Need to Know About Dip Powder Nails

0

What Are Dip Powder Nails?

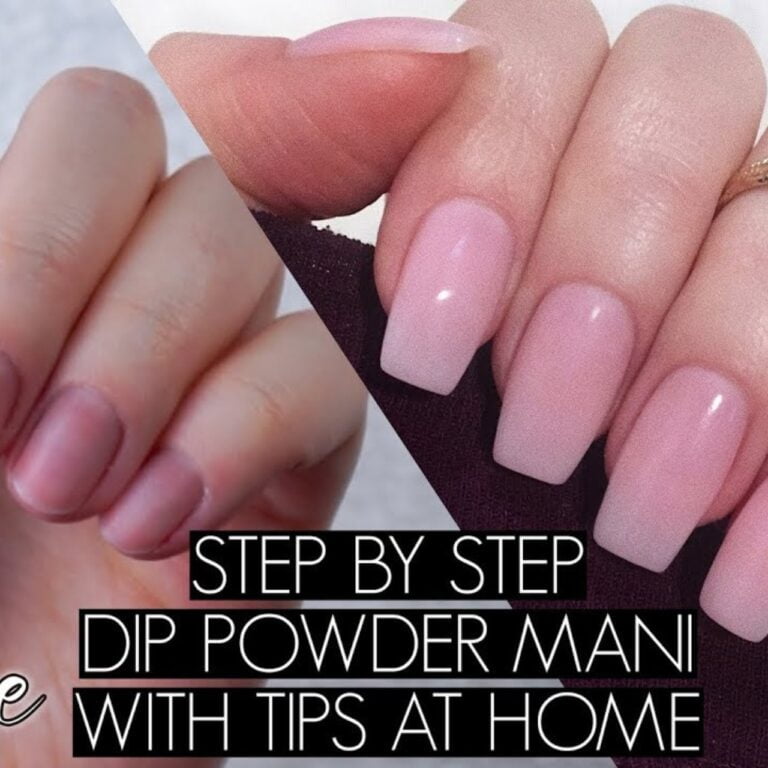
Dip powders are a combination powder and a glue liquid that hardens when the air hits, leaving a long-lasting color on your nails. There are no need to use ultraviolet (UV) lights when applying this type of powder, while gel nails DOES require UV lights.

Also known as SNS nails, (Signature Nail Systems), dip powder nails are a better option than gel nails due to its simple application. All you need to do is dip your nail into a powder of your choice and seal it with a coat of polish. You’ll also need a base coat and a topcoat.

How Are Dip Nails Applied?

As we said before, the application is pretty easy but it all depends on the method your nail salon uses. There are two techniques of dip powder nail application:

#1. Dipping Technique:

Some nail technicians use this method which consists of dipping the nails (hence the name) in the powder after applying a layer of polish like glue. The dipping process will continue depending on how deep you want the color to be.

This technique has been proven not to be the most healthy one. When you dip your nail into the powder you are exposed to germs, if the powder isn’t changed constantly this can be quite unsanitary.

#2. Painting the Powder Technique:

The safest method to apply dip powder is to paint the powder with a brush onto the nails. This way the amount of powder used will be controlled and exclusive for you.

Just like the dipping technique, apply a coat of the glue polish and then paint/brush the powder. Apply another layer of glue polish and continue applying color until the color desired is reached. If you are doing this at home always be careful and clean the edges.

Pros and Cons of Dip Nails

Pros:

Every girl dreams of the perfect manicure that lasts a long time, well, dip powders gives you just that. Dip powder manicures last for almost a month.

You will be rocking your natural nails!! The powder goes on top of your natural nails so there is no need to get fake nails. Whether your nails are long or short, dip powder is for every type of nail.

Dip powder actually protects your nails, using it allows the nail to have an extra layer of protection to prevent breakage and allow the nail to grow without any complications.

No more chipped nails! Since it last longer and thanks to the glue-like polish, dip powder manicure won’t chip or peel like regular polishes after a few days.

You can do it at home! Yes, dip powder manicure is so easy that you can do it yourself. Purchase a starter kit online and you are good to go but remember to be careful since you will be dealing with glue polish.

Cons:

As we said before, the dip powder manicure can be kind of unsanitary since some salon uses the dipping methods. Imagine having 10 different people dipping their nails in the same powder, yes – no good – the amount of bacteria risk is huge. If you decide to get your dip powder to manicure in a salon try to go to one that uses the painting powder technique instead.

The removal process can be a bit longer if you are not careful enough. To remove dip nails, you need to follow every step carefully and not pick your nails. Luckily, removing your dip powder at home is possible, look into our nail section to find more about it.

It can be a bit more expensive than other manicures, this is due to how trending it is and not a lot of people know the techniques. Read more

Also read: Stretch Marks be Gone! Everyday Oils to Combat Stretch Marks

Stretch Marks be Gone! Everyday Oils to Combat Stretch Marks

Say goodbye to stretch marks once and for all with these everyday oils to combat. All-natural, and all 100% effective!

Stretching out our muscles and limbs feels so great and produces wonderful effects for the body and mind. On the other hand, when our skin stretches out it can leave a scarred appearance that many people are self-concious of and uncomfortable with.

Luckily, stretch marks don’t have to be a forever thing. Just as they came, they can disappear with a little TLC and regular treatment. Topical treatments containing healthy oils and essential oils have been found to greatly reduce the appearance of stretch marks, so add these to your skincare line and send the stretch marks packing!

Oils That Combat Marks

Coconut oil is a great combator when it comes to eliminating stretch marks. It is loaded with healthy fats that help improve skin elasticity and promote cell rejuvenation. Coconut oil is also super moisturizing and nourishes damaged skin while preventing further damage.

Argan oil is packed with vitamin E which has been found to build-up skin elasticity and nourish stretched or scarred skin. Argan oil also contains fatty acids that further invigorate the skin and prevent stretch marks. Read more

Also read: Go Green…With Your Eyeshadow

Luckily, don’t have to be a forever thing. Just as they came, they can disappear with a little TLC and regular treatment. Topical treatments containing healthy oils and essential oils have been found to greatly reduce the appearance of stretch marks, so add these to your skincare line and send the stretch marks packing!Stretching out our muscles and limbs feels so great and produces wonderful effects for the body and mind. On the other hand, when our skin stretches out it can leave a scarred appearance that many people are self-concious of and uncomfortable with.


7 MAKEUP HACKS THAT WILL CHANGE YOUR LIFE

With so many new makeup hacks and trends all going on simultaneously its sometimes hard to keep up. From strobing, to sculpting and contouring, we sometimes feel like we need a handbook just to get it right. Thankfully there are plenty of tricks and tips available online to fill in the gaps and make even the most intimidating makeup looks not so scary. Below are seven of our favorites makeup hacks that every makeup lover should know and tuck away to use when needed.  However, these aren’t your average makeup tips. These makeup hacks are sure to change your makeup game forever.

1. FIX BROKEN EYESHADOWS

So, it happened. Your reflexes failed you and your brand new palette fell to the ground. The beautiful eyeshadow colors you so lovingly used daily are now shattered. Don’t start crying yet! Your shadows are not done for. Shattered eyeshadow can be easily fixed with some rubbing alcohol and a little TLC. First, break up your already shattered shadow into a fine, powdery consistency. Next, fill a spray bottle with rubbing alcohol and spray the shadow. Be sure to use rubbing alcohol that has a high concentration. Lower concentrations have the tendency to create a film over the shadow because of the content of water in them.

2. GET MORE USE OUT OF YOUR DRIED-UP MASCARA

Want to get a few more uses out of your favorite mascara? We’ve got an awesome hack for you. Simply use a saline solution, like contact solution, to re-wet it. A few drops should be all you need to have voluptuous lashes again. However, it is important to keep in mind that you should not use your mascara longer than three months after you bought it. If you are still within that three months range, go for it!

Pro tip: To get the best effects from your mascara, don’t pump it. Instead, twist the wand back and forth using a circular motion. To avoid clumpy lashes, make sure you wipe excess mascara off of the wand before you apply it to your eyes.

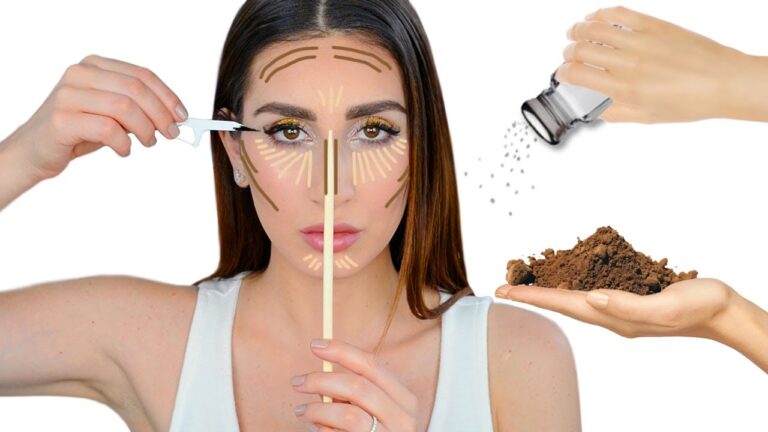
3. CONTOUR MAP LIKE A PRO

If you’ve been struggling trying to figure out how all of those Instagram MUA’s contour so perfectly, we’ve got you covered. Map out the areas that you want to contour (your cheekbones, along your hairline, the sides of your nose, and anywhere else you think you need a little bronzing) with a pencil that is easily smudged, like a brow pencil. Brow pencils are easy to use for contouring because their pigments are usually heavily concentrated and can be blended in easily.  Read more…………...

Also Read: Aloe Facial Cleansing

Aloe Facial Cleansing

If you’re a lover of all things beauty, you’ve no doubt heard of Holika Holika Aloe Facial Cleansing Foam! And if you haven’t…well, it’s taking the beauty world by storm! This deep cleanser contains pure aloe vera left juice that turns from gel to foam, and its reviews are stellar!

But, if you’re like most people are your beauty arsenal is just a little too crowded and your wallet too thin, no need to fret, because we’ve come up with a dupe! This homemade aloe cleanser is a replica of the Holika Holika cleanser and (we believe) works just as well! Of course you’ll need to get your hands on raw, all natural aloe vera gel, but that’s fairly easy to do!

Ingredients:

  • 1/4 cup distilled water
  • 2 tbsp fresh aloe vera gel (see here how to make aloe vera gel)
  • 1/2 cup liquid castile soap
  • 1 tbsp jojoba oil
  • 5 drops watermelon seed oil
  • 10 drops cucumber seed oil
  • 5 drops lotus essential oil

Directions:

  1. In a bowl, mix the distilled water and aloe vera gel. Use a whisk to thoroughly combine.
  2. Pour in castile soap and stir well.
  3. Add in the essential oils and pour into a clean pump bottle.
  4. Use morning and night, as you would any other cleanser!

Notes:

  • We in no way do we claim that this will be exactly like the Holika Holika Aloe Facial Cleansing Foam, but merely a homemade replication (we did our best!).
  • We realize most people don’t have watermelon seed oil, cucumber seed oil, or lotus essential oil, and initially the cost will be great, but once purchased, you’ll be able to make SO many amazing DIY beauty products (including this awesome cleanser!).
  • This cleanser should work wonders for all skin types, especially those with oily/acne prone skin.
  • The amazing scent of watermelon seed oil and cucumber seed oil will leave your skin smelling divine!
  • Gentle enough to use every day! Read More……………

Also Read: DIY scrubs: 8 sugar scrubs you can make at home to exfoliate your skin

DIY scrubs: 8 sugar scrubs you can make at home to exfoliate your skin

0

DIY scrubs: 8 sugar scrubs you can make at home to exfoliate your skin

Sugar is not only a great scrubbing ingredient but also helps in retaining moisture of the skin. Applying sugar scrubs on your face helps remove dead skin cells and also attracts water to the deep layers of the skin. With the lockdown in place, you might not be able to get your scrubs or face packs, which is the reason why these homemade scrubs might come handy. Here are a few scrubs which you can make with sugar and some other ingredients which can easily found in your pantry:

1. Lemon and sugar scrub

Lemon is a natural skin brightening ingredient, which naturally removes tan. Mixing it with sugar makes an excellent scrub for removing dirt and giving your face a natural glow. Just mix a tablespoon of sugar in half a lemon’s juice and mix it. You can also add a bit of honey to attain a nice consistency. Apply it all over you face and leave it for 20-30 minutes. Wash away with water along with gently scrubbing your skin.

2. Green tea and sugar scrub

Green tea is an antioxidant which is loaded with anti-inflammatory and anti-microbial properties. Applying it on your face will give you a feeling of freshness and will also help in reducing acne. Just take a teaspoon of green tea leaves and add a teaspoon of sugar in it. Add a few drops of olive oil to achieve a thick consistency. Apply the paste all over your face and leave it for a while. When you wash it away, make sure you gently scrub it with your fingertips to remove all the dirt and dead skin from you face.

3. Oatmeal and sugar scrub

Another amazing ingredient for people with oily skin and acne is oatmeal. It absorbs the excess oil from your skin and also helps in treating acne, because of its anti-inflammatory properties. Just take a tablespoon of oats and add a teaspoon of sugar in it. Add a few drops of olive oil or honey to turn it into a paste. Apply the mask all over your face and let it dry off. Scrub it gently while washing off and make sure you don’t hurt your face in the process.

…….Read More……

Read Also: 5 amazing skin-and-hair benefits of aloe-vera gel

15 Best Fruit and Vegetable Juices for Glowing Skin
A good skin care regimen begins with a healthy diet. A good and healthy diet should constitute an ample amount of natural food items like fruits and vegetables. The benefits of consuming fruits and vegetables for our skin are multifold, from hydration to antioxidants and much more. Drinking fruits and vegetable juices is one of the easiest and the best ways to get the maximum nutrients from veggies and fruits. Here we look at the best of the lot for glowing skin.

Which Juices Are Good for Glowing Skin?

You may be aware that carrot and beetroot juice is extremely good for our skin, which is indeed true. But there are many other vegetable and fruit juices which give us glowing skin. What exactly do these and other fruits and vegetables have that make them positively wonderful for our skin? Let’s take a look at how these juices benefit our skin.

1. Beetroot Juice

Beetroot is the go-to choice of vegetable juice of most people who have blemishes and marks on their skin. Its iron and potassium content helps purify the blood. Beetroot juice also contains vitamins A, C, K, folic acid, magnesium, copper, and zinc and has anti-inflammatory properties.

When to Consume  

It is best to drink this juice in-between meals.

Recommended Intake

One glass per day

2. Carrot Juice

No doubt the vitamin A content in carrot is good for our eyes but it also wards off acne, pimples, pigmentation, sun damage. It even helps to even out your skin tone. The antioxidants in carrot fight against the free radicals in the body, thereby slowing the process of ageing.

When to Consume 

Carrot juice is best consumed early in the morning.

Recommended Intake 

Not more than two glasses per day.

3. Tomato Juice

Packed with antioxidants, tomato juice is perfect for young and healthy-looking skin. Vitamins C, A, and Lycopene in tomato juice offer oxidative protection. It reduces discolouration, spots, and acne. It even reduces large pores and gives one glowing skin. Blending tomato with some salt or honey to lose the acidity is the simplest tomato juice recipe you can try.

Read more 

Also read  Vitamin E Oil for Your Face – Benefits and Tips to Apply

5 amazing skin-and-hair benefits of aloe-vera gel

Amazing skin and hair benefits of aloe-vera gel

Being worried about our skin and hair is extremely natural. That being said, we must also be prepared and ready to tackle all these skin and hair-related problems whenever they arise. While we can resort to expensive beauty products and supplements, we can also make use of the most harmless yet effective natural remedy easily available at our home i.e. Aloe Vera gel.

Apart from its herbal benefits, an aloe vera gel has skin soothing properties that relieve your skin of sunburns and inflammation. It’s moisturizing attributes, not only tend to skin ailments but also can prove beneficial for your hair.

Some of the amazing skin and hair benefits of aloe vera gel are as follows.

1. Hair moisturizer

Summer or winter, our hair is highly affected by external entities and becomes prone to dryness and dullness. In order to avoid such problems, aloe vera gel is your best go-to ingredient. Not only does it moisturise your hair but it also brings back the radiance.

2. Cures dandruff

Dandruff can not only prove unhealthy but it can also hamper you confidence and self-esteem. To prevent yourself from a dandruff-ridden hair, you can apply aloe vera gel on a regular basis. Aloe vera helps in curing dry skin and also hydrates your scalps, which automatically controls the occurrence of dandruff.

3. Reduces acne

Aloe vera is rich in salicylic acid which is great for acne-prone skin. Acne-breakouts are usually caused due to pore clogging or an oily skin. Aloe vera gel acts a great exfoliator and unclogs all the pores, reducing the appearance of acne on the skin.

4. Can be used as a face cleanser or make-up remover

While you must have already got yourselves face cleansing and make-up removal products, aloe vera is the best ingredient to cleanse your skin and remove all the cosmetics from your skin. Not only is it effective but its natural and harmless. It soothes the skin to the maximum and gives it a beautiful radiance too.

……Read More……

Read Also: 6 MASCARA MISTAKES YOU SHOULD TRY TO AVOID