Home Blog Page 348

3 Easy-To-Make Homemade Deep Conditioners for Natural Hair

0

For some of us, going natural did not stop with our hair.  It continued with a move towards mixing our own “natural” products.  While numerous recipes exist on the internet, few are actually both simple AND effective in meeting the needs of our natural hair.  If you are new to making your own products or are a current mixtress searching for an easy-to-make recipe that actually works, you can start with these homemade deep conditioners, which are my three favorites:

1. For Manageability – Bananas, olive oil, glycerin, and honey

This homemade deep conditioners improves the manageability of my hair for post-rinse styling. The secret is in the banana, which has a way of minimizing shrinkage and softening the hair when mixed with the other ingredients.  Meanwhile, glycerin and honey, which are both humectants, and olive oil, which is known to penetrate the hair, all contribute moisturizing benefits.  Do not be alarmed if you notice a loosening of your coils or curls with this conditioner; the effect is temporary until your next wash day. This recipe is ideal for naturals who want to achieve easier blow-outs or better stretched styles.

Ingredients:
1 large overripe banana (sliced) OR 7 oz banana baby food
4 tbsp extra virgin olive oil
2 tbsp pure vegetable glycerin
2 tbsp pure honey

Instructions:
Place the sliced banana, extra virgin olive oil, glycerin, and honey all in a blender. Blend the ingredients thoroughly making sure no lumps or banana bits remain. (Depending on your blender quality, you may or may not have to then sieve the mixture.  Another option is to use banana baby food, though the conditioner may not be as effective.) Apply to hair and let sit for 30–45 minutes under a shower cap. Detangle, rinse thoroughly, and style as usual. Read More…………….

Also Read: 5 Carrot Face Mask Recipes for Youthful, Glowing Skin

Skin Conditions: Teenage Acne

Almost all teens get acne. It happens when an oily substance called sebum clogs pores.Pimples usually pop up on the face, neck, back, chest, and shoulders. Acne isn’t a serious health risk, though severe acne can cause permanent scars. Acne can also damage self-esteem.

What Does Acne Look Like?

Acne can appear as one of the following:

Whiteheads: White dots that are pores impacted with oil and skin covered by skin layers.

Blackheads: Black bumps that are impacted pores in which material pushes out through the follicles. The black color is not from dirt. It may be from bacteria, dead skin cells, and matter that react with oxygen.

Papules, pustules or nodules: More serious lesions appearing red and swollen due to inflammation or infection of the tissue around the clogged follicles, which are often painful and feel hard.

Cysts: Deep, pus-filled pimples.

Why Do Some People Get Acne and Others Don’t?

It is not clear why some people are more prone to acne than others.

The exact cause of acne is not known, but hormones called androgens can play a role. Androgens increase in both boys and girls during puberty. Androgens make the skin’s oil glands get larger and make more sebum. Androgens also can increase because of hormonal changes related to pregnancy or starting or stopping birth control pills.

Genetics may also matter. If your parents had acne, you may have inherited that tendency.

Some medications (for example, androgens taken as medicine, epilepsy medication, lithium, and prednisone) can cause acne.

Cosmetics that have a greasy consistency may also clog pores. Water-based products are less likely to cause acne than oil-based makeup.

Other things that can make acne worse include:

  • Friction caused by leaning on or rubbing the skin; harsh scrubbing
  • Picking or squeezing blemishes
  • Pressure from bike helmets, backpacks, or tight collars
  • Changing hormone levels in adolescent girls and adult women two to seven days before the start of the menstrual period
  • Stress

How Is Acne Treated?

Dermatologists (doctors who specialize in skin problems) often treat acne, particularly in severe cases. Family or general practitioners, pediatricians, or internists can treat milder forms of acne. Read more

Read also: Permanent Makeup


Permanent Makeup

Permanent makeup, or cosmetic tattooing, is a fast-growing part of the health and beauty industry.If you have faint eyebrows, no eyebrows, or partial eyebrows, a cosmetic tattoo can help. A lip tattoo can reduce “lipstick bleed,” and give definition to the lip line. With a colored lip tattoo, lip scars seem to disappear, plus you can kiss lipstick good-bye. After an eyeliner tattoo, you can put away your eye pencils for several years.Cosmetic tattooing also has more serious applications, such as improving the appearance of a nipple after breast reconstruction.Check your tattoo artist’s credentials carefully. Ask to speak with former clients. Ask to see before-and-after photographs. To avoid infections and ensure professional results, it is important to work with a licensed aesthetician, ideally one recommended by a cosmetic surgeon. Make sure the aesthetician uses sterile gloves and sterilized equipment. 

How Permanent Makeup Is Done

The process is just like getting a tattoo. The person applying permanent makeup uses a needle that penetrates your skin and releases pigment.

Proper sterilization, techniques, and licensing are key.

Getting Permanent Makeup

Before getting permanent makeup applied, you’ll get a patch test on your skin to check on whether you have an allergic reaction to the pigment that will be used.

After that, you will choose the color, based on advice and suggestions from the makeup artist. The technician will then use a sterile surgical pen to sketch the area to be tattooed and then put an anesthetic gel on your skin.

Using a hollow, vibrating needle, the technician will apply the pigment into the top layer of the skin. Each time the needle penetrates the skin, a droplet of pigment is released into the hole the needle makes. You will feel a slight stinging.

After getting permanent makeup, it takes about three weeks for the color to fade to its permanent shade.

At first, the color will likely look dark and shiny. The surrounding tissue will be swollen and red.

You can use a cold compress to reduce swelling and antibiotic ointment to help prevent infection. Strict sun avoidance and use of sunscreens that block the entire ultraviolet light A and B spectrum for several weeks is important to prevent post-inflammatory color changes. Complications are rare but can include infection or allergic reactions to the tattoo dye. Read more

Read also: The ABCs of Summer Hair Repair


The ABCs of Summer Hair Repair

Most of us are quick to acknowledge the need to protect our skin from the rigors of summer heat and sun. But come Labor Day a quick glance in the mirror frequently lets us know what we forgot to protect — our hair.

Indeed, a season of exposure to sun, salt water, and chlorine chemical residues — not to mention a few extra chemical “sun” streaks for style — can come together to wreak havoc on our tresses. By the end of the summer, experts say hair can become so dehydrated it looks and feels nearly fried.

“From a technical standpoint, there’s a protective coating on hair called the hydrolipidic film; if you have dry hair, that film is broken down somewhat anyway, when you color it, it breaks down a little more — but when you add sun, salt water, and chlorine, you can destroy the film altogether,” says Melissa Baker, national training advisor for Rene Furterer hair care products in Paris.

The end result, says Baker, is that moisture located deep in the core of the hair shaft evaporates — and in what seems like one “poof” your “pouf” can be gone.

“Hair looks, feels, acts, and actually is, crying out for moisture,” says Baker.

That means hair not only has a dry look and feel, but can also be frizzy, unmanageable, have problems holding a curl or style, and even take longer to dry. In its worst form damage causes the ends of the hair to split, and breakage can begin.

Read more

Read also: Vaseline and Egg White Mask for EVERYTHING


Vaseline and Egg White Mask for EVERYTHING

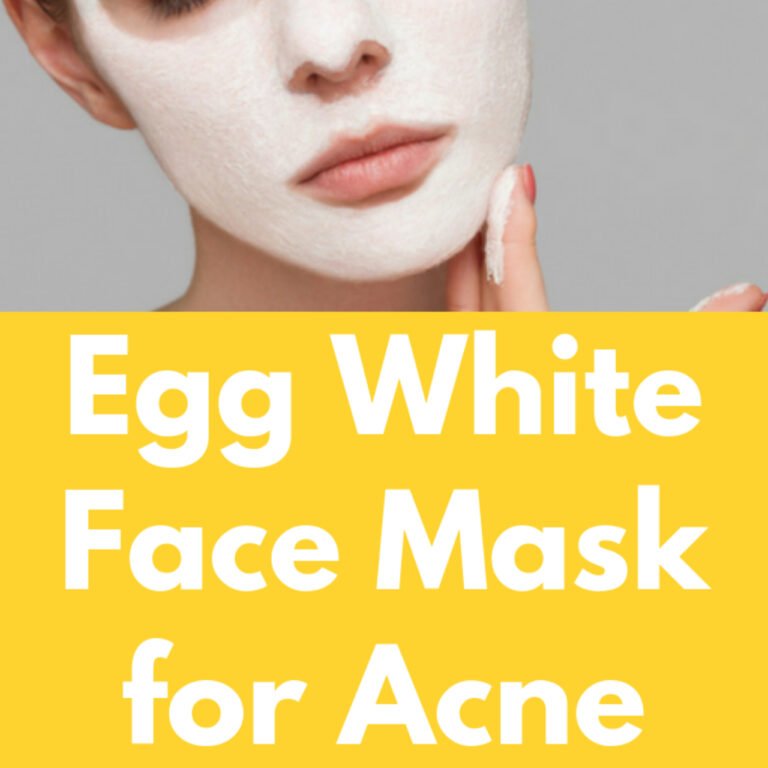
If you’re looking for a cure-all, fix-all type of face mask, this Vaseline and egg white mask truly is for EVERYTHING! And by everything we mean, it will treat acne, random breakouts, dull skin, dry skin, oily skin, aging skin, and even reduce the appearance of acne scars, dark spots, and sunspots. Seriously, if there’s ONE mask you try this week it should be this Vaseline and egg white face mask – you won’t be disappointed! So is Vaseline good for your face? The answer is absolute yes!

The reason we love this Vaseline face mask is that it’s so simple to make and requires the most basic ingredients: Vaseline, egg white, and a little lime or lemon juice!

What’s even better is that after just one use, you’ll notice brighter, softer skin, and, when used on a regular basis (2-3 times a week) can cure a multitude of things (see above!). Applying Vaseline on the face does something truly magical – it brightens dull skin, softens, and adds a beautiful glow that works for all skin types, even sensitive skin!

Eggs for face problems is another amazing way to rid the skin of dirt, impurities, and blackheads. Raw eggs are packed full of protein and minerals, and when used on a regular basis have the ability to tighten the skin and prevent premature aging.

Vaseline and Egg White Face Mask

Vaseline: also known as petroleum jelly, protects the skin (acts as a barrier) and helps to seal in skin’s moisture. Also, helps skin retain water which makes it a great ingredient to fight wrinkles! Applying Vaseline on the face will leave your skin super soft and silky because of its moisturizing properties as well as give it a really beautiful glow.

Eggs: packed with protein, egg whites tighten, aid in regenerating cells, and purging pores. Makes for the perfect skin cleanser as well!

Lemon juice: acts as a natural bleaching agent helping to reduce the appearance of scars, dark spots, and age spots. Also detoxifies the skin, cleanses, and acts as a toner.

You’ll Need:

  • 1 tbsp Vaseline – if you don’t have Vaseline, you can substitute for aloe vera gel
  • 1 egg white
  • a few drops of freshly squeezed lemon or lime juice (preferably organic if you can!)

Directions:

  1. Separate the egg white from the egg yolk.
  2. Whip up the white just until a little frothy and add the Vaseline and a few drops of lemon juice.
  3. Apply the mask to a cleansed face and neck and leave on for 15 to 20 minutes or until completely dry. Your skin may feel a little tight, but that’s completely normal.
  4. Rinse off and pat dry.
  5. Use 2-3 times a week!

Overnight Egg White Face Mask

You can even use this egg face mask overnight to really purge pores and do a deep cleaning and skin tightening!

This Vaseline and egg white mask won’t clog pores and is gentle enough for sensitive skin types. Use on a regular basis to rid the skin of blackheads, breakouts, and prevent dryness and sagging. Read more

Also read: Hangover Skin Remedies


Hangover Skin Remedies

Had a little too much to drink last night? Not to worry, these hangover skin remedies will hydrate from the inside out, making sure your skin is in tip-top shape again!

Many of us can relate to those mornings when we wake up feeling a little crusty because of the extra cocktails we had the night before. A pounding head and an upset stomach are common ailments that accompany our weekend hangover. And if that’s not annoying enough, to top it all off we are generally wearing our hangover loud and proud on our faces. Due to the dehydrating effects of alcohol, our skin can suffer the consequences and appear discolored, inflamed and dry. To replenish your skin and give your face a hydration boost, try these hangover skin remedies!

Hangover Skin Remedies

Today we’ll share two of our absolute BEST and favorite hangover skin remedies: a cucumber face mask and a milk and oats face mask.

Cucumber Face Mask

For cooling and re-hydrating, try this Cucumber Mojito Face Mask. Cucumber cools inflamed and irritated skin, while helping retain water and brighten. Lime’s citric acid removes dead skin cells and honey helps draw moisture onto the skin and is sweetly nourishing. Mint also helps to cool the skin and is known combat to acne. What a better way to fight that cocktail-induced face than with a cocktail-inspired face mask!!

What You Need:

  • 1 small cucumber sliced
  • Juice from half a lime squeezed
  • 1 tbsp of honey
  • 5-10 fresh mint leaves

Throw all of the ingredients in a blender and blend until they are well combined and the cucumber is closer to a liquid form. Rinse your face then apply the mask and allow to chill for 10-15 minutes. Rinse with warm water and again with cool water and pat dry.

Milk & Oats Face Mask

For ultra-moisturizing and skin soothing, try this Oatmeal Breakfast Face Mask. Oatmeal is an awesome go-to for inflamed and irritated skin, while the lactic acid in milk deeply nourishes skin cells and honey locks in moisture. A few drops of lavender will have a calming effect while you lay back and let your mask soak.

What You Need:

  • ¼ cup of ground oats (whatever you have in your kitchen should be just fine)
  • ¼ cup of whole milk
  • 3 tbsp of honey
  • 3-5 drops of lavender essential oil

To make, simply combine all of the ingredients in a bowl and mix until well blended and the mixture is a paste-like texture ideal for massaging onto the face. Gently rub all over the face and allow to sit for 10-15 minutes. Rinse with warm water then again with cool water and pat dry. Read more 

Also read: Gelatin Face Mask: How to Make a Peel Off Mask at Home

5 Carrot Face Mask Recipes for Youthful, Glowing Skin

0

Carrot Face Mask Benefits:

As you may already know, carrots have a slew of health benefits when eaten. They are packed with vitamins and minerals, and have been proven to prevent eye degeneration and also improve skin tone. When applied to the skin, carrots can do a lot more for your skin. It’s a natural, inexpensive treatment that can do wonders for oily skin, aging skin, acne prone skin, and even dry and sensitive skin. No matter your skin type, carrots can and will better your skin with continued use!

  • Packed with vitamin C and antioxidants to heal skin and protect against free radicals.
  • Helps repair damaged skin cells and aids in the body’s natural regeneration process.
  • Contains beta-carotene which reduces skin inflammation, making it great for those with rosacea, eczema, psoriasis, rashes, or acne prone skin.
  • Slows down the aging process.
  • Contains vitamin A which helps keep body tissue healthy and is also a key vitamin in helping stop and prevent acne.

As you can see, carrots have a multitude of benefits for the skin, but it doesn’t just stop there. Carrots can also help improve hair, nails, and other organs, but that’s for another day! Don’t forget that on top of using these carrot face mask recipes, it’s also recommended that you consume carrots on a regular basis.

How to Make a Carrot Face Mask

carrot face cream

There are several ways to make a carrot face mask. Today, we’ll look at five different recipes. Each of these recipes have been tried and tested for different skin types, as they each have their own benefits.

#1. Carrot and Honey Face Mask for Oily and Acne Prone Skin

A honey and carrot face mask for acne works best on oily skin. Honey has antiseptic and antibacterial properties which target acne and breakouts at the source. It helps to pull out dirt and impurities, and also minimizes the look of enlarged pores.

You’ll Need:

  • 2 medium carrots
  • 2 tbsp raw, natural honey

Directions:

  1. To a pot of boiling water, add 2 medium sized, peeled carrots and boil until tender.
  2. When soft enough to be mashed with a fork, drain the water and add the carrots to a bowl.
  3. Mash the carrots until they are smooth.
  4. In a microwave safe bowl, warm up the honey for 10-15 seconds and mix in with the carrot paste.
  5. Apply the honey and carrot face mask to cleansed skin and neck and leave on for 10 to 15 minutes.
  6. Rinse off with lukewarm water and pat dry.
  7. Follow up with a toner and moisturizer.
  8. Repeat 2-3 times a week for best results.

Read more 

Also read  15 Effective Home Remedies for Open Pores

Effective Tips On How To Remove Dark Circles At Home

0

Effective Tips On How To Remove Dark Circles At Home

Dark circles under eyes are a common issue among all genders and age groups, especially with the hectic and busy life. Let’s know what are dark circles, reasons, tips and how to remove dark circles.

How To Get Rid Of Dark Circles?

These are some common culprits of causing under eye circles which should be addressed as soon as possible before it gets out of your hand.

Although there are plenty of cosmetics products, dark circle creams or vitamin c and hyaluronic acid serums available as dark circles remedy to help you get rid and lighten circles, they often may come along with some side effects if natural ingredients are not used.

However, there are various natural remedies for dark circles which you can use to remove those stubborn under eye circles overnight. And the best thing is they are entirely natural and without any side effects.

Dark Circles Removal Tips

With little changes in your daily routine and schedule can make a lot of difference to your dark circles. Try to enjoy a healthy lifestyle and reap all the benefits with your glowing and relaxed eyes.

Eye Pack For Dark Circles

  • Eye packs are exceptionally useful in reducing under eye circles. To make an eye pack one needs a few drops of lemon juice, coconut, 2 tbsp cucumber, and fresh cream.
  • Mix a few drops of lemon juice, coconut oil, cucumber, and fresh cream and massage it over under-eye circles.
  • Wash after 20 mins.
  • Apply once a week to remove dark eye circles.

Diet For Dark Circles

Your skin reflects what you put on your plates. Include vitamins rich foods for dark circles in your diet that will help in keeping your skin healthy. Add green vegetables and fruits like spinach, carrots, brinjals, bananas, mangoes, and oranges in your diet that have an excellent effect on the skin near your eyes. Stay hydrated by drinking at least 10-12 glasses of water in a day.

Exercise For Dark Circles

Exercise directly may not help in preventing the dark circles, but it does improve the circulation of blood and removes toxins from the body, thus allowing your skin to glow.

Good Sleep

One of the main reasons for dark circles is a stressful life and improper sleep schedule habits.

  • As per experts, at least 7-8 hours of undisturbed sleep is necessary for a fresh eye.
  • Keep all electronic things like mobile phones etc. away at least 1.5 hours before bed.

Home Remedies For Dark Circles

How about if you get rid of your stubborn dark circles from the ingredients that are not only cheaper but also can be found easily in your kitchen. Smart right? Then, have a look at the given below natural treatments that you will love:

Aloe Vera For Dark Circles

Aloe Vera has anti-inflammatory and antioxidant properties.

  • Applying aloe Vera gel hydrates your skin and reduces skin pigmentation.
  • Apply freshly extracted Aloe Vera gel under your eyes.
  • Leave it overnight and rinse with cold water in the morning.

Tea Bags For Dark Circles

Green tea for dark circles has antioxidants which brighten your skin. Tea has tannins, which constrict dilated blood vessels and reduces under eye circles and puffiness of eyes.

  • Soak two tea bags in refrigerated water and put them over your eyes for 20-30 mins. Then wash your face with cold water.
  • Repeat it 2-3 times a day to get the best results.

Rosewater For Dark Circles

Rosewater or rose petals have skin rejuvenating properties. It also soothes the skin and works as a skin toner.

  • Apply rose water on the under eye circles and closed eyelids, using cotton pads.
  • Repeat this process for 3-4 weeks to get better results.

…..Read More……

Read Also:  Best Coffee Face Masks Recipes For Acne, Glowing Skin And Other Skin Problems

Gelatin Face Mask: How to Make a Peel Off Mask at Home

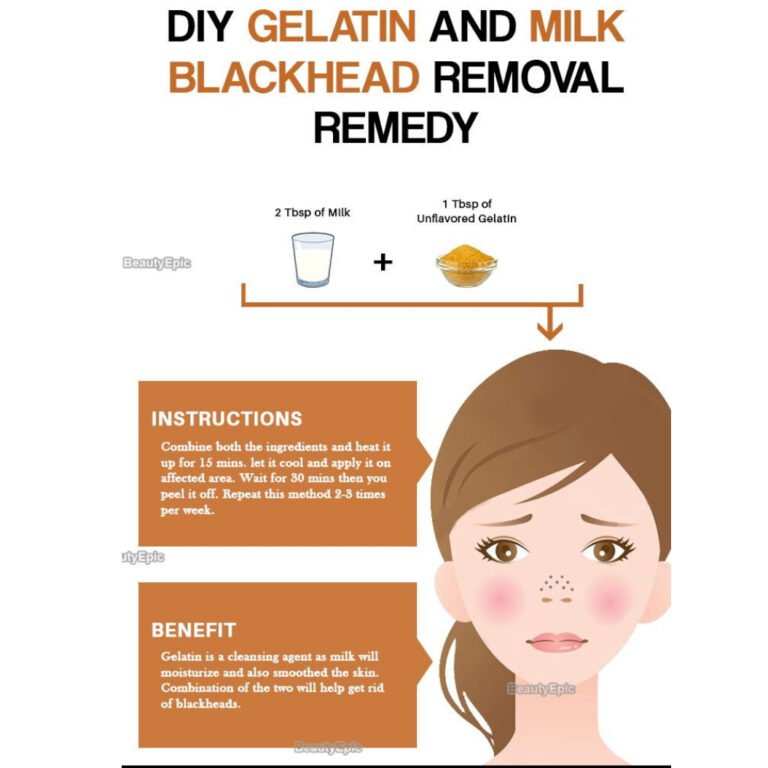
This gelatin face mask recipe only requires two ingredients: unflavored gelatin powder and milk! Smooth, glowing skin is just one face mask away! You’ve undoubtedly seen those charcoal peel-off masks everywhere, and I’m sure most of you have tried them, but did you know you can make your own gelatin peel-off mask right at home with just two ingredients?

This DIY gelatin face mask will cost you less than fifty cents and will take you minutes to make it. Best of all, it will leave your skin silky soft, shrink pores, and will also revive dull skin. Learn how to make a gelatin face mask at home and you’ll never purchase another peel off mask again!

How to Make a Gelatin Face Mask – DIY Peel Off Mask Recipe

Before we dive into this recipe, we’d like to take a look at some of the amazing benefits of a gelatin face mask.

Produces Collagen

Gelatin is a dietary source of collagen which means it will help the body produce more collagen. And, as we all know, collagen helps to prevent premature aging, prevents the formation of fine lines and wrinkles, and creates firmer, tighter looking skin.

Packed With Protein

As the skin ages, it loses moisture as well as proteins. Gelatin is packed full of proteins that feed the skin. This in turn helps to plump up the skin, making it look younger.

Tightens Skin

The combination of gelatin and milk both helps to tighten the skin, making it appear younger. Think of this gelatin face mask as a kind of Botox…an anti-aging remedy that’s cheaper and healthier! Gelatin for face wrinkles has been used for a long time, and it can have some pretty amazing results!

Shrinks Pores

This face mask is AMAZING at shrinking pores – try it and you’ll see! Any type of peel off face mask actually does that, but this one in particular works wonders!

Removes Blackheads

Milk contains lactic acid which helps the skin shed dirt, debris, dead skin cells, and blackheads all in one! Also helps to get rid of excess oil (sebum).

Moisturizes Your Skin

This gelatin face mask also helps to moisturize your skin by replenishing lost moisture.

You’ll Need:

  • 2-3 tbsp milk
  • 1 tbsp unflavored gelatin powder, such as Knoxx

Directions:

  1. In a small bowl, add in your gelatin.
  2. Heat up the milk on the stovetop or in the microwave, just enough so that’s it’s warm but not super hot.
  3. Pour the warm milk over the gelatin and stir until all gelatin has dissolved.
  4. Apply the peel-off mask all over a cleansed face and neck, concentrating on blackhead ridden spots such as nose and chin.
  5. Leave on until mask has hardened and it can be peeled off (usually 10-30 minutes).
  6. As the mask dries, sit back, and relax! Place a couple of cold cucumber slices over your eyes to reduce puffy eyes.
  7. Start by peeling the mask off in an upward direction and watch as blackheads, whiteheads, and dirt comes out (best part ever!)
  8. Wash off any remaining mask, and pat dry.
  9. Follow up with a light moisturizer.
  10. This mask will immediately leave skin smooth, and is so much better than any store-bought version! Read more

Also read: Hyaluronic Acid Foods: Natural Sources of HA

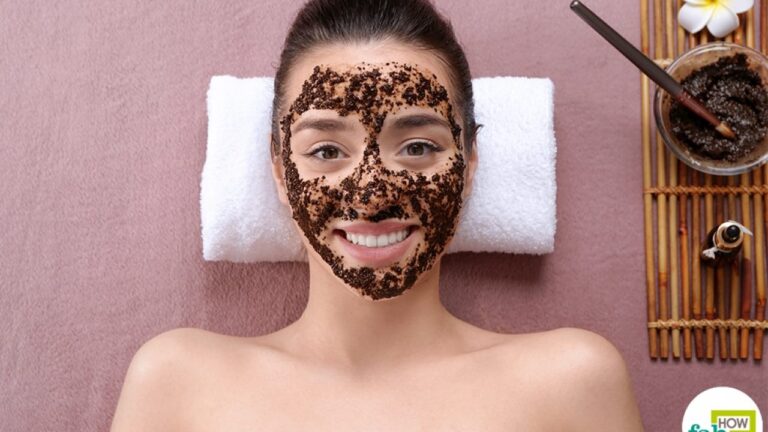
Best Coffee Face Masks Recipes For Acne, Glowing Skin And Other Skin Problems

We obviously will not miss the morning cup of coffee which boosts metabolism and energy. Did you ever know that a face mask with the coffee powder can also work wonders on your skin?

Well, thanks to its antioxidants, which help fight free radicals in the clogged pores that can lead to skin damage.  Also, when you gulp down a cup of coffee it boosts antioxidants into your body.

While a cup of coffee provides antioxidants internally, it enhances the skin texture externally by applying topically as a mask or scrub.

DIY Coffee Face Mask For Glowing Skin

1. Gram flour and Coffee face mask

Ingredients
  • 2 Tbsps Coffee powder
  • 1 Tbsp Gram flour
  • 1 Tbsp Honey
  • Few drops of Lemon Juice
  • 1 Tbsp Yogurt
How to prepare and apply?

You just need to take two tablespoons of coffee grounds or powder in a bowl. To that, add gram flour, honey, yogurt and a few drops of lemon juice. Mix all the ingredients into a smooth and spreadable paste. Apply the mask all over your face and neck area. Let it dry for 10-20 minutes and then rinse off with warm water. Later, apply a good moisturiser to your face. Repeat this treatment 2-3 times a week.

This Gram flour and coffee face mask will make your skin fair and glowing because of the antioxidant properties of coffee which can cleanse your skin by removing excess oils, dirt and bacteria. It can also tighten your skin by removing fine lines and wrinkles from your face. Gram flour will absorb the excess oils from your skin while yogurt lightens the skin. Honey and lemon juice acts as natural bleaching agents. They help to lighten and brighten your skin texture.

2. Aloe vera and Coffee grounds face mask

Ingredients
  • 2 Tbsps Coffee grounds
  • 2 Tbsps Aloe vera gel
How to prepare and apply?

Take two tablespoons of ground coffee powder in a mixing bowl. To that, add another two tablespoons of aloe vera gel. Mix both the ingredients until well combined. Apply the mask all over your face without leaving the corners and neck. Now, gently massage your face with circular strokes for a while and let it dry. When the mask dries, rinse it off with warm water and pat dry. Apply a moisturiser to leave the skin moisturized. Repeat this treatment frequently.

The Caffeine in coffee powder will lighten pigmentation, dark spots, sun spots and blemishes. It also brings back the glow and brightens your skin tone. Aloe vera also helps with skin lightening and it greatly helps with moisturizing the dry skin.

3. Honey and Coffee face mask

Ingredients
  • 2 Tbsps Coffee powder
  • 1 Tbsp Honey
  • Few drops of Lemon Juice
How to prepare and apply?

In a mixing bowl, take 2 tablespoons of coffee powder, a tablespoon of honey and a few drops of lemon juice. Blend all the ingredients thoroughly until they get well combined. Apply the thick paste all over your face and neck area. Massage your face with circular strokes for a while and wash it off. Pat dry and apply a moisturiser to leave your skin soft and supple. Repeat this treatment twice a week.

…..Read More…..

Read Also: Get your glow on! Easy turmeric face mask