Home Blog Page 393

Stay Away From These 5 Beauty Ingredients If You Have Sensitive Skin!

From all the skin types, sensitive skin deserves special attention. Unlike normal skin, sensitive skin is more reactive to environmental stressors and certain product ingredients. Rashes, itchiness and burns are common with those who have sensitive skin and can be fatal if one doesn’t know how to care for their skin type. If it’s face acids you’re looking for, lactic acid is the best one for sensitive skin. It’s a gentler version of glycolic acid that helps to balance and even out your skin’s texture. Other ingredients to look out for aloe vera, marshmallow extract, chamomile extract, calendula extract and shea butter. While products that have these ingredients are great but do double-check their ingredient list once to ensure that they don’t contain these other ingredients mentioned below.

5 Beauty Ingredients To Stay Away From If You Have Sensitive Skin

No matter how pretty the packaging is, please don’t fall prey to skincare products that contain these uncool ingredients.

1. Essential Oils

Yes, most essential oils contain anti-inflammatory and anti-bacterial properties that are great for oily and acne-prone skin. However, they can be extremely harsh and drying to sensitive skin types. Especially lavender, tea tree, citrus and mint, can irritate the skin and cause rash and red bumps. Since they’re highly concentrated, essential oils need to be diluted with another skincare product like an unscented moisturizer or body lotion. In spite of diluting the essential oil, if you still experience itchiness and rashes, stay away from essential oils altogether.

2. Harsh Exfoliants

Physical exfoliators such as scrubs are extremely harsh for the skin. Whether it’s fruit pits, ground-up shells, micro-beads or volcanic rock, using them often will cause micro-tears and will eventually weaken and destroy your skin’s barrier. Once that happens, your skin will be prone to flakiness, redness and dryness. For sensitive skin, it’s better to use mild cleansers and lactic acid to remove dead skin.

3. Alcohol

Alcohol is one skincare ingredient to stay away from. As an ingredient, its goal is to help other ingredients penetrate deep into the skin. It works as a preservative but has the tendency of irritating the skin and causing breakouts. If you spot denatured alcohol listed as an ingredient, stay away from it as it will strip your skin of its natural oils.

4. Sodium Lauryl Sulfates

Any person with sensitive skin who uses an SLS product runs the risk of experiencing an allergic reaction. Like alcohol, SLS too strips the skin from its natural oils and can cause inflammatory skin reactions such as dermatitis and eczema. It’s best to bid this ingredient adieu!

5. Fragrance

Ever wondered why fragrance exists in a product? Simply because to mask the less-pleasant scents of other ingredients in the product. As heavenly as they smell, don’t trust heavily scented products because they contain harsh chemicals and that can irritate the skin severely. Look for labels on products that read as ‘fragrance-free’ and ‘unscented’ as these will be gentler and milder on the skin.

…..Read More….

Read Also: Here’s How You Can Make Your Own Makeup Brush Cleaning & Disinfecting Solution…

Here’s How You Can Make Your Own Makeup Brush Cleaning & Disinfecting Solution

0

Behind every remarkable piece of art, there are multiple tools that made it happen. And in the magical world of makeup, the tools are our makeup brushes! Think about it, can you really do a full face of makeup without using a single brush? From setting your skin with powder to applying your eye makeup, the right makeup brush can make all the difference.

What most of us tend to overlook is that with every use, makeup and your dead skin cells accumulate on the brush. Even if you’re not using your makeup brush, dust and bacteria will settle on it. What happens if you don’t clean these for a few weeks? You’re depositing all that dirt, bacteria first onto your makeup product and then on your skin. Doesn’t that sound like an open invitation to acne and clogged pores?

Now that we’ve warned you, it’s time to clean your makeup brushes!

Keep on reading to know how you can make a DIY makeup brush cleaner at home!

DIY Makeup Brush Cleaning Solution

Clean your makeup brushes at least once a week to keep them germ-free! Here are two types of disinfecting makeup brush cleaning solutions you can make, one for weekly use and another one that you can use to spot clean your tools!

Weekly Makeup Cleaning Solution

We get it, cleaning your makeup brushes is tedious but would you rather clean your makeup brushes or deal with the repercussions later– you decide!

You’ll need:

  • An empty bottle
  • A bowl
  • Liquid dish soap or an antibacterial face wash
  • Olive oil
  • Essential oils, preferably lavender or tea tree
  • A disinfecting solution

Step 1: In a bowl, add 3 tbsp. of any liquid soap and 1 tbsp each of a disinfecting solution and olive oil.

Step 2: Add 4-5 drops of your essential oils and mix well.

Step 3: Dip your wet makeup brushes in this solution and then on the palm of your hands, (or on a brush cleaning mat) swirl them around until all the makeup and dirt comes out. Squeeze out all the excess, rinse in clean water and repeat if necessary.

Step 4: If you have a made a larger batch of this makeup cleaning solution, save some in a bottle so you can use it later.

Clean Your Brushes, Instantly

To instantly clean your makeup brushes, a spot cleaning solution made up of alcohol and some dish soap or disinfectant is what you need.

You’ll need:

  • A bowl
  • Disinfecting liquid
  • Rubbing alcohol
  • Spray bottle
  • Disinfecting wipes
  • Essential oils (optional)

Step 1: In a bowl, add 3 large tbsp each of a disinfecting liquid and rubbing alcohol.

Step 2: Add 2 drops of essential oils (tea tree or lemon) and mix well.

Step 3: Transfer this mix to a spray bottle and mist it on a dirty makeup brush.

Step 4: Rub your makeup brush on a clean tissue or on a disinfecting wipe to further clean it. Repeat step 3 & 4 if necessary.

…..Read More….

Read Also: 7 Skin Care Tips for Men…..

7 Skin Care Tips for Men

0

Men’s skincare should be straight forward and easy. There is no need for five-step peels or multiple layers of creams.Daily shaving can take a serious toll on a man’s skin-especially when you factor in the drying effects of winter weather. Check out our expert’s advice on how to keep your skin healthy, clean and moisturized.

1. Cleanse Your Skin

For most men, skin tends to get oily throughout the day in certain areas, even in winter. Excess oil can stick to the skin and block the pores, preventing your razor from gliding along the skin smoothly. So before you shave, wash your face with water and facial soap to make sure there are no blockages.

2. Get Ready for Shaving

Before you pull out the razor, Ricci suggests splashing your face with warm water after you cleanse it, which will open up the pores. Then apply a light layer of pre-shaving cream, gel or mousse to keep the skin moist and warm. The smoother the skin, the closer the shave.

3. Multitask for a Better Shave

Another way to simplify shaving is to do it in the shower. Not only is it a time-saver, the humidity of your shower will keep your skin moist and your pores open and even make the hair softer and easier to remove.

4. Follow Your Hair Growth

According to Ricci, the popular belief that shaving against the direction of hair growth is better is not necessarily true. Shaving in this way can actually cause irritation and can also damage the hair. For a more comfortable shave, move in the same direction as the growth of the hair.

5. Choose the Right Razor

Razors can be single- or multi-blade. If you like to spend as little time as possible shaving, you can go for a razor with three or five blades. The important thing to remember is that you should be comfortable with your razor and not apply too much pressure, as this can cause irritation.Read More….

Also Read: Dermaplaning: How to Dermaplane at Home

Dermaplaning: How to Dermaplane at Home

0

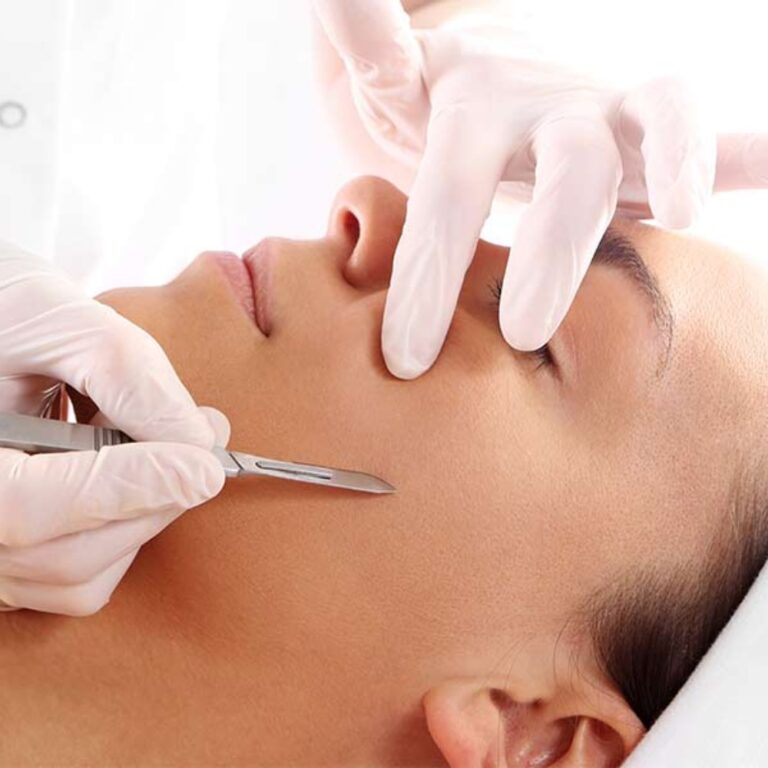
In recent months, dermaplaning has become a very popular method for women of removing facial hair. In a dermatologist setting, an experienced facialist will use a type of scalpel to remove peach fuzz, facial hair, and dead skin cells. But, if you don’t want to shell out a bunch of money or you’re just looking for a quick fix, we’ll show you to dermaplane at home. But, before we get into all of that, let’s take a quick look at what dermaplaning is, who it benefits, and what exactly it does for your skin.

In short, dermaplaning is an exfoliating treatment that involves the use of a small scalpel or facial razor to help remove facial hair, peach fuzz, dead skin cells, and more. If you have sensitive skin, or you’re apprehensive about trying this at home, we recommend you visit a dermatologist that specializes in dermaplaning. Dermaplaning on a regular basis can improve skin texture, prevent breakouts and wrinkles, and also leave skin super soft. After just one treatment, you’ll quickly notice.

What Are the Benefits of Dermaplaning?

As mentioned above, dermaplaning removes dead skin cells and peach fuzz to reveal softer, smoother skin. Removing dead skin cells and peach fuzz ensures that your skin care products can penetrate the skin more easily, but will also make your makeup look a lot less cakey. When you have peach fuzz and dead skin cells sitting on the skin and you apply makeup, it can look cakey. But with dermaplaning, the application will be smooth and perfect, and that’s one of the big reasons why it’s become increasingly popular.

  • Softer, smoother skin.
  • Removes peach fuzz and facial hair.
  • Gets rid of dead skin cells.
  • Reveals brighter skin.
  • Helps to prevent breakouts.
  • Great for aging skin.

Read more 

Also read: How to Smooth Chest and Neck Wrinkles


How to Smooth Chest and Neck Wrinkles

0

The face is always in the spotlight when it comes to skin care, but it’s not the only part of your body affected by aging. Your neck and chest are also on display and because this skin is far thinner and more fragile than other areas of the body, they’re often the first to show signs of aging. A little care and prevention can go a long way; so don’t neglect those areas when they have the potential to be just as radiant as what’s above them.

Prevent Dryness

As you age, the sebaceous glands in your body begin to produce less oil. For women, this typically happens after menopause and results in drier, itchier skin all over your body, including the delicate skin around your neck and chest. To keep these areas smooth and supple, treat them the same way you treat the skin on your face. Moisturize your neck and chest morning and night with a fragrance-free product to minimize irritation and the potential for allergic reactions. Apply your moisturizer right after bathing to seal in the moisture and prevent some of the water in your skin from evaporating.

Fight Sun Damage

Unless you perpetually wear turtlenecks and scarves, your neck and chest are exposed to the sun’s UV rays almost as often as your face, and they’re not immune to damage. The biggest factor in aging skin is sun exposure, which can weaken skin’s elasticity, cause dark spots and accelerate the development of wrinkles. To fight sun damage, apply sunscreen every day—specifically, a broad-spectrum sunscreen that’s water-resistant with an SPF of 30 or higher. Using sunscreen regularly can also help even out the skin tone between your face, neck and chest.

Extend Your Exfoliation

Dull, wrinkled skin is a common concern in the neck and chest area, especially because those parts of the body tend to show aging first. To rejuvenate neck and chest skin and make it look brighter and more radiant, use products that encourage cell turnover in the skin. Whether you use physical scrubs or chemical exfoliants like alpha hydroxy acid (AHA) or beta hydroxy acid (BHA), be sure to apply them all the way down to the top of your chest. AHAs and BHAs can both improve the color and texture of skin damaged by the sun. If you have sensitive skin, opt for products containing BHA, because it tends to be less irritating.

Read more 

Also read  Special Skin Care: Post-Surgery Bruising Treatment


Special Skin Care: Post-Surgery Bruising Treatment

0

Like after most surgeries, bruising and swelling in the days—and possibly weeks—following cosmetic surgery is completely normal. Even with the skillful hands of a surgeon, a cosmetic procedure still constitutes a type of trauma from which your body must heal. In addition to following all post-care recommendations provided by your doctor, there are a few things you can do to ensure a speedy recovery.

Causes of Post-Surgery Bruising

Surgery—even minor procedures and some injections—makes your body react as if it’s been injured. Your body can’t distinguish between falling down and scraping your knee and a doctor taking a scalpel to your chin. Fluid rushes to the “injured” region, causing swelling. Bruising occurs as the surgery causes tiny blood vessels—known as capillaries—to burst. The blood from these vessels sits right below the skin’s surface, creating blue, black or purple discoloration. The extent of your bruising depends on the procedure and the methods used by your surgeon. Even some injections, especially those done at the lip area, can cause bruising. Bruises generally last seven to 10 days, but can hang around for as long as three weeks.

Direct Treatment of Post-Surgery Bruises

Keep all dressings and compresses on the wound site until your doctor tells you to remove them. Your doctor may suggest an application of Vaseline to the surgical site; massage it in gently to prevent pain associated with the bruises. If you had a procedure performed on your face or neck, sleep with your head elevated about 45 degrees for the first few weeks. While this doesn’t directly heal any bruising, it does help reduce the swelling that can make bruising appear worse. Apply ice packs to the bruised area, if approved by your doctor. This helps shrink blood vessels and may lighten the black-and-blue hue. Avoid heat, as it will open up the blood vessels and make your bruising appear more extensive. If you have a lot of redness around the site of the procedure accompanied by pain and fever, or the treated area feels hot, contact your doctor immediately. This could be a sign of infection.

Post-Surgery Self Care

Take care of yourself post surgery to allow your immune system to work its best. Don’t smoke for at least a week, and avoid drinking alcohol for the first 48 hours after the operation. Certain anti-inflammatory medications and aspirin can worsen the appearance of bruising, as well as cause bleeding; ask your doctor what you can take for pain. Keep the bruised areas out of the sun, since this can deepen their color. Stay fully hydrated after your surgery to encourage a reduction in swelling and avoid strenuous activity in the first few weeks after surgery to support healing.

Read more 

Also read  Potato Cucumber Ice Cubes For Dark Spots


Potato Cucumber Ice Cubes For Dark Spots

The most substances within the potato cucumber ice cubes location unit potato and cucumbers that location unit one among the simplest herbal substances you may be capable of use to remedy dark spots.

Why This works:

Potato CAN help get rid of acne scars and dark spots. It can be used as a toner or blend along with any of your face masks, or freeze it to ice cubes and use it on your skin once it sets. Let us see how exactly is potato so useful.Vitamin C present in potatoes helps build collagen and improves skin health.

Potato juice contains a lot of nutrients, including Vitamin B & C, potassium, calcium, iron, phosphorus, and copper. Since potato juice is so nutrient dense, it offers a wide range of benefits for the skin. One of those benefits includes making your skin clear and blemish free.

You’ll want:

  • 1 small-medium potato
  • 1 small cucumber
  • lemon juice
  • ice dice tray
  • Guidelines:

  1. Peel the potato and grate it.
  2. upload your grated potato to a liquidiser or kitchen equipment, and add on your cucumber and additionally the juice from a lemon.
  3. depending on the dimensions of your potato, you may need much less cucumber or a whole lot of – the consistency need to be slushy-like.
  4. Pour your mixture into companion in Nursing dice receptacle and freeze for 5-6 hours or till hardened.

Rub the cube for 1-2 mins and put off. Rinse skin with warmness water and pat dry. you will be able to use these cubes as soon as or double each day an afternoon, and among three-4 days you need to be aware your darkish spots obtaining lighter and lighter. maintain victimisation until darkish spots are not any more prolonged present. Read More…………..

Also Read: Skincare: Easy DIY face pack that will make your dark spots and pigmentation go away in minutes

Laser Hair Removal

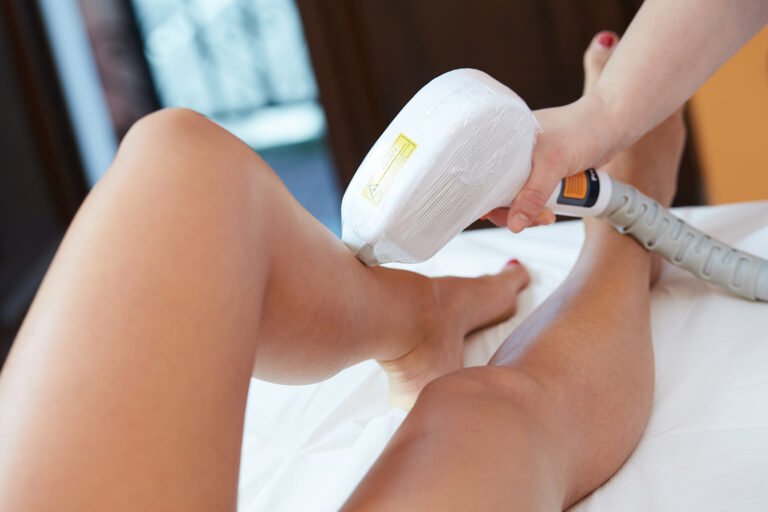
If you’re not happy with shaving, tweezing, or waxing to remove unwanted hair, laser hair removal may be an option worth considering.Laser hair removal is one of the most commonly done cosmetic procedures in the U.S. It beams highly concentrated light into hair follicles. Pigment in the follicles absorb the light. That destroys the hair.

Benefits of Laser Hair Removal

Lasers are useful for removing unwanted hair from the face, leg, chin, back, arm, underarm, bikini line, and other areas.

Benefits of laser hair removal include:

Precision. Lasers can selectively target dark, coarse hairs while leaving the surrounding skin undamaged.

Speed. Each pulse of the laser takes a fraction of a second and can treat many hairs at the same time. The laser can treat an area approximately the size of a quarter every second. Small areas such as the upper lip can be treated in less than a minute, and large areas, such as the back or legs, may take up to an hour.

Predictability. Most patients have permanent hair loss after an average of three to seven sessions.

How to Prepare for Laser Hair Removal

Laser hair removal is more than just ”zapping” unwanted hair. It is a medical procedure that requires training to perform and carries potential risks. Before getting laser hair removal, you should thoroughly check the credentials of the doctor or technician performing the procedure.

If you are planning on undergoing laser hair removal, you should limit plucking, waxing, and electrolysis for six weeks before treatment. That’s because the laser targets the hairs’ roots, which are temporarily removed by waxing or plucking.

You should also avoid sun exposure for six weeks before and after treatment. Sun exposure makes laser hair removal less effective and makes complications after treatment more likely.

What to Expect During Laser Hair Removal

Just before the procedure, your hair that will be undergoing treatment will be trimmed to a few millimeters above the skin surface. Usually topical numbing medicine is applied 20- 30 minutes before the laser procedure, to help with the sting of the laser pulses.The laser equipment will be adjusted according to the color, thickness, and location of your hair being treated as well as your skin color. Read more

Read also: See How Your Life Affects Your Skin


See How Your Life Affects Your Skin

How to Keep Your Skin Beautiful

Your skin protects your body, but that’s not all. It’s the face you present to the world. When healthy, it’s a source of beauty. The choices you make every day — what you eat, where you go, how you feel — affect how your skin looks. Use this visual guide to keep your skin youthful, healthy, and wrinkle-free.

You’ve Got Food on Your Face

Want good skin? Watch your diet. Higher intakes of vitamin C and a lower intake of fats and carbohydrates are associated with better appearance as your skin ages. Changing your diet will help your looks. Foods rich in antioxidants, such as fish, fruits, and vegetables, seem to help protect skin. Some studies suggest that to avoid breakouts, go for complex carbohydrates (like whole grains and pasta) and healthy protein. Dairy may also be linked to acne flares.

Eat Your Vitamins

Your anti-aging cream may contain vitamin C or E. Put these antioxidants to work from the inside, too. Eating foods rich in these vitamins, plus the mineral selenium, can help protect your skin against sun damage. They may even help reverse signs of aging, like wrinkles and skin discoloration.

Run Away From Aging Skin

Exercise benefits every part of your body — including your largest organ, the skin. Working out improves circulation, helping nourish the skin. Better blood flow brings more oxygen and nutrients and may help your skin produce collagen, which staves off wrinkles. Don’t fret about sweat — exercise will not clog your pores. Wash your face right after a workout and avoid tight headbands, which can trap sweat and irritate skin.

Get Your Beauty Rest

Burn the candle at both ends for a few nights, and you may see it reflected in your face: Dark circles under the eyes, pale skin, and puffy eyes. Getting 7-8 hours a night will keep your body and skin in top shape. It matters how you sleep, too — rest your face on the pillow in the same position for years, and you’ll get wrinkles where the skin is pressed against the pillow. Sleeping on your stomach will worsen bags under your eyes. Solution? Sleep on your back. Read more

Read also: 15 Tips for a Perfect Manicure


15 Tips for a Perfect Manicure

French Manicures: Hot or Not?

Before all else, a manicure lover dreams of her fashion statement.  Is yours the French manicure? Depending on who you ask, this pale pink polish with a white tip is either classic or old-fashioned. If you love the look, you’ll be happy to know that it makes nails look longer. And pale shades are just right for serious moments, like a job interview.

Gel and Shellac Can Take a Beating

Maybe your crazy hobbies wreck your nails. A gel or shellac manicure may give you two to three weeks of shiny, chip-free nails. Both types require several layers of polish that need curing under a special lamp. And you probably need to pay a pro to remove these tough polishes.  But fuss-free nails may be worth the price.

Do a Skin Check for Sizzling Color

Will cherry red polish make you look vampire-pale or sizzling hot? The answer is in your skin tone. For skin with blue undertones, choose pinkish nudes, deep violet, fuchsia, or that cherry red. For olive or yellow undertones, pick beige or white nudes, chocolates, and corals. Test new shades on a piece of clear tape stuck to a nail.

Let Nail Shape Flatter Your Hand

Should your nails be short and square or long and pointy? You can play it safe with an oval shape, which flatters most hands. If you want to soften your look, try a round shape. Square nails look best on long fingers. A “squoval” looks like a square, but has rounded corners. A point is more daring and makes your fingers seem longer.

Pearly Pinks Look Good Longer

Shimmery or pearly nail polishes may last longer than matte ones. And a neutral color — pale pink or a pretty cream — makes nicks and dents less obvious. To touch up your nails at home, use an extra layer of top coat (instead of any old clear nail polish). Two thin coats are less likely to chip than one thick layer. Read more

Read also: Skincare: Easy DIY face pack that will make your dark spots and pigmentation go away in minutes