Home Blog Page 391

5 Possible Causes of Dry Skin

0

Frustrating and common, dry skin is caused by a seemingly endless number of factors. Odds are, you’re already trying to do all you can to care for your skin. You may be able to make your daily routine more effective, though, if you understand some of the reasons why your skin sometimes seems extra-irritated. Here are five common causes of dry skin.

1. Lack of Humidity

Although both heat and humidity can affect dry skin, the latter has a more profound effect. Dry air may be the most common overall cause of dry skin. When humidity levels are low, it’s harder for your skin to retain moisture, and its protective barrier has trouble functioning effectively. Low humidity can also increase production of the stress hormone cortisol, reports a 2013 study in Experimental Dermatology Journal. This hormone then increases the risk of inflammation, rash, flaking and dull, wrinkled skin. To combat low humidity, cover exposed skin with a hat, wear gloves or mittens in the winter and use a humidifier at home.

2. Over-Indulgent Showers

If you’re like most people, you love the occasional long, hot shower. But while that warm water may feel great in the short term, it’s not kind to your skin in the long run. To help retain moisture rather than deplete it, limit bathing time to 10 minutes and use water that’s lukewarm rather than hot. As soon as you’re done, apply moisturizer to “lock in” some of the water.

3. Your Moisturizer Isn’t Working

You need a moisturizer that works for your skin type. There are hundreds of products out there, so if yours isn’t doing the job for your skin, consider a change. Specifically, try a thick, oil-containing ointment or cream instead of a lotion, especially in cold weather and dry conditions. Lotions can be more irritating and less effective at trapping moisture in for long periods of time because they’re water-based. Oil-based creams, in contrast, “lock” moisture into the skin since their oils don’t evaporate like water-based solutions.

4. Your Products Smell Great

Nicely scented lotions, soaps, cleansers, perfumes and other products are appealing, but their fragrance ingredients may be making your dry skin worse. People with dry skin are more likely to also have sensitive skin, and fragrances in skin care products are the most common cosmetic allergen, notes a 2011 study in the Journal of Allergy. Unscented, fragrance-free products tend to be gentler, less irritating and more effective at retaining natural oils in the skin. Even products that don’t come into direct contact with your skin, like laundry detergents, can make a difference.

Read more 

Also read  What Are the Signs and Symptoms of Hyperkeratosis?

Haircare: THIS DIY 3 ingredient hair mask will tame your frizzy hair like MAGIC & easily become your favourite

It is that season of the year when humidity is at a whole new level and we know what that means – frizzy hair for days. When the humidity levels are high, our hair tends to get the most affected and that’s a whole new roller coaster to deal with. So to save your mane from getting more dry and frizzy and reach the breaking phase, we’re here with a 3-ingredient hair mask that will work wonders and nourishes your hair and scalp like nothing else.

You will need: (quantity can differ based on hair length)

3 tablespoons of coconut oil

2 tablespoons of fresh aloe vera gel

3 vitamin E capsules

How to:

  1. Mix all the ingredients in a bowl.
  2. You will now need to blend it all up to let the aloe and oil combine and form a smooth paste.
  3. Once you have a runny texture, apply it religiously starting from the tips of your hair and slowly going upwards. When we say religiously, we mean it. Make sure your hair is almost drenched from root to tip.
  4. Massage the mixture on your hair and scalp for about 10 minutes and put it in a bun.
  5. Use a shower cap to protect the hair from the humid hair and let it sit for around 2 hours.
  6. Once done, shampoo and condition with cold water.
  7. See the results once dry, you’re going to love it!

Benefits:

Aloe Vera nourishes and strengths the hair while also dealing with any and every scalp issue you must have developed during the monsoon. It also moisturises the hair making it less prone to frizz and dryness.

Coconut oil is the saving grace for any and every scalp and hair issue. It has the ability to penetrate into the scalp and even the hair shaft and moisturize from within. It also deals with seasonal scalp infections like dandruff and moisturises the scalp.

Vitamin E improves the quality of the hair and strengths it to reduce breakage. It also adds a natural sheen to the hair which most likely would have been lost due to all the frizziness.

….Read More….

Read Also: An apple a day: 3 DIY face masks that will help you bring back the lost glow

An apple a day: 3 DIY face masks that will help you bring back the lost glow

0
You are what you eat, but what you eat can be applied on your face too. We list down 3 DIY face masks that you can apply for glowy skin.
Our skin is doing well, especially now when we are mostly indoors and there aren’t too many pollutants harming our skin, plus we are all mostly eating home food while seldom ordering in. So overall, the skin is doing okay. BUT that glow is missing! Of course, we have been told a gazillion times to take a digital break, stay away from screens, get good sleep, eat right and more. But realistically, are we doing any of those things? Probably not.

Yoga during the First Trimester of Pregnancy

The first three months of pregnancy are a time of major changes in your body. Long before any outward manifestation begins to get in the way of doing poses, things feel different on the inside. This is the challenge of first trimester yoga, and also why yoga is so useful during this delicate phase of your life. The core of any yoga practice is listening to your body. You may think you know yourself and what your body can do

Is it Safe to Practise Yoga in the First Trimester of Pregnancy?

Yes, yoga can be safely practised during the first trimester of pregnancy but only under the guidance of a certified yoga instructor who is aware of your health. There are certain asanas and poses which may inhibit the blood flow to the uterus and cause sprain or muscle spasms, hence yoga asanas should be practised with caution and under the guidance of a yoga instructor. You should also consult your gynaecologist before you start practising yoga.

Benefits of Practising Yoga 

Let’s try to understand how practising yoga in the first trimester of pregnancy can benefit your health.

It Can Help Keep Unhealthy Habits at Bay
It’s pretty much imperative that you have to let go of unhealthy eating habits and lifestyle during the first trimester of your pregnancy for the sake and wellbeing of your developing baby. Yoga helps you let go of toxic emotions and cope better with letting go of unhealthy habits like overeating/anorexia, smoking, alcoholism, and insomnia.

It May Provide Relief from Pain
Yoga provides relief from the pain that comes with pregnancy. You’ll be able to cope better with the pain during the three trimesters by practising safe yoga asanas. Practising breathing techniques can help you stay relaxed and stress-free during pregnancy.

Read More

Also Read:Simple Home Remedies for Facial Hair Removal

What Are the Signs and Symptoms of Hyperkeratosis?

0

It’s that stubborn callus on the bottom of your feet, or the plantar wart that develops after you forget your flip-flops at the pool—hyperkeratosis refers to the thickening of skin and takes on many forms. The symptoms you experience can serve as a clue that points to the underlying causes of your skin’s reaction.

Corns or Calluses

You thought those shoes fit well at the store—but now that you’ve run around in them, you may notice calluses or corns cropping up on your feet. Corns are thickened spots of skin on the toes or top of the foot, and can appear as dull, rounded bumps. Calluses are thick spots on the bottom of the foot. Both are formed by constant pressure or rubbing, such as when you wear ill-fitting shoes. You may not notice any symptoms, but these spots can become painful if the skin gets too thick. The American Podiatric Medical Association cautions that corns and calluses can lead to serious problems in people with poor circulation, such as diabetics.

Thickened Skin

Sometimes hyperkeratosis is not brought on by shoes that rub you the wrong way but by chronic inflammation. Hyperkeratotic eczema develops as thick, scaly areas on the palms of the hands or the soles of the feet. The dry areas of thickened skin can appear grayish, and hyperkeratotic plaques on the palms can make it uncomfortable or painful to work with your hands. Combination therapies from your dermatologist may involve corticosteroids and moisturizers to comfort the parched skin.

Blisters

Hyperkeratosis can also be written in your DNA. The genetic condition can develop in babies as red skin and blistering. With aging, the blisters may go away and the skin thickens. Epidermolytic hyperkeratosis comes in two forms: one involving the palms and soles of the feet and the other appearing on different body parts. The thickened skin isn’t scaly but may be darker in color, and can occur in areas where the skin rubs together such as on the joints, the neck or the head. The affected areas may also have an odor, because bacteria can flourish in these rough patches.

Red, Scaly Patches

Hyperkeratosis may also appear as a form of skin cancer: squamous cell carcinoma. This will develop as nodules of thickened skin or as red, scaly patches similar to psoriasis plaques. These lesions are more likely to appear on areas of the body that get the most sun exposure, such as arms and hands. They may bleed if bumped even lightly. See your doctor if you have an unexplained lesion like this that does not heal.

Read more 

Also read What You Should Know Before Getting Facial Fillers

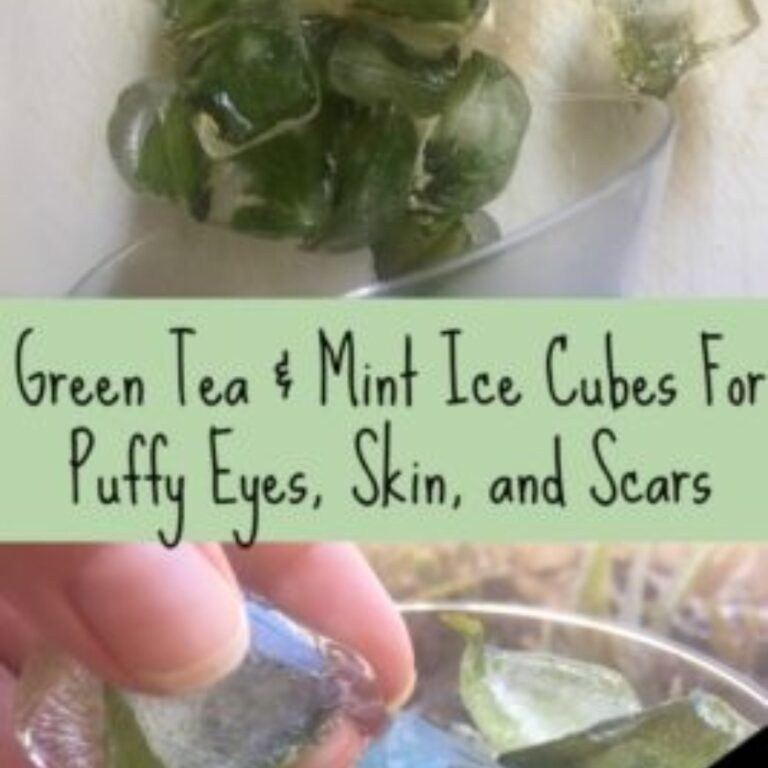
DIY Green Tea Mint Ice Cubes for Puffy Eyes & Scars

Ever wake up and look in the mirror only to realize that you look like you’ve only slept for literally 30 seconds? Well, the feeling’s mutual! Those puffy eyes and blotchy skin that we get in the morning can easily be fixed in just 1 minute with these DIY green tea mint ice cubes! These little ice cubes bring a powerful punch to help your skin reduces blotchiness and reduce puffy, swollen eyes. Another thing they do? They also help reduce acne scars, dark spots, and age spots! Who knows a little ice cube could do SO much? And, if you like ice cube remedies, check out our potato cucumber ice cubes for dark spots!

DIY Green Tea Mint Ice Cubes

You’ll Need:

  • ice cube tray or any mold of your choice
  • green tea (brewed, and cooled)
  • mint leaves

Directions:

  1. Clean an ice cube tray or mold of your choice really well.
  2. Rinse off some fresh mint leaves and dry with a paper towel.
  3. Rip off a small piece of the mint and place it at the bottom of the ice cube tray.
  4. Pour cold brewed green tea over the mint leaves.
  5. Place in the freezer and let freeze for a few hours or overnight.

How to Use the DIY Green Tea Mint Ice Cubes

Pop a cube out of the tray and rub against skin right as you wake up! You’ll only need to do this for a minute (plus, the ice will melt pretty quickly anyway).

Rub the cube over clean skin in slow, circular motions, focusing on puffy areas such as under eyes. If you have scars and dark spots, rub the cube over those spots as well.

Do this every morning to make skin look fresh, young, and to de-puff!

Benefits:

Green Tea is chock-full of antioxidants that help slow the aging process. It also acts as a skin toner, improves skin texture, and feel. Green tea is also great for soothing sunburns, and, when applied to the skin, acts as a de-puffer!

Mint also soothes the skin and reduces puffiness and blotchiness, all the while keeping acne and blemishes at bay, and keep the skin oil-free all day!

These DIY green tea mint ice cubes are AMAZING for the summer as not only do they reduce puffiness and scars, but they also keep your skin cool and preps it for the day ahead. Think of it as a super cool prime and prep solution! Read more

Also read: Hyaluronic Acid Foods: Natural Sources of HA

How to Make a Honey and Cinnamon Face Mask Recipe and benefits

0

Honey and Cinnamon Face Mask Recipe :-These two ingredients go as well together in a honey cinnamon face mask as they do when included in some delicious desserts. Mix the two of them together in order to create a simple and effective skin treatment. Not really sure how to make this mask? Guest blogger Jordan will guide you through a few recipes, but not before she enlists the reasons why you should try this face mask in the first place.

5 Benefits of a Honey Cinnamon Face Mask

1 Fights Fine Lines

Cinnamon is a fantastic anti-fine line agent. It contains compounds which promote circulation and bring more blood toward your skin, nourishing and plumping it.

2 Anti-Acne

Both honey and cinnamon are antibacterial, managing to combat the bacteria that causes acne bursts. Honey is particularly effective against the swollen, red pimples since its properties are greater.

3 Exfoliation

Honey contains glycolic acid and several other types of organic acids with unique properties. They ‘eat away’ at dead cells, promoting exfoliation without your usual scrubbing process. This way, you will rejuvenate your skin in a rub-free manner.

Honey and Cinnamon Face Mask Recipe

Materials

  • Raw, organic honey
  • Ground Cinnamon

Tools

  • Measuring spoons
  • Small mixing bowl
  • Wash cloth
Instructions
  1. Scoop 2 tablespoons of raw, organic honey into the mixing bowl.
  2. Add 1/4 to 1 teaspoon of ground cinnamon powder to the honey and mix thoroughly until combined.
  3. Perform a patch test on a small patch of skin like the inside of your arm or behind your ear.
  4. Keep your hair out of your face with a hair tie or hair clips. Even though honey rinses off easily from your skin, it sticks to hair like crazy!
  5. Scoop about a teaspoon of the face mask out of the mixing bowl with clean fingers or a face mask brush.
  6. Spread a generous layer over your skin. Repeat several times until your face is covered with a thick layer of the mixture.
  7. Let sit for a few minutes or rinse immediately with lukewarm water. Use a wash cloth to remove every last bit of face mask. Pat your face dry and apply a gentle moisturizer if you want to. Read More………

Simple Home Remedies for Facial Hair Removal

Although the problem of facial hair is rarely serious, it can cause embarrassment to some women. Therefore, we have come up with an article to help women come out of this problem through the use of easy-to-do home remedies without having to spend oodles.

Causes of Thick Facial Hair in Women:

All women have  which is very fine, and therefore, not noticeable. However, there are few who may have thick.The fuzz of hair on a woman’s face can be due to a number of reasons. Let us discuss them in detail.

  • Hormonal problems are one of the main causes of facial hair in women.
  • If hormones are not the ones for the fuzz on your face, blame it on your genes.
  • Some underlying health issues like Polycystic ovarian disorder can also cause this problem.
  • Cushing syndrome can also cause hirsutism.
  • Virilization, a condition in which a female develops secondary male sexual characteristics causes thick facial hair in women.
  • Women suffering from congenital adrenal hyperplasia produce less of androgen and cortisol hormones, causing hirsutism.
Home Remedies to Remove Unwanted Hair on Face

Facial hair in women can be quite a nuisance. It can make even the prettiest face look odd. Therefore, removing them is the only solution. However, getting it removed professionally can pinch your pockets. Therefore, use the following home remedies to get rid of the unwanted fuzz from your face.

1. Lemon Juice and Sugar

This is an ancient beauty technique to remove unwanted hair.

Ingredients

  • Sugar
  • Lemon juice

Read More

Also Read:How to Put Eyeliner on Small Eyes


Hyaluronic Acid Foods: Natural Sources of HA

0

You may already be using skincare products that contain hyaluronic acid (HA) or a hyaluronic acid serum, but what about hyaluronic acid foods? They do in fact exist, and if you’re a fan of healthy eating, you should definitely take a look at these natural sources of HA. Hyaluronic acid is naturally occurring in the body and is responsible for retaining moisture and also attracting it. Without HA, your skin can become dry, flaky, and also show early signs of aging. HA also helps to improve cell turnover and improve collagen synthesis, which can help prevent the formation of wrinkles and improve the skin’s texture. So, if you’re looking to get beautiful skin, you may want to add some of these hyaluronic acid foods into your diet along with some HA skin products!

While your body does naturally produce HA, over time, as you get older, that production slows down. This is why many people get HA fillers (by way of injection) or use topical treatments such as hyaluronic acid serums and creams. But aside from that, you can also get your HA from healthy foods.

Benefits of Hyaluronic Acid

It is a vital component to fighting premature aging and wrinkles. If you’re looking for beautiful, youthful skin, hyaluronic acid is then super important. Here are some benefits:

  • Hydrates and moisturizes the skin
  • Prevents wrinkles and fine lines
  • Reduces redness
  • Helps with dermatitis
  • Reduces inflammation
  • Prevent dryness
  • Keeps skin supple
  • Softens skin
  • Reduces the appearance of dark spots and age spots
  • Plumps skin up
  • Can reverse wrinkles and crows feet

What Foods Contain Hyaluronic Acid?

Foods high in hyaluronic acid are plentiful, and as you may have already guessed, they’re also some of the healthiest foods. Not only do these hyaluronic acid foods help you feel better, but some of them also help increase hyaluronic acid production. Plus, these foods are also rich in vitamins and minerals which is just an added bonus!

#1. Bone Broth

You may have heard about the miraculous benefits of bone broth. Plenty of people consume bone broth for a number of different reasons, but mainly for health reasons. Also, it’s at the top of our list as it contains the highest amount of HA of any foods. This is because bone broth is made from animal cartilage and bones (sounds gross, yes). These parts are then simmered in water for at least 24 hours so that all of the nutrients, including hyaluronic acid, are extracted into the water. Consuming one cup a day can have extraordinary benefits not only for your skin but your overall health.

#2. Soy Foods

Soy-based foods such as tofu, edamame, and tempeh, all contain some level of estrogen in them. It has been proven that an increase in estrogen may help the production of hyaluronic acid by the body. If that wasn’t enough to get you going on the soy train, they’re also chock-full of protein, vitamins, and minerals.

#3. Citrus

Citrus fruits contain naringenin which prevents the breakdown of hyaluronic acid in the body. Consuming citrus fruits on a regular basis ensures that the HA in your body does not break down. Add oranges, grapefruits, tomatoes, and bananas to your everyday diet to keep skin glowing and supple. Read more

Also read: Makeup Tips For Aging Skin