
Home Blog Page 355

DIY Anti Aging Cream For Wrinkles, Crow’s Feet, and Fine Lines

0

Preventing and getting rid of wrinkles is certainly no easy feat, but it IS definitely possible! Expensive creams and serums will only break your bank, but this DIY anti aging cream will ensure your wallet stays nice and fat, while your wrinkles, crow’s feet, and fine lines diminish right before your eyes! We’ve found an amazing combination of all natural oils that, when used together, create the ultimate anti aging powerhouse!

DIY Anti Aging Cream

This DIY anti aging cream will only cost you about $30, which may seem like a lot, but it will last you for at least a year, and will work faster and a lot better than any commercial creams or serums. You can make as much as you like at a time, and it will last you depending on how often you want to use it, but once a night before bed is plenty. This recipe below should last you about a year.

Ingredients:

  • 1/4 cup sunflower seed oil or your favorite carrier oil
  • 1/4 cup organic castor oil
  • 5 vitamin E capsules
  • 20 drops rosehip seed essential oil OR rose essential oil (Rose essential oils is very expensive, since it takes about 22lbs of rose petals to make a small, 5 ml bottle, but it is extremely effective and one of the most valuable oils you can buy).

Directions:

  1. To a clean bowl, add the sunflower seed oil.
  2. Break up your vitamin E capsules and mix in with the sunflower seed oil and castor oil.
  3. Then add, your rosehip seed oil.
  4. Stir everything together and keep in a clean, airtight glass jar or container.

How to Use:

Apply the oil around the eyes, mouth, and forehead every night before bed. The oil mixture is extremely potent, and will work very fast. Make sure to use it every single night and you should see results within two weeks!

Benefits of DIY Anti Aging Cream

  • Hydrating. For those with dry skin or sensitive skin, this cream will quickly penetrate into the skin to deliver moisturized and soft skin.
  • Prevents wrinkles. Regular use of this anti-wrinkle face cream will dramatically reduce the formation of wrinkles, face lines, and crows feet.
  • Fades age spots. Will gently and safely fade age spots, dark spots, sun spots, and scars.
  • Smooths skin. Removes dead skin cells, revealing smoother, softer skin.
  • Leaves skin glowing. Will give skin a beautiful, natural glow after just one use. Read more

Also read: Homemade Deep Conditioner For Natural Hair
Homemade Face Moisturizer For Acne Prone Skin

0

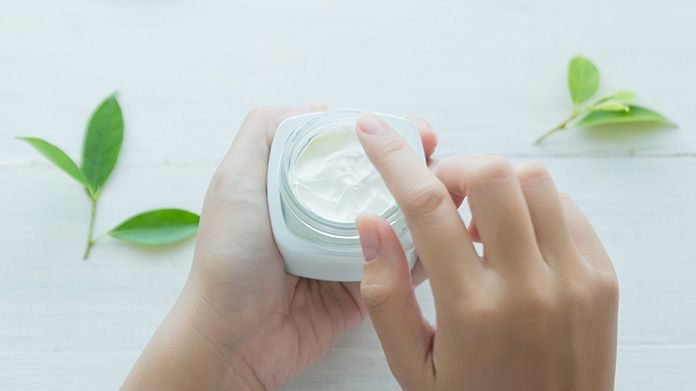
Commercial face moisturizers can be packed full of harmful ingredients, but this homemade face moisturizer for acne prone skin is NOT! Made entirely out of natural ingredients, this DIY face moisturizer was made for those with oily  and acne prone skin to hydrate all the while controlling oiliness and keeping breakouts at bay. This homemade face cream will not only control oil product, but also reduce it, as well as help with breakouts.

For those with acne, it can be hard to find the right products, especially when there seems to be SO many to choose from. On top of that, commercial products are often laden with chemicals, dyes, parabens, and alcohols which can dry out the skin and make acne even worse.

Homemade Face Moisturizer For Acne Prone Skin – The Ingredients

Before we begin, it’s important that you know that not all oils are bad for your skin! As someone who has suffered from acne for over 20 years, I’ve always thought that oils were a no go. We were always told that if you have oily skin, you definitely should NOT apply oils to your skin. Well, that’s actually not the case.

Sunflower Oil

Interestingly enough, sunflower oil has a comedogenic rating of 0, which is pretty amazing when you think about it! This is because sunflower oil has the highest concentration of linoleic acid, and those with oily and acne prone skin, actually have low levels of linoleic acid in their skin. It is common knowledge that oils which contain linoleic acid are very beneficial for those with acne prone skin.

One thing I will say though, is be careful about which type of sunflower oil you use. Omit from using sunflower oil that has a high level of oleic content, as it can clog pores and create breakouts. To make sure that the sunflower oil you purchase isn’t high in oleic content, just look on the bottle. Most sunflower oils will specific whether they are high in oleic content or not.

Hemp Seed Oil

Like sunflower oil, hemp seed oil also has a comedogenic rating of 0, which again, is great for those with acne prone skin. See where I’m getting at here? All of the oils in this homemade face moisturizer are BENEFICIAL to those with acne – how great is that?!

Hemp oil is great at balancing out the oils in your skin, and also helps to reduce excessive sebum production. What’s more is that hemp oil is also very gentle on the skin and can help with inflammation and cystic acne. Additionally, hemp seed oil is also said to help minimize the look of large pores, get rid of blackheads, and prevent future breakouts.

Rosehip Oil

Rosehip oil is one of those amazing all-around essential oils that EVERYONE should have in their homes. Not only does it help fight bacteria on the skin, reduces inflammation, and makes skin overall healthier, but it also combats premature aging and is said to help with hair growth.

Although rosehip oil has a comedogenic rating of 1, it’s still pretty low on the scale, and the recipe doesn’t call for much of it. At a low comedogenic rating of 1, it will not make you break out, but it will in fact prevent breakouts and help the skin re-balance itself. Oh, and did I mention it works wonderfully on fine lines and wrinkles?!

Argan Oil

Argan oil is NOT just for your hair – it’s a wonderful addition to your skin care regimen! Like sunflower oil and hemp seed oil, argan oil also has a comedogenic rating of 0, making it the perfect candidate for a homemade face moisturizer for acne prone skin.

…..Read More…..

Read Also: 5 Carrot Face Mask Recipes for Youthful, Glowing Skin

5 Best Natural Oils for Your Top Hair Needs

0

Natural oils are just about the best thing you can use on your hair. They’re packed with nutrients that strengthen, repair and condition both the hair and the scalp. They’re natural too, so you can apply them without worrying about harsh chemicals or toxic additives. Plus, they’re completely customizable, each targeting a different hair concern. Whether you have thin and brittle hair, frizzy hair, or dry and itchy scalp, see which oils you should be adding into your hair care routine.

1. Avocado Oil

Best for Thin, Weak or Brittle Hair

Avocado oil is a miracle worker for thin hair because it’s lightweight and rich, with reparative and hair-strengthening properties. Like avocados themselves, avocado oil is made up of fatty acids, antioxidants, vitamin E and proteins—all essential nutrients for healthy hair. Thin hair tends to break easily, especially when exposed to heat styling tools like blow-dryers and curling irons, so adding an oil that helps repair breakage and strengthen the hair shaft is ideal.

2. Rose Flower Oil

Best for Dry, Damaged Hair

Rose Flower oil is a known natural antioxidant, rich in vitamins and minerals. It absorbs quickly and helps repair damage by restoring hair with essential lipids, like ceramides and fatty acid–rich ingredients. Rose flower oil aids in preventing future damage that can be caused by free radicals. It also locks in moisture without weighing the hair down or causing it to look greasy.

3. Sweet Almond Oil

Best for Dull Hair

Sweet almond oil contains a high concentration of proteins and vitamins A, B, D and E, all of which help add shine to otherwise lackluster hair. It’s also lightweight, making it a great resource for leave-in protection and extended shine. Also, because it has emollient properties, it enhances the softness and manageability of the hair, giving it an overall healthy, more lustrous appearance.

4. Argan Oil

Best for Frizz and Flyaways

Argan oil is an excellent ingredient to add to any hair-care routine because it’s loaded with deep conditioning properties that help soften hair and fight frizz. The oil itself is made up of fatty acids, vitamin E and antioxidants which, when applied to the scalp directly, nourish and strengthen the hair. It’s also lightweight and can be used on dry hair as a styling agent, giving the hair a subtle sheen and taming flyaways.

5. Coconut Oil

Best for Scalp Health and Damaged Hair

Coconut oil is one of those ingredients that can be used from head to toe. This powerhouse ingredient enhances the strength of hair and prevents hair from becoming dry and brittle. It’s comprised of antioxidants and nutrients like vitamin E, vitamin K and iron, which helps combat and eradicate dandruff. It also contains antifungal and antimicrobial properties that keep the scalp and hair clean and protected.

5 Carrot Face Mask Recipes for Youthful, Glowing Skin

Did you know that carrots aren’t just for eating? Their incredible health benefits can also be applied to the skin! These 5 carrot face mask recipes are quick and easy to make, won’t break the bank, and will make your skin look glowing and youthful. But before we get into these homemade carrot face mask recipes, let’s take a quick look and see why carrots are so good for our skin and what kind of benefits we can expect!

How to Make a Carrot Face Mask

There are several ways to make a carrot face mask. Today, we’ll look at five different recipes. Each of these recipes have been tried and tested for different skin types, as they each have their own benefits.

#1. Carrot and Honey Face Mask for Oily and Acne Prone Skin

A honey and carrot face mask for acne works best on oily skin. Honey has antiseptic and antibacterial properties which target acne and breakouts at the source. It helps to pull out dirt and impurities, and also minimizes the look of enlarged pores.

You’ll Need:

  • 2 medium carrots
  • 2 tbsp raw, natural honey

Directions:

  1. To a pot of boiling water, add 2 medium sized, peeled carrots and boil until tender.
  2. When soft enough to be mashed with a fork, drain the water and add the carrots to a bowl.
  3. Mash the carrots until they are smooth.
  4. In a microwave safe bowl, warm up the honey for 10-15 seconds and mix in with the carrot paste.
  5. Apply the honey and carrot face mask to cleansed skin and neck and leave on for 10 to 15 minutes.
  6. Rinse off with lukewarm water and pat dry.
  7. Follow up with a toner and moisturizer.
  8. Repeat 2-3 times a week for best results.

#2. Carrot and Potato Face Mask for Aging Skin & Dark Spots

A potato and carrot face mask can do wonders for those that have wrinkles and/or fine lines, age spots, sun spots, dark spots, and acne scars. This is because potatoes have bleaching agents which help to remove dark spots and discoloration. The combination of potato and carrot is great at keeping skin looking young, youthful, and glowing. This recipe also contains turmeric, which is another wonderful ingredient for aging skin and also helps to minimize the look of dark spots and acne scars.

You’ll Need:

  • 1 small potato, peeled and cut into small cubes
  • 1 small carrot, peeled and cut into small cubes
  • One tsp turmeric powder
  • 1 tsp baking soda

Directions:

  1. To a pot of boiling water, add the peeled potato and carrot.
  2. Boil until both are soft enough to mash with a fork.
  3. Once softened, strain the water out, and mash the potato and carrot in a bowl until a smooth paste-like consistency forms.
  4. Add in the turmeric and baking soda and mix well.
  5. Apply the face mask to a cleansed face and neck and leave on for 15 minutes.
  6. Rinse off with lukewarm water and pat dry.
  7. Follow up with your favorite toner and moisturizer.
  8. Use twice a week for best results. Read More……………….

Also Read: Homemade Lemon Facial Cleanser With Honey

Homemade Lemon Facial Cleanser With Honey

0

This homemade lemon facial cleanser requires only two simple ingredients: honey and lemon! If you’ve never thought about making your own homemade facial cleanser, you should seriously consider it! Commercial cleansers are packed full of unnecessary, and sometimes harmful ingredients that can irritate and dry out the skin.

Lemon Facial Cleanser

You’ll Need:

  • 2 tsps raw, organic honey
  • 1 tsp fresh lemon juice (preferably organic)

Why The Lemon Facial Cleanser Works:

This lemon facial cleanser works on many different skin types including oily, acne prone, dry, and aging skin. Because it contains lemon juice though, we advise anyone with sensitive skin against using it as lemons can further irritate the skin. Today, we will show you 3 different ways of using this lemon facial cleanser: as a cleanser, a spot treatment, or as a face mask.

Raw, organic honey has incredible healing abilities and can cure even the most stubborn of acne if used on a regular basis. Honey is also a natural anti-septic and able to cure other skin ailments such as rosacea, blackheads, whiteheads, and dark spots. On top of all of that, honey is also a natural moisturizer so those with dry skin can benefit from this immensely!

Lemon juice acts as natural cleanser and toner. Because of its acidic properties, lemon juice can erase blackheads, dark spots, skin stains, and also naturally lighten the skin due to its bleaching properties.

You can use this facial cleanser every day, or apply it as a mask 2-3 times a week in order to see results.

Lemon Facial Cleanser:

  1. In a small bowl, combine the honey with the lemon juice.
  2. Stir into well incorporated.
  3. Wet the skin, and apply as you would any other cleanser.
  4. Rub in slow, circular motions, and rinse the lemon face wash off with warm water.
  5. Pat dry and follow up with a moisturizer.

Lemon Honey Spot Treatment:

This lemon honey spot treatment will target acne prone areas. Leave on overnight to treat breakouts. Honey fights off bacteria and lemon juice lightens dark spots to give you clearer skin!

  1. In a small bowl, mix the honey and lemon juice until well combined.
  2. Use a cotton ball to apply the mixture directly to pimples, dark spots, and acne scars.
  3. Leave on overnight.
  4. Rinse off with warm water in the morning.

Lemon Honey Face Mask:

This is a great face mask for those who don’t have a lot of time. Simply apply the mixture to cleansed skin and leave on for 10-15 minutes. The honey will fight off dirt, impurities, and bacteria, all while hydrating skin. Lemon juice will brighten and exfoliate the skin, leaving skin glowing and clean.

  1. Mix lemon juice with honey in a small bowl.
  2. Use your fingers to gently massage the mask onto your face in slow, circular motions.
  3. Leave the mask on for 10-15 minutes.
  4. Rinse off with warm water and pat dry.
  5. Follow up with a light moisturizer. Read more……..

Also Read: Tips to care for your skin during menopause

Tips to care for your skin during menopause

By the time they reach menopause – which officially begins one year after a woman’s last period -; many women think they have their lives figured out. Careers are well established; children are grown and independent; and there’s more time for leisure and self-care. Yet many women in their 40s and 50s are surprised to suddenly notice changes on their skin, including acne and age spots. Fortunately, dermatologists from the American Academy of Dermatology say that while many of these changes are inevitable due to hormones, there is a lot women can do at home to lessen these effects.

Although fluctuating hormones during menopause can result in a number of skin changes, these don’t need to be disruptive to daily life. With the right care, women can continue to have healthy, blemish-free skin during midlife and beyond.”

Diane S. Berson, MD, FAAD, board-certified dermatologist

To care for your skin during menopause, Dr. Berson recommends the following tips:

  • Soothe dry skin: During menopause, estrogen levels decrease, leading to changes on the skin such as dryness and itching. This can be especially noticeable when the air is dry. To help prevent dryness, wash your skin with a mild cleanser, as regular soap may be too drying. After bathing or showering and throughout the day, apply a moisturizer with hyaluronic acid or glycerin. Don’t forget to apply the moisturizer to your jawline and neck.
  • Relieve itch: To help soothe itchy skin, apply a cool, wet compress. To make a cool compress, soak a clean towel or washcloth in cool water and wring it out until damp. Apply it to the skin that itches. After removing it, apply moisturizer. You can also relieve itchy skin by taking a colloidal oatmeal bath. This soothing product is available in most drug and beauty stores. When bathing, make sure to use warm, not hot water, and pat your skin dry -; instead of rubbing -; to avoid further irritation.
  • Treat and prevent acne: Due to fluctuating hormones, some women develop acne during menopause. If you have acne, wash your skin with a cleanser containing benzoyl peroxide. However, if the cleanser dries out your skin, stop using it and opt for a mild cleanser instead. You can also consider applying a product containing adapalene to prevent breakouts. Always be gentle with your skin. Avoid vigorously scrubbing your skin or picking and squeezing at acne, as this can lead to scarring. In addition, avoid acne products that dry out your skin, as this can worsen acne. If these tips don’t work, see a board-certified dermatologist, who can prescribe treatments for post-menopausal acne. Read more

Read also: Maple leaf extract could prevent wrinkles


Maple leaf extract could prevent wrinkles

Maple trees are associated with the maple syrup that they provide. Researchers have now found that the trees could provide us with more. The extract from maple leaves can actually prevent wrinkles, they found.

The team of scientists from University of Rhode Island presenting their work at the 256th National Meeting & Exposition of the American Chemical Society (ACS) in Boston have found the benefits offered by the maple leaves. Their study is titled, “Inhibitory Effects of Glucitol-core Containing Gallotannins from a Proprietary Red Maple (Acer rubrum) Leaves Extract on Elastase Enzyme”. There have been historical records of the medicinal uses of maple leaves as used by the Native Americans explained Navindra P. Seeram, Ph.D., the project’s principal investigator. He said that Native Americans used the red maple leaves in their traditional systems of medicine.

The team explains that the elasticity of the skin is maintained by special proteins called elastin. When the skin ages wrinkles are formed because an enzyme called elastase breaks down the elastin. Hang Ma, Ph.D. research associate in Seeram’s lab, who is presenting the work at the meeting explained that they tried to find if the maple leaf extracts could stop the enzyme elastase.

The team of researchers extracted the phenolic compounds in the leaves known as glucitol-core-containing gallotannins (GCGs) from red maple leaves (Acer rubrum). They looked at each of these compounds individually to see if it could inhibit elastase within a test tube. GCGs which contained multiple galloyl groups were found to be more effective in stopping elastase action than those with a single galloyl group. Sreeram has shown in earlier studies that these GCGs do not just prevent wrinkles but also protect the skin from inflammation and remove dark spots, freckles and age spots.

Seeram and Ma continued their testing after their initial findings and Sreeram calls this “a plant-based Botox” that could be applied over the skin and does not have to be injected like Botox. He added that consumers who wish to use plant based natural ingredients in their skin care products would appreciate this finding. Read more

Read also: Dermatologist offers tips to help vitiligo patients care for their skin


Dermatologist offers tips to help vitiligo patients care for their skin


Millions of people worldwide have vitiligo, a condition that causes the skin to lose its natural color, resulting in patches of light skin. Although the white or light patches do not typically cause other symptoms, the condition can cause low self-esteem and depression in patients- of whom nearly half develop vitiligo before the age of 21. Although there is no cure for vitiligo, dermatologists from the American Academy of Dermatology say there is a lot patients can do at home to make vitiligo less visible and help prevent the condition from spreading.

“Many people with vitiligo do not have any other signs or symptoms and feel completely healthy,” says board-certified dermatologist Anisha Patel, MD, FAAD. “However, the change in appearance caused by vitiligo can affect people emotionally, especially those who are younger and more concerned about their appearance. The good news is that there are things patients can do at home to make the condition more manageable.”

To help vitiligo patients care for their skin, Dr. Patel recommends the following tips:

Protect your skin from the sun- Exposure to the sun’s harmful ultraviolet (UV) rays increases your risk of skin cancer, including melanoma, the deadliest form. Since vitiligo skin can burn more easily, it’s important to protect your skin whenever you’re outdoors. To do this, seek shade, wear protective clothing-;including a lightweight, long-sleeved shirt, pants, a wide-brimmed hat and sunglasses and apply sunscreen to all areas of the body not covered by clothing. Use a broad-spectrum, water-resistant sunscreen with an SPF of 30 or higher, and remember to reapply every two hours when you’re outside or after swimming or sweating.

Avoid tanning- Just like the sun, tanning beds also emit damaging UV rays that cause sunburn and skin cancer, including melanoma. Further, if you have a light skin tone, tanning may make your vitiligo more pronounced by increasing the contrast between your natural skin color and the light patches. Read more

Read also: How to Make Sugar Scrubs at Home


How to Make Sugar Scrubs at Home

If you love making your own beauty products at home, you’ve undoubtedly made your own body scrubs. Making your own scrubs is incredibly easy, satisfying, and will save you a ton of money in the long run. Today we’ll show you how to make sugar scrubs at home using any type of combination you wish. All you need is sugar, oil, your favorite essential oils, and some mason jars to make some amazing and easy concoctions! These sugar scrub recipes are 100% natural and are great at sloughing off dead skin cells and revealing beautiful soft skin.

How to Make Sugar Scrubs

Before you start making any sort of sugar scrubs, it’s important to remember the ratio. From there on, you can pretty much mix any type of essential oil and concoct your own, unique scent. Homemade sugar scrubs consist of 80% sugar and 20% oil. For most recipes, I use 1 cup of brown or white sugar and 1/4 cup of coconut oil, almond oil, or olive oil. Alternatively, any other type of oil will also work if you don’t have either of the three.

So with that 80-20 ration in mind, now we can go ahead and make some great sugar scrub combinations! As with anything, please remember to test a small patch of skin on your arm to make sure your skin is not overly sensitive to any of the ingredients. We prefer a homemade body scrub over a store bought scrub because they’re incredibly easy to make, will save you a ton of money, and they only contain natural ingredients.

Orange Sugar Scrub

This orange sugar scrub is great for mornings as the orange is super energizing and will wake up all of your senses! Mix 1 cup brown sugar, with 1/4 cup coconut oil and 7-8 drops orange essential oil.

Cucumber Mint Sugar Scrub

This cucumber mint sugar scrub is extremely refreshing and perfect for hot summers. For those with dry, itchy, and sensitive skin, this is the perfect cucumber sugar scrub! Mix a cup of sugar (white or brown), 1/4 cup coconut oil, 5 drops peppermint essential oil, and 4 drops of cucumber essential oil. Rub onto wet skin in the shower in slow, circular motions. Will leave skin feeling cool, refreshed, and oh-so-soft!

Vanilla Lavender Sugar Scrub

A soothing scrub that will calm all your senses! Perfect scrub for before bed! Mix 1 cup white sugar, 1/4 cup coconut oil, 1 tsp pure vanilla extract, and 5 drops lavender essential oil. Rub the scrub onto wet skin while in the shower in slow, circular motions. Rinse off and pat dry. Can be used 1-2 times a week.

Honey and Brown Sugar Scrub

A deliciously sweet and decadent sugar scrub that’s perfect for cooler days. This scrub exfoliates and moisturizes all in one, and will leave skin feel buttery soft! Mix 1 cup brown sugar, 1/4 cup coconut oil, 1 tsp pure vanilla extract, and 1 tsp honey.

Use the above scrubs 2-3 times a week in the shower. Grab a small amount with your hand, and rub against skin in slow, circular motions. The sugar will remove dead skin cells, revealing soft, bump free skin. The oil will hydrate dry skin, and the essential oils will give your skin a beautiful glow. Read more……

Also Read: How to Remove Underarm Hair – Easy Tricks and Home Remedies