Home Blog Page 389

Five DIY rice flour face packs for flawless skin

0

An easily available ingredient in the kitchen, rice flour isn’t just great for preparing lip-smacking dishes, it has anti-aging qualities too.

In fact, it is known to be extremely beneficial for our skin.

From removing dead skin and fighting acne to getting rid of skin tan, rice flour can do it all.

Here are five easy DIY rice flour face packs to try.

#1-Rice flour and oats face pack

You will need oats, rice flour, and honey.

Take one tablespoon of rice flour, one teaspoon oats, one teaspoon milk and another teaspoon of honey. Mix these ingredients until you get a thick paste.

Apply this mix all over your face and leave for about 10 minutes. Then, wash off with cold water. Use this face pack twice every week for even skin tone.

#2-Rice flour and chocolate powder face pack

To make this face pack, you will require rice flour, chocolate powder, and some cold milk.

Start by adding these three ingredients in a bowl. Mix until a smooth texture is gained.

Using your fingers, apply the pack well over your face and let it stay for about 15 minutes.

Rinse off with lukewarm water. Use this method daily for great results on skin.

#3-Rice flour and castor oil face pack

You will need three/four drops of castor oil, one tablespoon of rice flour, and a couple of drops of rose water. Put these ingredients in a bowl, and mix until a thick texture is formed.

Apply on your face for about 5-10 minutes. Then, wash off with cool water.

Use this face mask twice or thrice each week to fight acne and brighten skin.

#4-Rice flour and egg whites face pack

To prepare this pack, you will need one tablespoon rice four and two egg whites. Add these in a bowl and beat them together.

Apply the solution on your face and let it stay until it completely dries out.

Rinse off with cold water and witness its amazing anti-aging benefits.

With this pack, get ready to bid goodbye to those fine lines and wrinkles.

#5-Rice flour and aloevera gel

In order to prepare this face pack, you will require two tablespoons of aloevera gel and one tablespoon rice flour.

Mix these two together. Then apply well over your face. Allow it to stay so for good 20-30 minutes.

Finally, wash off with cool water, and you are done.

Use this face mask twice every month to get rid of dead skin.

…..Read More….

Read Also: Prepare and Apply These Milk Powder Face Masks at Home….

Prepare and Apply These Milk Powder Face Masks at Home

Being rich in important minerals and vitamins, milk powder can be used with some other ingredients as a mask and can rejuvenate your skin. From lightening your skin colour to promoting collagen production and helping to remove sun tan, milk powder can do it all for you. It contains lactic acid that can make your skin smooth and look bright. Milk powder is basically the solid part left after evaporating the water from milk.

It is quite powerful and effective in giving you a youthful skin. Applying milk powder on your skin can act as a cleanser and can remove blackheads. Here we tell you how you can prepare a go-to beauty face mask using milk powder and other natural ingredients.

Milk powder, orange, and flour face mask

To prepare an effective face mask at home, you need a teaspoon of each of these ingredients and mix them well. Apply the paste on your face and neck and leave for 15 minutes. Then, rinse off with cold water. Notably, milk powder, orange and flour when mixed together, act as a strong exfoliator that can flush out impurities from your skin and can make your feel fresh.

Milk powder and Multani Soil face mask

This face pack is ideal for those with oily skin as this skin type absorbs lot of dust and harmful particles that lead to onset of acne and other problems. This is the reason why oily skin looks dull and unattractive. Applying a face pack prepared using milk powder, multani soil and water can give you the natural glow you were longing for. This home-made face mask can remove the excess oil from the face. Use it twice a week and see the result yourself.

Milk powder, lemon, and yogurt face mask

If you have dark spots and pigmentation on your skin, you must try this home-made face mask. Take two teaspoons of yogurt, half a spoon of lemon juice, and a teaspoon of milk powder. Mix them well and apply on your face. Leave it on your face for 20 minutes and then rinse off with cold water. You will feel fresh and your skin will glow after the use of the mask.

…..Read More…..

Read Also: Coffee Spray For Hair Health & Growth….

Apricot Rosehip Body Butter Recipe for Face and Body

0

This apricot rosehip body butter recipe for the face and body will leave your skin silky smooth and smelling like heaven!

This super simple, super luxurious body cream made with only three ingredients will keep your skin fresh, youthful, and glowing!

Shea Butter is a healthy source of fat for the skin as it contains high amounts of saturated fatty acids which can help repair damaged skin and blemishes while plumping up wrinkles and fine lines. Shea butter can go so far as to reduce the appearance of cellulite, stretch marks and scarring while also helping to heal sunburns and protect the skin against drying out.

Apricot Oil is a non-greasy oil that is easily absorbed by the skin, making it great for body and face. It helps firm and tone skin, and because it contains Vitamins A and E it is antiaging. It also contains strong anti-inflammatory properties which make it nourishing enough to soothe rough skin and eczema.

Rosehip Oil is mega moisturizing, seals water into the skin, and is anti-acne by reintroducing sebum back to the skin. Rosehip is also packed with Vitamin A for Anti-Aging! And, has the properties to fight free radicals, strengthen collagen and exfoliate dead skin cells, while rejuvenating and brightening dark spots on the skin.

Apricot Rosehip Body Butter Recipe

What You Need:

  • 1 cup shea butter
  • ¼ cup apricot oil
  • 2-3 tbsp rosehip oil

Directions:

  1. First, create a double-boiler system by using a medium-sized saucepan and a glass mixing bowl that sits right on top of the saucepan. Fill the saucepan about? full of water and bring to a boil.
  2. Place the glass bowl over the boiling water and put the shea butter in stirring until completely melted.
  3. Once melted and liquidy, remove the bowl from the pan and let it sit until slightly cooled, then add in the oils.
  4. Stir until the shea butter and oils are well combined.
  5. Next, place the mixture in the fridge for 20-25 minutes so it thickens but isn’t too hard.
  6. Finally, using a hand mixer or hand whisk, blend the shea and oils until it becomes a whipped texture. Then transfer to glass jars for storage.

To use simply massage onto the face, neck, and body after showering. It is best used at night before bed so the shea butter and oils can be fully absorbed by the skin. This buttercream can be used daily! Read more 

Also read: Coffee Spray For Hair Health & Growth

Coffee Spray For Hair Health & Growth

The coffee spray, coffee is a miracle booster in the morning when its hidden powers of caffeine are released stimulating our sleepy minds and getting us ready for the day. But did you know it doesn’t end there?

This amazing beverage can stimulate more than just our brains, as caffeine is a natural hair simulator a.k.a. growth potion as well. So the next time you’re steaming up a cup of a coffee for yourself, make an extra for your friends up top… your hairs 🙂 This coffee spray for hair health & growth is easy to make and will promote healthy hair growth, shine, and strengthen follicles all in one!

When applied topically, caffeine gets down to the roots of your hair stimulating circulation which revs up the engine on growth while improving the root’s structure. By way of the hair shaft, caffeine can also help make your hair stronger, have a smoother texture, and illuminate your hair’s natural color. The antioxidants in coffee furthermore prevent hair breakage and help repair damaged scalp and hair.

For an extra boost, add lavender or rosemary essential oil to the coffee concoction. Both have been found to do wonders for hair thickness and growth while also healing the scalp if dry and irritated.

Coffee Spray for Hair Health

What You Need:

  • 1 cup of freshly brewed organic coffee

OR

  • 1 cup of hot water combined with 2 tbsp of organic instant coffee and mixed thoroughly
  • 3 drops of essential oil (lavender or rosemary)
  • 8 oz spray bottle

Once cooled, pour the brewed coffee or instant coffee mixture into the 8 oz spray bottle. Next, add the essential oil of choice and give the bottle a good shake.

To Use:

Spray all over scalp and hair and lightly massage the scalp for 2 to 3 minutes. The spray can also be used as a detangler before brushing or combing.Read more

Also read: How Does Pore Size Change with Age?

20 Homemade Hair Treatments for Dry, Dull or Frizzy Hair

0

20 Homemade Hair Treatments

Here are 20 tips for easy Treatments DIY hair masks made with simple ingredients you probably already have in your kitchen.

Need to moisturize?

Avocado Hair Mask

1. Avocado

Avocado has a well-deserved reputation for being one of nature’s perfect foods. Its oils and proteins will smooth and moisturize your locks without weighing down fine hair. Mash up half an avocado and add a couple of drops of peppermint essential oil. Shampoo hair, squeeze out the water, and apply the hair mask. Let it sit for 15 minutes and then rinse.

My hair came out super soft—not flat or greasy at all. And the added scent made sitting around with green goop on your head much more pleasant.

If you’re not worried about weighing down your hair, you can amp up the moisture by adding 1–2 tablespoons of oil, egg yolk, or yogurt.

2. Coconut Oil

The wonders of coconut oil never cease! This oil is heavy, which is great for penetrating deep into the hair shaft, but use it sparingly, especially if you have fine or thin hair.

Take a small amount of coconut oil, rub it between your hands, and apply just to the ends of damp hair. If the oil is in the solid form, just warm it in the microwave for about 10 seconds until it becomes liquid, and let it cool a bit before touching it (be careful because it can get VERY hot).

Whether you need moisture or a color boost, find an easy remedy with 20 Homemade Hair Treatments. Here are the natural tips for healthy hair.

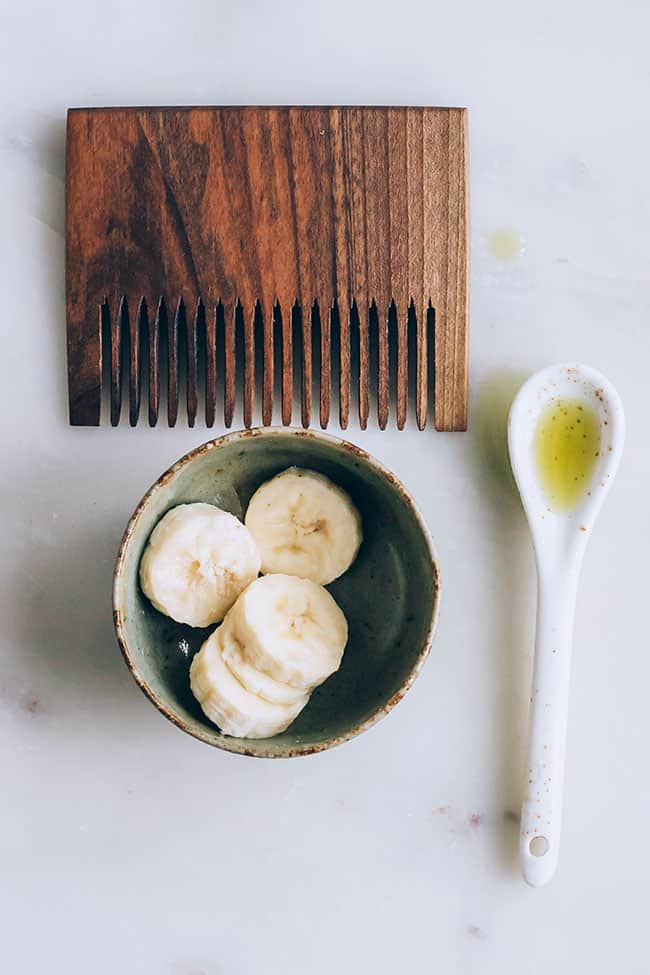
3. Banana + Olive Oil

Not only can bananas work their magic on your feet, but they are awesome for your hair! Mix a banana with 1 tablespoon of organic extra virgin olive oil and mash thoroughly until the banana is pureed.

You definitely want a super smooth smoothie-like texture, so you don’t end up with banana chunks in your hair. Then massage into your hair and scalp. Leave the treatment on for 30 minutes, then rinse thoroughly and shampoo.

Pumpkin and Honey At Home Hair Treatment

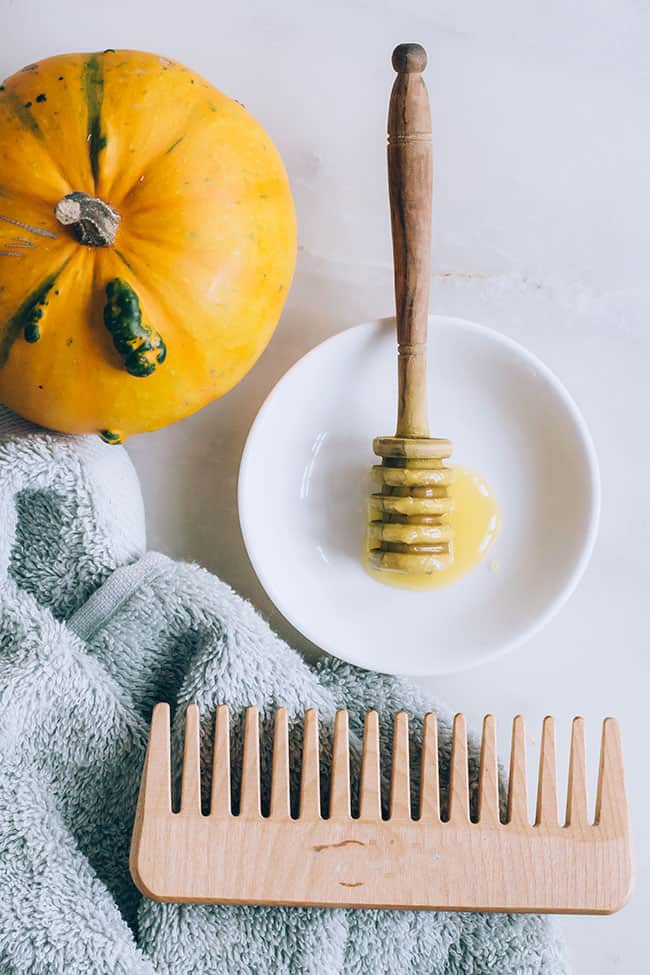
4. Pumpkin + Honey

This could be the perfect use for canned pumpkin puree leftovers (because there are always leftovers). Pumpkins have lots of amazing benefits—they’re rich in vitamins A and C, beta-carotene, potassium, and zinc.

Read More

Also Read: NATURAL MOISTURIZERS FOR OILY SKIN THAT WON’T FEEL HEAVY OR GREASY


NATURAL MOISTURIZERS FOR OILY SKIN THAT WON’T FEEL HEAVY OR GREASY

Moisturizers for Oily skin is perhaps one of the most difficult skin types to manage as it usually tends to be sensitive and acne prone. The excess oil production makes the skin look dull and unpleasant. A lot of people believe that since their skin is naturally so oily, they can skip the moisturizer completely. However, this only makes the problem worse and leads to breakouts. Therefore, it is really important to moisturize oily skin on a daily basis.

Argan oil

Argan oil is not called the ‘miracle oil’ for nothing! It is an amazing moisturizer for oily skin because it is 100% non-comedegenic in nature; meaning that it will not clog pores. Argan oil also helps balance the sebum production of the skin (1) and is, therefore, one of the best moisturizers for oily skin. The lightweight texture of argan oil sinks right into the skin and does not feel greasy at all. It moisturizes from deep within, leaving your skin hydrated and nourished.

Shea Butter

Another great moisturizer for oily skin has to be shea butter. While it may be hard to associate shea butter with oily skin owing to its thick consistency, trust us when we say this, shea butter has a comedogenic rating of zero! This means that it is a great moisturizer for oily skin and does its job without breaking you out. Additionally, this amazing butter has natural UVB rays blocking ability that makes it perfect to be used both during the day as well as night.

Rosehip oil

If you have oily skin that is also sensitive and acne prone, then rosehip oil is God-sent for you! This is an amazing oil to help combat inflamed and irritated skin, reduce redness and calms acne. Apart from its amazing moisturizing abilities, rosehip works at reducing acne scars and making your skin tone even. Additionally, rosehip oil helps with a lot of skin conditions such as fine lines, wrinkles, scarring, skin discolorations, age spots, eczema, psoriasis, as well as stretch marks. Apart from being a great moisturizer for oily skin, it would be great to include rosehip oil in your daily skincare routine, thanks to the amazing benefits it has to offer. Read More…………

Also Read: How to Cope With Summer Hair Problems

How Does Pore Size Change with Age?

0


As people age, change happens on the inside and the outside. Maturing affects everything from skin pigment to texture, so it’s mainly the world around your pores—the surrounding skin—that changes. You can embrace the years gracefully, though, knowing you have several options for keeping your pores manageable no matter your age.

What Affects Pore Size

From the outset, your genetics largely determine your pore size. Whatever your age, their appearance is most affected by hygiene; neglecting your skin-care routine causes oil, dead skin cells and dirt to clog the pores, stretching them out and making them appear larger. The body’s output of pore-clogging oil, known as sebum, varies greatly depending on gender (men are more susceptible) and hormonal factors, including menstruation. The more sebum your body produces, of course, the larger your pores appear.

What Happens Over Time

As the years pass, UV rays and other environmental factors cause the skin to lose its elasticity. When this happens, pores clogged with sebum, dirt and dead skin appear to be larger than before. This is because the skin around each pore is not as firm and collagen-rich as in younger skin. Firm skin essentially girds and supports pores, so it has the effect of making pores appear smaller, while looser, inelastic skin makes pores appear larger or more dilated. Use sunscreen year-round to help lessen the effects of UV damage, and keep your skin firmer even as it ages.

At-Home Solutions

Regular exfoliation is key when it comes to battling enlarged pores. Choose an exfoliating pore scrub with an active ingredient like salicylic acid or gylcolic acid to slough away dead skin cells, helping prevent clogged, enlarged pores. Wash your face twice daily, as well as after dirty or sweat-inducing activities. If you have naturally oily skin, use an oil-absorbing moisturizer, and turn to matte makeup and mattifying skin care products to reduce shine and help pores appear smaller. For any skin type, apply face primer before foundation to lend the skin a smoother look.

Read more 

Also read How to Fade Acne Scars Using Topical Treatments

What Are the Main Causes of Under-Eye Bags?

0

Your face tells a story. Whether it’s a touch of color that says, “I’ve been at the beach all day,” or under-eye bags that reflect late nights and high stress. While under-eye puffiness is largely hereditary, you can help deflate the appearance with healthful lifestyle changes and some simple additions to your skin care routine.

Core Issues

With time and age, the ligaments underneath your eyes begin to weaken. This causes fatty tissue behind the ligaments to fall forward, giving the area under your eyes a sagging, baggy or bulging appearance. While heredity certainly plays a role here, sleep and stress are also core contributors. Because your circulatory system works more slowly during sleep, excess fluid collects beneath the eyes. With less sleep, or more stress, the body doesn’t flush out this extra fluid as efficiently as it normally does, leading to puffy eyes.

Lifestyle Causes

In addition to the big issues of sleep and stress, factors such as hormonal imbalances and irritating food or dust allergies can lead to puffy under-eye bags, as can smoking cigarettes or excessive caffeine intake. Health problems including sinus infections, kidney and thyroid issues, and iron deficiency may also cause bags under the eyes. Consult your doctor if these issues apply to you. When the root cause is treated, your eyes should return to normal.

Unexpected Culprits

Skipping shuteye isn’t the only eye-bag offender. Staring at a computer all day and backlit mobile screen by night could be straining your eyes significantly. All this eye strain can lead to squinting and therefore under-eye wrinkling and puffiness. Creating better nighttime rituals should also include proper makeup removal. While waking up with perfect eyeliner sounds appealing, removing your eye-makeup is just as important as cleansing your face before bed. Hitting the hay with mascara and the like can make your eyes water and lead to morning-after puffiness. Sleeping in eye makeup repeatedly can also clog the tiny hair follicles and oil glands on your eyelids—resulting in bacteria buildup and inflammation.

Keys to Prevention

To encourage healthy circulation and reduce bag-causing fluid buildup, aim for eight hours of sleep each night. Sleeping with your head elevated helps the cause, as well. Avoid puffiness-inducing food and drinks such as alcohol and salt. Tasty as they may be, these foods encourage fluid retention, which in turn encourages under-eye bags. Similarly, cut back on the vices of smoking and rubbing your eyes, if you want a smoother under-eye area.

Read more 

Also read  How to Fade Acne Scars Using Topical Treatments

How to Fade Acne Scars Using Topical Treatments

0

Acne can be a confidence crusher but it isn’t just the red pimples that can be a nuisance. Acne scarring can plague you long after a breakout has healed. Treating acne scarring certainly isn’t a “one-size-fits-all” approach. Whether you suffer from rolling acne scars, boxcar scars, dark marks or fresh scars, there are several treatment options available to improve the condition of post-acne skin.

Fresh Scars

For fresh acne scars, it’s essential to take care of newly formed marks properly. Since exposure to the sun can make dark acne scars appear more prominent, applying SPF that offers UVA and UVB protection is a must. The latest lightweight formulas won’t clog your pores or lead to further breakouts, so there’s no excuse not to apply it daily. In addition, applying vitamin E oil each morning will help to improve the texture and hydration of fresh scars and even out hyperpigmentation with prolonged use.

Discoloration and Pigmentation Scarring

Hydroquinone skin-lightening creams can help to lighten dark pigmentation patches left behind after acne has healed. Available over the counter in 2 percent concentrations, or with a prescription as with 4 percent concentration, hydroquinone creams work by bleaching the dark patches. A typical course of treatment can require daily application for up to six months.

Mild Marks or Pink Marks

For those with slightly pink or mild marks left behind by acne, topical treatments might not cut it. A popular treatment for pink marks is pulsed-dye lasers (PDLs). These vascular-specific lasers work fast and effectively. And because this laser skin treatment doesn’t destroy cells, there is no significant redness or skin peeling.

Boxcar Acne Scars or Divots

At-home microdermabrasion, which can help to improve the texture of shallow boxcar scars, should be your first line of attack. For deeper divots, dermabrasion (a more intensive form of chemical exfoliation carried at your dermatologist’s office) offers a stronger treatment option.

Rolling Acne Scars

Rolling acne scars are the result of scar tissue forming under the skin, creating a “rolling” or wave-like appearance. Since the damage runs deeper, rolling acne scars typically require resurfacing laser treatment to remove the top layer of the skin. Laser treatments can be expensive and time-consuming, (patients often require multiple procedures) so chemical peels provide an alternative option. A chemical peel carried out by a dermatologist works in a similar way by removing the top layer of skin.

Read more 

Also read 4 Dos and Don’ts of Pore Maintenance


How to Cope With Summer Hair Problems

Our crowning glory — and Samson’s source of strength — human hair has long been a fascination and an obsession. What a shame that summer can reduce this glorious body adornment to ruins. What’s the worst that can happen — and how can you “head off” or heal the damage?

How to Cope With Summer Hair Problems

Problem No. 1: Sun Scorching

Without hesitation, Phillip Wilson, once voted the best hairstylist in 100 years and president of the Angles & Collections Salon and Day Spa, tells WebMD that the sun is the biggest enemy of hair during the summer.

Wilson, who often journeys to the Sundance and Cannes film festivals to tend to his movie star clients, says not only in Hollywood do 85% of women have color-treated hair. “That’s the figure nationwide,” he says. “Sun dries hair out. If it’s already processed, it’s already depleted and can become dry straw.”

To combat this, Wilson says, “the coolest thing on the market” is leave-in conditioners. “If not overly used,” he adds, “they start the styling for you, adding volume at the roots.”

David Bank, MD, director of the Center for Dermatology, Cosmetic, and Laser Surgery, in Mount Kisco, N.Y., also recommends a pretreatment with an SPF spray made for hair. “We see some skin cancers of the scalp and these not only protect hair, but guard against those,” he says, adding that SPF sprays are a light mist. What level of SPF? “Whatever you can get your hands on — 15, 30,” Bank says.

Hats can also protect hair from the sun, but there is a trade-off — hat head.

Problem No. 2: Green Hair

If a swimming pool is not properly balanced, metals such as copper in the water can leach onto hair. You know that nice green patina of a copper picture frame? It looks less fetching on the head.

Again, treated hair, especially the blond shades, tinges the most. “Chlorine is a nightmare!” exclaims Wilson. He recommends pretreating your hair with a pH balancer to try to get it to a pH of 3.5, which is acidic. “This almost creates a barrier [to greening substances in the water]. It’s like a mist.” Read More…….

Also Read: Are You in a Skin Care Rut?