Home Blog Page 353

Healthy Herb and Spices Water : Fight Cold, Flu and Infections With This Ayurvedic Wonder in Corona Time

Healthy Herb: There are days when we feel lethargic and low on energy. It might be due to the changing weather or mere stressful work life. Do you know that solution to all these and other bacteria borne illnesses lies in your kitchen masala box? Yes, you read it right. The mini masala box lying on your kitchen slab is the ultimate solution to boost your immunity, strength and digestive system as well.

Tulsi kadha

Add 2 glasses of water to a deep pan and boil it. Once boiled, add 5 tulsi leaves, 1/2 tsp cinnamon powder, 1/4 tsp black pepper, and 1/2 tsp grated ginger. Stir well and boil for next 10 minutes. Allow it to cool and then strain it. Your immunity booster kadha is ready. Add jaggery or lemon juice to enhance the taste and enjoy. This kadha will improve digestion and also flush out toxins from the body.

CCF tea

Take 4 cups of water in a sauce pan and boil it for 5 minutes. Now add 1/2 tsp cumin seeds, 1/2 tsp fennel seeds, and 1/2 tsp coriander seeds. Boil this concoction for a minute and switch off the flame. Strain and consume hot drink to boost the digestive system.

Rasam Kadha

To make this fusion kadha, grind 2 tsp cumin seeds, 2 garlic cloves, 2 tsp black pepper, 7-9 curry leaves to make a fine powder. Now add 1 tomato and 20 ml tamarind pulp to it and grind to a thick paste. Take a small pan, boil 2 cups of water, add the pastel stir well and cook for 3-5 minus. In the meantime, take another small pan and prepare the tempering using 2 tsp ghee, 1 tsp mustard seeds, 1 tsp turmeric powder, a pinch of asafoetida and 2 dry red chilli. Add the tempering to tomato concoction and garnish with coriander leaves and serve hot.

Read More..

Also Read: Put Your Best Foot Forward DIY Foot Mask

Hello, Sunshine: Everything You Need to Know About Vitamin D Deficiency

0

I think it’s fair to say most of us know we need vitamin D. After all, we don’t call spending some time in the sun “getting a healthy dose of vitamin D” for nothing. Vitamin D (sometimes affectionately known as the “sunshine vitamin”) is one of the essential vitamins—meaning your body needs it in order to work properly.

But how does sunlight actually turn into vitamin D? And why do we need it, exactly?

Cue the Experts 

Knowing very little beyond the above information (even though I once had a vitamin D deficiency, myself), I reached out to four medical experts to help better explain this vitamin, its functions and some of the risks associated with not getting enough of it. Read on for advice from board-certified dermatologist Alan M. Dattner, MD; Annie Grochocinski, RD, LDN, CNSC at the University of Chicago Medicine; June Hatfield MS, RD, CNSC, LD at Children’s Hospital Los Angeles; and Kathleen Meehan MS, RD, LDN, a registered dietitian nutritionist. (You can read more about each of them at the bottom of this post.)

What does vitamin D do for the body?

While many of its functions are internal, vitamin D also plays a role in skin health and wellness—especially when it comes to aging skin. “Vitamin D helps protect against oxidative damage of the skin,” says Dr. Dattner. It does this by protecting the skin from premature aging—especially in relation to sun exposure. This is why you might see vitamin D used in the topical treatment of psoriasis, says Hatfield. “[It] also regulates the activity of cathelicidin, an antimicrobial protein that promotes wound healing and tissue repair and may modulate the inflammatory responses in the skin.”

Vitamin D plays a vital role in helping the body absorb and maintain a healthy amount of calcium and phosphorus—in order to keep our teeth and bones healthy and strong. Without enough vitamin D, says Hatfield, your body would only be able to absorb and utilize somewhere between 10–15% of dietary calcium and around 60% of phosphorus.

Meehan adds, “Vitamin D helps control cell growth and may reduce inflammation. Preliminary studies in mice have determined that vitamin D may help protect skin against UV rays, but it’s still too early to know whether that applies to humans as well. It’s exciting, but right now more research is needed to determine exactly what role vitamin D plays in skin health.”

How do we actually get vitamin D from the sun?

Many of us know vitamin D comes from the sun, but what does that really mean? Meehan clarifies: “Technically, you don’t absorb vitamin D from the sun. Your skin is able to synthesize the vitamin based on a number of factors, including the season and the time of day when sun exposure occurs.”

Read more 

Also read  Put Your Best Foot Forward DIY Foot Mask


Put Your Best Foot Forward DIY Foot Mask

0

Put your best food forward with this DIY foot mask recipe that will exfoliate and hydrate, leaving feet ultra soft and moisturized!

Has stuffing your feet into thick socks and boots all winter left your feet calloused, dry and cracked? A trip to the DIY at-home foot spa may be just the answer to bring your feet back to life. With spring and summer just around the corner, it will soon be time to ditch the boots and break out the sandals. A hydrating foot mask will give your skin a moisture boost and have you ready to put your best foot forward in the coming warmer months!

This DIY foot mask is super easy to make and will leave your feet silky soft! All you have to do is apply it and let it sit overnight! Say hello to silky feet in the morning!

Coconut oil is a super moisturizer and oils like olive and jojoba are nourishing and easily absorbed by the skin leaving it smooth and soft. Vitamin E oil is especially beneficial for healing dry, cracked skin and honey helps soothe irritations and further lock in moisture.

DIY Foot Mask Recipes

Honey Foot Mask:

You’ll Need:

Directions:

Combine all ingredients in a bowl and stir until well blended. After washing the feet and while the skin pores are still open, liberally apply the mask to both feet massaging each foot for 2 to 3 minutes. Put on old socks to help lock the ingredients on the foot and keep from making a mess. Wear overnight and in the morning remove socks and rinse off anything that was not absorbed into the skin.

Cucumber Foot Mask:

The acidity of lemon juice breaks down dead skin and brightens dull skin and nails. Cucumbers are hydrating and have a cooling effect that refreshes tired skin.

You’ll Need:

  • 2 small peeled cucumbers
  • 1 tbsp honey
  • 4 tbsp olive or jojoba oil
  • ½ lemon juiced

Directions:

Combine all ingredients in a blender and blend until the mixture is un-clumpy and smooth. Wash the feet and pat dry, then apply the mixture to the feet and gently massage each foot for 2 to 3 minutes. Wrap both feet with plastic or saran wrap and let sit for 15 minutes. Remove the plastic wrap and rinse feet with warm water and pat dry. read more

Also read: How to Clean Makeup Brushes The Right Way

How to Determine Your Eyebrow Shape Based on Your Face Shape

Today we’ll show you how to determine your eyebrow shape based on your face shape! Believe it or not, not all brows are created equal! And of course, not all faces are created equal either. So having said that, it’s only natural that our brows need to accentuate our faces in the best way possible. What works for you, may not work for someone else, and vice versa!

Round Face Shape

Round shaped faces should go for high, sharp brows that will cut away from the round, curvy shape. For those with a round face shape, a structured brow with angled arches and longer ends is the way to go. This will slim the face, and give it a more oval shape, resulting in some pretty perfect brows!

Oval Face Shape

For oval shaped faces, go for a moderate arch instead of a high one. You don’t want to elongate the face even longer. The oval face shape is actually known as the “perfect” face shape because almost anything goes! For those with an oval face shape, well-balanced and contoured brows is the way to go! If you have a longer forehead or a long face, we suggest thicker brows, but if you have smaller facial features, thinner brows are the way to go.

Triangle Face Shape

Triangle shaped faces look well with long brows that frame the eyes and fills out the shape face’s wider forehead, making it look smaller. For triangle shapes, you can go with either thin brows or thick brows, it’s completely up to you!

Heart Face Shape

You’ll want a moderately high arch that rounds out at the tail. This will balance a wide forehead. Create soft, rounded brows to complement the sharp angles of a heart shaped face.

Pear Shape

Pear shaped faces should go for a higher arch that extends to the outer ends of the eye, to give the illusion of extra width at the forehead. Make sure you don’t go too high though, it’s always best to start a little lower.

Rectangle Shape

For a rectangle shaped face, you’ll want a barely there arch. A high arch will only draw more attention to an already strong jaw. A soft angled brow is the way to go with a rectangle face shape! Read More………..

Also Read: DIY After Shave Lotion Recipe

DIY After Shave Lotion Recipe

0

Looking for an all natural after shave lotion? Look no further than this DIY after shave lotion made entirely out of all natural, soothing ingredients! This DIY after shave lotion is not only for men – gals can use this lotion to soothe irritated and inflamed skin! Made with witch hazel, coconut oil, and aloe vera, this homemade after shave will hydrate dry skin, calm and soothe irritation, and leave skin feeling and looking silky smooth!

Commercial aftershave lotions are loaded with ingredients which can actually further irritate skin. Alcohols and other ingredients can cause redness and irritation, so a homemade lotion is the way to go, especially if you have sensitive skin.

DIY After Shave Lotion Recipe

Ingredients:

  • 1/2 tbsp coconut oil, olive oil, or jojoba oil (any carrier oil will do)
  • 1/2 tbsp aloe vera gel
  • 1/4 tsp witch hazel
  • essential oils – optional
  • a few drops of vitamin E oil – optional

Directions:

  1. In a small bowl, mix all ingredients and apply to freshly shaved skin using your fingers.
  2. Massage into skin in slow, circular motions.
  3. Do not rinse off.
  4. Can be used as often as needed.

Benefits of DIY After Shave Lotion:

  • Aloe vera has healing properties, making it an excellent choice for an after shave lotion. It will soothe dry, irritated, and inflamed skin.
  • Coconut oil comes in to hydrate and moisturize dry skin, plus it will leave skin glowing!
  • Witch hazel is a natural toner which balances the skin’s pH, sucks up excess sebum (oil), and leave skin super soft!
  • Essential oils – while this step is optional, you can certainly add a few drops of your favorite essential oil. Use tea tree oil if you have oily/acne prone skin. Essential oils can target specific skin problems and also give your aftershave lotion a nice scent!
  • Vitamin E oil is great for those with dry skin, as it can replenish moisture and also keep wrinkles at bay. Read More……………..

Also Read: 13 Benefits of Taking Fish Oil

13 Benefits of Taking Fish Oil

Fish oil is one of the most commonly consumed dietary supplements.

It’s rich in omega-3 fatty acids, which are very important for your health.

If you don’t eat a lot of oily fish, taking a fish oil supplement could help you get enough omega-3 fatty acids.

Here are 13 health benefits of fish oil.

What Is Fish Oil?

Fish oil is the fat or oil that’s extracted from fish tissue.

It usually comes from oily fish, such as herring, tuna, anchovies, and mackerel. Yet it’s sometimes produced from the livers of other fish, as is the case with cod liver oil.

The World Health Organization (WHO) recommends eating 1–2 portions of fish per week. This is because the omega-3 fatty acids in fish provide many health benefits, including protection against a number of diseases.

However, if you don’t eat 1–2 servings of fish per week, fish oil supplements can help you get enough omega-3s.

Around 30% of fish oil is made up of omega-3s, while the remaining 70% is made up of other fats. What’s more, fish oil usually contains some vitamin A and D.

It’s important to note that the types of omega-3s found in fish oil have greater health benefits than the omega-3s found in some plant sources.

The main omega-3s in fish oil are eicosapentaenoic acid (EPA) and docosahexaenoic acid (DHA), while the omega-3 in plant sources is mainly alpha-linolenic acid (ALA).

Although ALA is an essential fatty acid, EPA and DHA have many more health benefits (1Trusted Source, 2Trusted Source).

It’s also important to get enough omega-3s because the Western diet has replaced a lot of omega-3s with other fats like omega-6s. This distorted ratio of fatty acids may contribute to numerous diseases (3Trusted Source, 4Trusted Source, 5Trusted Source, 6Trusted Source).

1. May Support Heart Health

Heart disease is the leading cause of death worldwide (7Trusted Source).

Studies show that people who eat a lot of fish have much lower rates of heart disease (8Trusted Source, 9Trusted Source, 10Trusted Source).

Multiple risk factors for heart disease appear to be reduced by consumption of fish or fish oil. The benefits of fish oil for heart health include: Read more

Read also:Why Do I Bite My Nails and How Do I Stop?


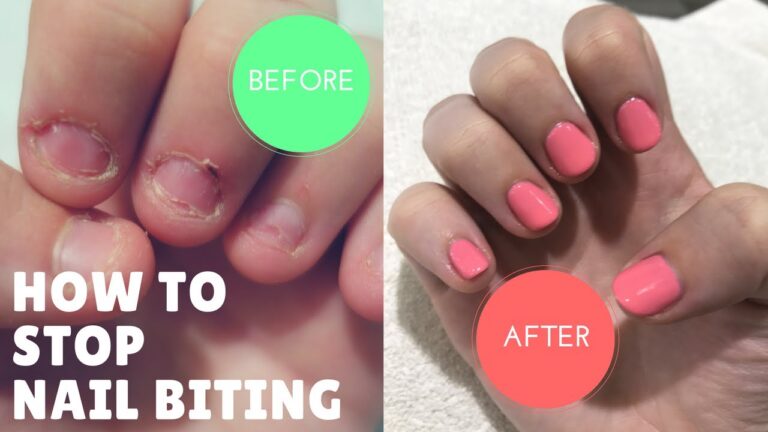
Why Do I Bite My Nails and How Do I Stop?

About half of all kids and teens bite their nails. Many don’t grow out of it, either. If you’re an adult who bites your nails, you may have done it when you were younger and just never stopped.It could be your parents’ fault: Scientists aren’t sure if nail biting is genetic, but kids whose parents bite their nails are more likely to bite their nails, too. Studies show this happens even if the parents stop doing it before their child is born.

Sometimes, nail biting can be a sign of emotional or mental stress. It tends to show up in people who are nervous, anxious or feeling down. It’s a way to cope with these feelings.

You may also find yourself doing it when you’re bored, hungry or feeling insecure. Most nail biting is automatic — you do it without thinking.

Reasons to Stop

Nail biting won’t typically cause permanent damage. But it definitely has its downsides:

  • It can make your nails grow in weird. If you damage the tissue around your nails, they may stop growing the way they should. This gives you abnormal-looking nails.
  • It can spoil your smile. You can chip, crack, or break your teeth when you bite your nails. Over time, nail biting can even cause jaw problems.
  • It can make you sick. Hands are a hotbed for germs, and nails are their perfect hideout. When you’re putting your fingers in your mouth multiple times a day, it increases your chances of getting sick. Plus, the skin damage you can cause when you bite your nails creates an easy way for germs to get in.
  • Prevention

    You may not see a change overnight, but with a little time and effort, you can bust your nail-biting habit.

    Try these tips:

    • Cut them short. If there’s not enough nail to grab with your teeth, it won’t feel as satisfying when you give biting a try.
    • Coat them with a bad taste. There are special nail polishes with a bitter flavor you can paint on your nails. The terrible taste will make you think twice before chewing.
    • Splurge on manicures. Spending money and time at a nail salon will give you both good-looking nails and a reason to keep them that way.
    • Wear gloves. It may sound silly, but if you can’t get to your nails, you can’t bite them. If gloves won’t work for your daily schedule, you can look for stickers made to cover nails — they can have the same effect.
    • Find your triggers. Notice how you feel or what you’re doing when you bite your nails. Once you know what kicks you into nail-biting drive, you can try to find other ways to cope.
    • Keep your hands or mouth busy. Find something to fiddle with — a stress ball, a worry stone, or even a pen to click. Chew gum so your mouth has a job. Give your nail-biting energy another place to go. Read more

Read also:How You’re Wrecking Your Hair

How You’re Wrecking Your Hair

Brushing Too Much

The old “100 strokes a day” beauty tip is a myth. Brushing your hair too much can cause split ends. Over time, it could even lead to hair loss

Too Many Blowouts

The more often you heat your hair, the more damaged it gets. Air-drying keeps hair its healthiest. When you can’t do that, be sure you keep your dryer’s heat setting on “low” and hold it at least 6 inches from your hair as you dry it.

Not Shampooing Often Enough

Your hair may not need a daily wash (or even one every other day). But it’s important to shampoo often enough to keep oily buildup at bay. That can lead to dandruff and other scalp problems.

Overusing Shampoo

When it comes to shampoo, a little dab will do. Focus on scrubbing your scalp instead of lathering up the whole length of your hair.

Brushing Wet Hair

Water weakens your hair, so treat wet hair with care. To tackle tangles after a wash, use gentle strokes with a wide-toothed comb instead of tugging your tresses with a brush.

Flat-Ironing It When It’s Damp

When heat hits water in your hair, it can turn to steam and cause “bubble hair.” You’re left with brittle locks that have frizzy ends and break easily. Be sure your hair is dry before you use a hot styling tool. Keep it on the lowest temperature you can, and use a heat protectant spray before you style.

Toweling It Dry

Wrapping your hair gently in a towel after a wash is fine (air dry is best). But rubbing it with a towel will damage the strands.

Sticking to the Same Tight ‘Do

If you leave weaves or hair extensions in too long, or you pull them out without a professional’s help, it can cause big-time breakage. Same goes for braids, buns, and ponytails — too tight for too long, and you’ll start to see split strands. Mix up your ‘do to keep hair healthy. Read more

Read also: 10 Simple Beauty Tips For Hands


10 Simple Beauty Tips For Hands

0

Since our hands are used to carry out most of the chores, they need the pampering and relaxing to look nice and smooth! Listed are ten sure shot ways to get those beautiful looking hands. Here we present you the simplest and best Beauty Tips For Hands that you can easily follow at home.

10 Simple Beauty Tips For Hands

Check out here what are the basic steps you need to follow to get beautiful and soft hands.

1. Moisturise your hand:

Use a good quality hand moisturiser and apply on hands at least thrice a day after you have washed it thoroughly. In the summers use a light non greasy moisturiser and in the winters opt for something heavier like body butter. Winters tend to dry out the skin, so you can do with the extra moisturising.

2. Pamper the hand:

Indulge in a manicure at least once a month. With a manicure you hand get cleaned, exfoliated and massaged. It’s thorough nourishment that your hand get.

3. Wash your hand:

When you wash your hand, ensure that you wash your hands in lukewarm water all year round. Too hot water or too cold water tends to damage the skin. Never use normal dish soap because it is harsh on the skin and it also dries the skin easily.

4. Scrub:

Scrub your hands at least once a week with a good exfoliating agent to get rid of any dead skin. No time to buy one? Make one at home. Take a teaspoon each of fine sugar and olive oil and mix it well with the juice of half a lime. If you want to try something different, add one drop of your favourite EO and you are done! You have your home made exfoliating scrub ready. Hands

Read More

Also Read: DIY Sea Salt Shampoo Recipe – Clarifies and Adds Volume

Gelatin Face Mask: How to Make a Peel Off Mask at Home

0

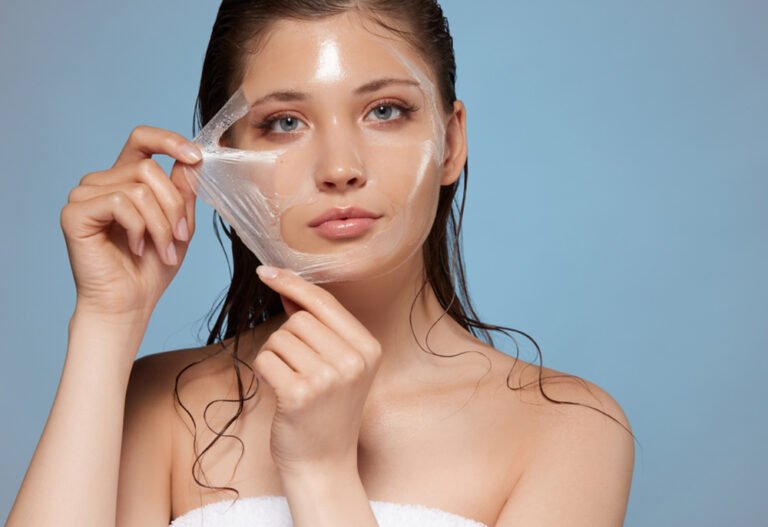
This gelatin face mask recipe only requires two ingredients: unflavored gelatin powder and milk! Smooth, glowing skin is just one face mask away! You’ve undoubtedly seen those charcoal peel off masks everywhere, and I’m sure most of you have tried them, but did you know you can make your own gelatin peel off mask right at home with just two ingredients?

This DIY gelatin face mask mask will cost you less than fifty cents and will take you minutes to make it. Best of all, it will leave your skin silky soft, shrink pores, and will also revive dull skin. Learn how to make a gelatin face mask at home and you’ll never purchase another peel off mask again!

How to Make a Gelatin Face Mask – DIY Peel Off Mask Recipe

Before we dive into this recipe, we’d like to take a look at some of the amazing benefits of a gelatin face mask.

Shrinks Pores

This face mask is AMAZING at shrinking pores – try it and you’ll see! Any type of peel off face mask actually does that, but this one in particular works wonders!

Removes Blackheads

Milk contains lactic acid which helps the skin shed dirt, debris, dead skin cells, and blackheads all in one! Also helps to get rid of excess oil (sebum).

Moisturizes Your Skin

This gelatin face mask also helps to moisturize your skin by replenishing lost moisture.

You’ll Need:

  • 2-3 tbsp milk
  • 1 tbsp unflavored gelatin powder, such as Knoxx

Directions:

In a small bowl, add in your gelatin.

  1. Heat up the milk on the stove top or in the microwave, just enough so that’s it’s warm but not super hot.
  2. Pour the warm milk over the gelatin and stir until all gelatin has dissolved.
  3. Apply the peel off mask all over a cleansed face and neck, concentrating on blackhead ridden spots such as nose and chin.
  4. Leave on until mask has hardened and it can be peeled off (usually 10-30 minutes).
  5. As the mask dries, sit back, and relax! Place a couple of cold cucumber slices over your eyes to reduce puffy eyes.
  6. Start by peeling the mask off in an upward direction and watch as blackheads, whiteheads, and dirt comes out (best part ever!)
  7. Wash off any remaining mask, and pat dry.
  8. Follow up with a light moisturizer.
  9. This mask will immediately leave skin smooth, and is so much better than any store bought version! Read More…………..

Also Read: DIY Sea Salt Shampoo Recipe – Clarifies and Adds Volume